
How to make a simple custom Photoshop brush! Made easy. ( Updated )
Ever wanted to make your own Photoshop brush but never knew how? Fear not my design friend! This little tutorial will have you making your custom brushes in no time! ( hopefully ).
I have used these exact methods for various illustration and design projects over the years.
How to make a simple custom Photoshop brush – Answer Overview
An easy method to make a custom Photoshop brush is to either create your own shape or source a shape first. Once you have created your own shape by working with Black against White, you can use that selection to define a new custom brush. In short, you will need to make a selection around your shape and then “define brush preset” – this will then become your new brush.
You can use this method to make a wide selection of brush shapes, be it weave, denim, pencil, or any texture you can imagine.
Also, consider when making your custom Photoshop brush, how you would like it to flow and whether there are soft or hard edges. There is a wide variety of options you can experiment with when creating a custom brush in Photoshop.
Please read on how to make a simple custom Photoshop brush. Or you may find this post interesting. How to reduce banding in Photoshop.

How to make an easy Photoshop brush in 5 simple steps
Step 1 – Create The Brush Document
1 ) Open Photoshop and create a new document – 300 x 300 px and 72 DPI for good measure, make sure the background is set to white. It should be noted that you can make this document larger or smaller but I tend to prefer working at a smaller scale.
If you prefer, you can copy the image above for free.
Step 2 – Draw Your Brush
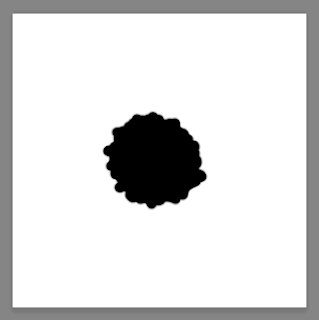
2 ) Working in black and white (Shortcut ‘D’ for black and white), draw your brush shape in black in your new document.
Remember your brush shape needs to be dark /black when you come to creating your brush. For the sake of this tutorial, I have made mine a solid brush. See the black ‘blob’ above on the white background. That is the new brush being painted onto the new document in preparation.
Step 3 – Select Your Shape
3 ) Either by using the marquee tool or Apple + ‘a’ to select all (CTRL + A for windows) select your shape that is to become your brush. If the selection is active, you will see the ‘marching ants’ in Photoshop. If you have made your selection in preparation for the next stage, proceed to the next step!
Step 4 – Use Shape To Define a Brush
4 ) Go Edit > scroll down to ‘Define Brush Preset’ and click on it!
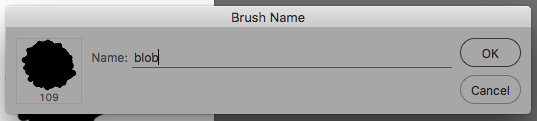
Step 5 – Name The Photoshop Brush
5 ) Label your brush, I called this one ‘blob’. Congratulations… it’s a blob!
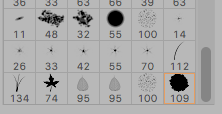
Well done, you should now have designed your very own custom brush and saved it to your Brush library.
If you press F5 to look at your brush palette, you will see the brush you have just made at the bottom of your library. Why not open a new document and test out your newly created Photoshop tool, make ink splats, and draw faces.
This is just to set you on the path of making more awesome brushes.
Thank you for reading, if you would like some help with a project in Photoshop you can always drop me a line! Freelance Photoshopper!
How to make a simple custom Photoshop brush
Other post that may help you with photoshop:
Quick layer short cuts
Drawing in Photoshop + Stylus
Reduce Banding in Photoshop
What is a design process
How to fix broken text boxes in Indesign
3rd Party Websites & Sources
– My design website
- Source – Adobe Photoshop