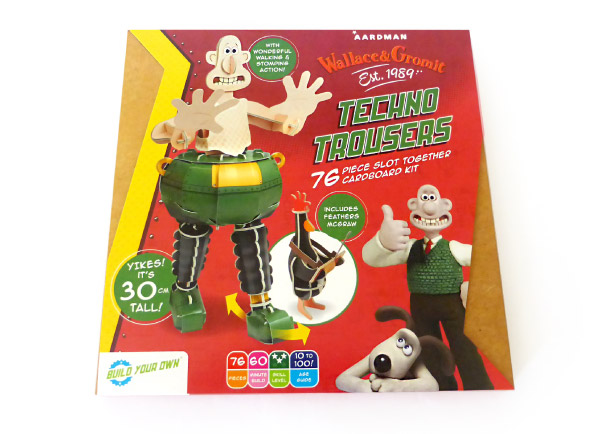
Aardman Wallace & Gromit Project – flex those Adobe Illustrator muscles. I have a new post to share… kindly, the team over at Paper Engine has now said that I can share and discuss my part in creating some of the packaging concepts for a new range of Wallace & Gromit themed products.
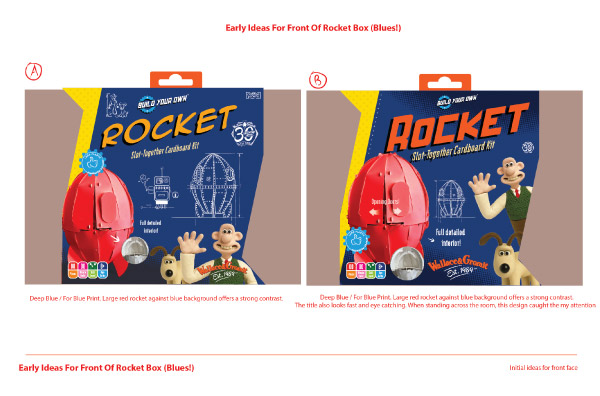
The artwork shown in this post was used to pitch to Aardman for a new range of British designed card products, otherwise known as – Build Your Own, For Paper Engine.
Aardman Project | The Brief
The Brief | I was commissioned by Paper Engine to help create the core design for the packaging concepts for a new range of of Wallace and Gromit themed paper products.
Aardman had set up an agreement with Paper Engine for them to come up with a range of products, themed around Wallace & Gromit.
If you don’t know Aardman, they are the animation studio behind Wallace & Gromit, Chicken Run, Arthur Christmas, and Shaun the Sheep to name a few.
Paper Engine got in touch with me and asked for assistance in coming up with the core packaging concept to pitch to Aardman.
I won’t lie, I was excited and honoured.
Under a strict NDA, I was called in to help come up with some of the core concepts for the new eye-catching packaging.
The NDA has been relaxed now, as the products have been released onto the market. So don’t worry. And I asked the crew over at Paper Engine and they were happy to allow me to show my my part!
(All artwork on this page is the intellectual property of Aardman and Paper Engine. Do not copy, save, or download any of this content for commercial use ).
Packaging For Paper Engine… Which was actually for Aardman
To spill the beans on the projects.
Here is a bit of extra information on the project process. Once Paper Engine had sent the brief across to me, and we did all the admin, the project was set in motion!
Aardman Wallace & Gromit Project | The design process involved…
Coming up with some very early ideas for speech bubbles, titles, typography, backgrounds, and other accents and parts for the project.
It should also be said that this project was quite particular and that there were 2 companies involved in the approval process. Nonetheless, it still allowed room for design creativity.
Aardman Wallace & Gromit Project | Developing The Design
While I was allowed to work conceptually and creatively, I also had to adhere to 2 sets brand guidelines! One set was supplied by Paper Engine for Paper Engine and, the other was for Aardman!
Aardman Wallace & Gromit Project | The Delivery
After working on the polished designs, Paper Engine pitched the artwork to Aardman. I was told on the grapevine that they were pleased with the project – with very few changes to the pitch!
Thank you Paper Engine, it was an honour! From there the look and feel for the range was set. It was an awesome project.
How I approached the project
When creating the packaging, I tried to create artwork that was exciting and matched the tone of Wallace & Gromit. I also tried to create packaging concepts that would excite both children and adults if they saw them on the shelf!
‘wow look at that!’
type of thinking with the hopes somebody would pick the product up and purchase it. The product did most of the selling in all fairness, these are very cool products.
Aardman Wallace & Gromit Project | Paper Engine Testimonial
‘We worked with Jimm on some early packaging concepts for our collaboration with Aardman on three Build Your Own kits. He delivered some superb designs which enabled us to get ahead of the curve by keeping the client on board with approvals and saved us some valuable in-house studio hours. We would definitely work with Jimm again in the future when the occasion arises. Top marks. 5 stars.’
Geff – Creative Director, Paper Engine Ltd.
Aardman Wallace & Gromit Project | You may be interested in some of the following
Working with beta testers… creating board games isn’t easy! A crucial and oftentimes overlooked stage for creating a commercial board game is the beta and alpha testing.
I was commissioned to create a board game prototype to teach children about youth homelessness. My primary role was – mostly – visual design and gameplay, and illustration. And… consulting and guidance on creating a game.
When working with Beta testers, I tried to create an environment that was open and invited constructive feedback.
While I took notes, I allowed the Beta testers to play how it suited them to play. Down to opening up the initial black packaging box to reading the rules, in whichever order they chose.
Setting up the Playtests for a board game prototype
This was my first playtest in quite a while. In the past, I have been involved in both helping to set up alpha testing and the follow-up stages of a Beta test. Beta testing on behalf of a 3rd party client was a new experience for me. And there was a lot involved.
Before preparing 2 different environments for beta testing. I had to get the testers to sign NDAs on behalf of the client.
It should also be noted that a large amount of effort was involved to find both beta testers, and finding a space to carry out the beta testing. Money also needed to be paid to the venue for lunch.
Alpha Testing vs Beta Testing
There are some key differences in the alpha and beta testing stages. With alpha testing, this is often a case of a game or game prototype being experimented with and developed internally. In my case, I was the first tester of the rules. I created the rough rules to see how the game mechanics may work and wrote these down as I went along. This is typically the very early stages of creating a working board or card game. The more alpha testing you can do before going to external beta testing, the better.
This is a photo of some of the first game components and alpha
Beta testing the game involved finding other parties to look at and play the game. These people had never read the rules or knew what the game was or anything. Once I sourced the beta testers, found spaces to play the game – this then set about into motion the gameplay.
The beta stage is the more developed stage of creating the game prototype.
Creating the gameplay | My experience of working with beta testers
I was involved in creating the initial gameplay as well as working on all the visual design for game. This was part and parcel of the commission of the game project – from top to bottom. Finding board game testers can be tricky ( external website on finding beta testers ) , but I feel that these beta testers offered tremendous value to creating the board game prototype.
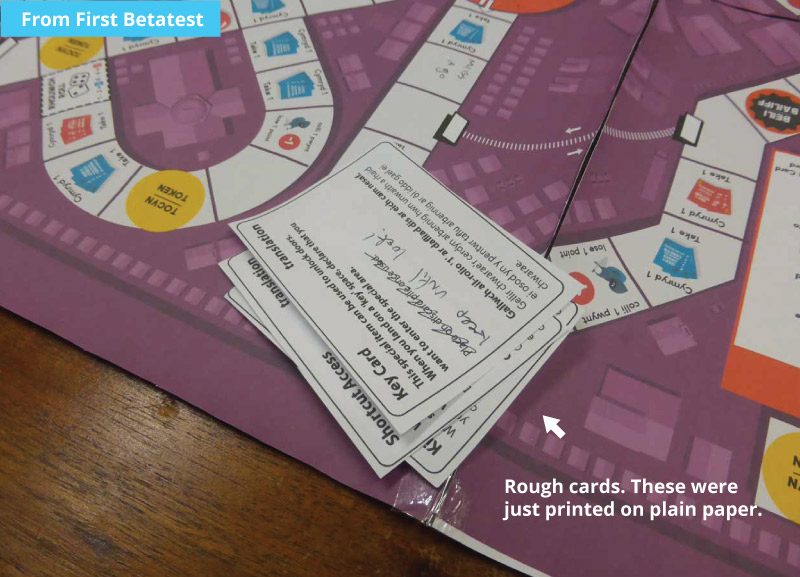
Here are some initial screen grabs from the playtest. An important stage when creating a board game prototype.
The first draft low-fidelity prototype
The later stages of the playtest | working with ‘other’ beta testers
I would advise when doing a playtest of your game, to try the game on people you don’t know. ( although I do know Paul here – thanks Paul, Paul is also a drummer I’ll have you know! ) The wider the pool of people… the better. Below are some visuals of the playtesters in action doing their thing!
And me… taking notes on how the game is being played.
Doing these live tests is not always easy on the ears. But they can be essential for making a better and more rounded board game.
A special thank you to the playtesters for this game
This lot should be proud – although the Conwy Council may not know the names of the playtesters I would like to announce who helped make the prototype a more rounded and playable experience.
( me, I was the first tester ) Faye Willets + Family, Helen Edmonds, Jake Joung, Paul Whibley, Steve – and a Special thank you to Liz Chadwick for introducing me to some fellow playtesters!
If you would like any advice or a design service to design your board game you can read more here – freelance board game designer
Are you a playtester?
If you are a playtester for board or card games? Feel free to drop a message across with a bit about you, what you do, where you are based, age, your demographic, and the types of games you like to play. ( please note that many of my playtesters are currently based in the South East – UK )
Are you looking for playtesters?
Playtesters or beta testers can be tricky to find if you are just starting out. This article here on Dragon Bone games About finding playtesters may be helpful – ( Alpha ). Or if in the later stages of development – where to find Beta Testers. ( external website )
Notes – On Prototype
It was a fun project to work on. I would like to say I have no idea what the mass production or future edition of the game will look like but either way – I was happy to be part of the pre-first edition of the gameplay.
Are you looking to create a board game? I was involved in the visual look and feel of the game along with the vector character illustration. Feel free to get in touch if you want to discuss your game project!
This post has been written to answer how to get into the board game design industry and what you can do to potentially get through those elusive hidden board game industry doors.
Getting into the board game industry is both simple yet difficult. When you know how and where to look, it Is simple.
When you do not know where to begin, getting into the board game industry is difficult, or at least finding the hidden doors is hard.
Boardgame design is experiencing a creative renaissance and there is no better time to join this growing fun and creative business. Nobody could blame you for wanting to work for a board game company at this time.
Getting involved in the industry is fun, creative, and rewarding!
What does it really mean to be In the board game industry?
Many board game designers are individuals and small teams with board game design being their passion. Their companies and side projects may run secondary to another main source of income.
In other words, their board game companies are paid hobbies that may bring them additional income and fulfilment.
These are all people who have got into the industry and make up for a large portion of the creators behind board games and the creative board game development.
Many of these smaller independent games design companies might be friends, partners, husband and wife teams etc which make up the board game ‘in’ crowd.
To get into the board game design industry, these smaller teams started to create games for the love of making games and published their own.
The smaller studios and tabletop game developers often grow their companies from a side passion to something that can earn money and allow them to continue to make board games.
Of how to get into the board game design industry and get involved with the big publisher to sell your game – that’s a battle in itself and are 2 very different doors into the industry.
Details below, if you are looking at working in the tabletop gaming industry, want to work for a game publisher or sell your game, idea or product then this helpful post is for you.
how to get into the board game design industry and work with smaller publishers and designers
If you are just starting out, looking to change career, or launch a passion project you can start creating your board game now.
There is no harm in starting small on a hobby project and working your way up to the bigger companies later if that is what you want to do.
There is also no shame in working with smaller companies and staying with little studios. By being part of a small team or going solo, you can get hands on experience with game design and development on many levels and in many “departments”.
As with various creative roles in the smaller outfits, it is a great way of being shown the ropes when you are part of a small unit.
But, even getting involved with smaller studios can be a challenge if you don’t want to go solo or you are just starting out.
Here are some tips on how to get into the board game industry and work with smaller developers and publishers.
Steps on how to get involved with (smaller businesses) in the board games industry
1 ) Have an interest in board games! This should be a given, but if you want to create some games, great! If you just want to make quick money, consider other careers.
2 ) Start creating games. Make it all about the game and the enjoyment of creating games. If you are stuck for ideas consider making a personal game project with a pencil and paper. You can make a fan game to, like this website shows – how to create a HeroQuest style game.
3 ) Take an interest in other games that have been created. Ideas rarely come from nowhere! Show interest in what types of games you like to play.
4 ) Sign up to board game forums and become an active member
5 ) Hang around with board game creators! You can attend various meetups and casual board game events
6 ) Network work extensively
That list of steps is a simplified way of what you can do to get into the tabletop gaming business and work with the smaller studios and independent makers.
There are many ways of accessing the industry and at varying levels.
And to be involved – is to be involved!
Enjoy games and meet people that also enjoy creating games, make connections In the gaming field.
how to access the board game industry and sell your game (small scale)
If you want to get serious and commercialise your game, meeting the right people is both important to this goal and challenging.
But how do you make these all-important contacts?
It is a case of where to be and where to look.
The most simple first step to making some initial contact in the industry is by going onto forums, looking at board game directories, and seeing what companies you find on Google.
This is the most straightforward, but in my opinion – not the most effective solution for making contacts in the board game industry.
Meeting face-to-face and showing what you can do is better. You can build up a rapport and discuss board games there and then. Be it at a show or a networking event.
So ‘where’ to meet these contacts and get into the board game design industry.
Get involved with the board game industry by attending shows and conventions
One of the best ways of getting involved with the board game industry is by showing up to conventions and shows and saying “hi”. Go to the boardgame stands, say hello and talk about your passion and see where it may lead!
Going to conventions and shows will also broaden your view on the industry as a whole. You get to meet companies that focus on party games, board games for the family, adult games, card games, poker games, RPG’s, science fiction, fantasy, games for young children!
There are too many to list.
Going to shows is a big way to build those all-important contacts.
Another way of getting into the industry, is through self-proclamation!
Self-publish your board game! “I am a board game developer”
I am a board game designer! Therefore, I am part of the board game industry!.
Another way to get into the board game design industry is by creating your own games and products. You may have already created your own game or aspire to create a game. By actually creating a game or products around gaming you can say –
“You are part of the board game industry”
To what capacity? That can be left to interpretation.
Creating a game and building a board game design career
The main focus of this article is on how to get into the board game design industry and creating your own games is early access to this.
I do not wish to deviate too much into the intricacies of creating a board game in this article. Creating board games is a skill in itself that deserves more than just a few sentences.
You can read more on creating a retail-ready game here if you want to focus on board game creation and selling your own products.
If you would like help with creating your game, you may also wish to look at the board game design services page or get in touch via my contact form.
Creating your first game or board game product is a great way of getting into board game creation. You can learn a lot from even just making a prototype. You can either pitch your prototype to a company or look at selling it yourself.
Getting involved with the big board game publishers (selling to and working with)
Getting into the board game design industry is challenge number 1. Eg create a game or fan game) and show what you can do. Set up a business.
But.
Working ‘with’ or ‘in’ the BIG board game companies is a separate challenge in itself, and tough inner circle to break into.
Because it is hard to get into, it certainly doesn’t mean that it isn’t worth it. Especially from a financial or publicity standpoint.
Here are few listed benefits as to why getting your board game into a larger board game can help your and your board game development career.
The benefits of getting your game in with a big company (selling your game)
Larger market penetration and industry coverage. The larger board game companies – publishers and distributors are more likely to have the retail and business channels to sell more copies of your board game in higher volumes. They might be good to approach after you have also (potentially) created a Kickstarter, if crowdfunding is a path you take.
Great marketing for your board game. At first, getting your name out there can be a huge advantage for the future and for growing your board game design business.
More revenue – Having more revenue isn’t the same as having a higher margin (making more money per individual unit) The the big retailers are likely to shift larger volumes of your game than just you on your own.
More on the example below.
Selling your game through a larger board game company vs do it yourself – rough example
Although “do it yourself” is a great way of getting into the board game industry, you will have to out a lot of energy into multiple avenues of the business. As opposed to the bigger business may be able to sell your game in larger volumes.
Do it yourself method
You sell 100 units, throw all of your time and energy into distribution and logistics – earn £3 (profit) unit for example per game. You take away £300
Selling your game through a large publisher or distributor (getting involved with the companies)
As an example, you sell 10,000 units through a board game publisher or distribution company and earn £2 per unit. (rough example – NEVER a guarantee)
Per unit, that is less.…
The publishers will take a larger cut – BUT – you earn £2 x 10,000 = £20,000. The bigger companies have access and possibly bigger selling power.
Not only will you be more likely to sell higher volumes through a board game distributor or publisher. It will allow you to focus more on board game development and design. If that is what you want to do.
To get involved with the large publishers can be difficult if you are starting out in your career. The next section focuses on how to get into the board game design industry and work with the big board game companies.
“The easier you make it for the businesses to sell your game and increase ‘their’ revenue. The easier you will make it for yourself.”
How to get your board game into the big companies, publishers and retailers
If you are board game designer and developer or an aspiring creator! You may have ambitions to get your game into the big publishers and distributors.
As with any businesses, and contrary to popular belief, most companies and buyers are risk-averse. If working with you and your game proves to be a potential risk with weak financial returns, they won’t sell your game.
To get involved with the big companies in the board game industry, make your game retail-ready and full or promise.
The easier you make it for the businesses to sell your game and increase ‘their’ revenue. The easier you will make it for yourself.
In other words, earn more revenue for them and earn more revenue yourself.
Getting yourself and your board game ready for retail
In order to get into the board game industry, I have written a couple of design-focused entrepreneurial tips that will help you in creating a game for retail in mind.
Creating your game and playing it is one thing but creating game that gets the attention of the bigger businesses is another.
* it should be noted that reading posts and saying “is that all” it takes is not the best mindset to start on. Creating games and creating games ready to be sold is a big time consuming effort and can be a labour of love many.
Tick boxing alone, will not guarantee the success of a game. Use your initiative, use critical thinking, and be prepared to try and try again to crack that industry!
How to work for a board game company (in house, freelance)
To work for a board game company you need to prove that you can work in a relevant field in the board game industry and also work as part of a team!
There are various skills, roles and departments for budding games designers to consider :
To answer “how to work for a board game company“, be it freelance, contract, or in-house, you should consider working on skills that will lend itself to the game company you wish to work for or with.
As with the list of skills and roles above, this is a glance at some or the roles and departments available that you can work in. If you wish to work in a more permanent position at a company or a board game publisher you should network and look on job boards to find the ideal position for you.
You may also need to be prepared to move location for most jobs if you wish to work in-house.
What is the ‘best’ way of getting work in the board game industry?
There isn’t a single and clear cut path of how to get into the board game industry, each journey and career will be unique to the individual.
To choose which is the best way, as based on opinion, experience, and observations on how to get into the board games business. I would say the following are some of the best and most prominent ways of getting into the tabletop gaming industry.
1) Have a passion for tabletop games or/and creating games
2) Meet the right people for your game niche and share passion, knowledge, and skills with games and creating games.
3) Attend trade shows and make contacts. Network with other board game creators * ( personnel and favourite/ best method)
4) Look on jobs boards in the creative industries and dedicated board game communities. Facebook and Board game geek
5) ‘Niche’ on a certain skills and keep scouring the communities equipped with a portfolio or examples of what you can do!
6 ) And above all else – the best way on getting into the board games is to keep trying if you are passionate about board games!
“We found these contacts mostly through trade shows and events.“
How to get into board game design industry | A firsthand account
I wanted to discuss my first-hand account of how I became involved in the board game industry and how you may find my story interesting or helpful in your creative journey!
I was involved In creating a party game at my previous job. It was created as part of “Product Development – innovation engine” which was a weekly process that was rolled out from 2016.
I and the team at the time realised that a game might be popular. It was inspired by something a colleague had seen on TV. I was sceptical initially but I was won around. (good job!)
We spent a few months designing and developing a party game.
The game was a commercial success and we went on to develop more products and expansion at the request of a large board game retailer. This opened a very wide door to more investment.
From there other retailers also requested the game. It grew in popularity in the UK.
We found these contacts mostly through trade shows and events. They were a mixture of board game distribution companies, smaller retailers, and high-street shops.
That was my first-hand experience in working commercially in board games and 1 first-hand example of how to get into the board games industry.
Off my own back.
I then started to find more contacts at conventions and shows. Many of the these people I networked with were a mixture of small independent game designers to larger-scale board game developers.
And to this day, I am always looking for ways of building new contacts and ways I can help independent board game developers create their game.
That was an (‘is’) part of my professional journey.
An example of how to start early – get your children to start making games!
This is an example of somebody that has the will and drive to create something they love! This person was undeterred by pessimism, cynicism, and the knowledge of money!
Just the want and the like of creating their own game. I think there is a lesson us adults we can learn here.
* For confidentially, I cannot mention in detail about the parties involved.
I wanted to draw your attention to this prototype by a budding game designer. ( my part was in the visual and creative design + getting it ready to look at )
The client started first by drawing a rough game on post-it notes and mapping out the game.
They had already playtested and worked out the mechanics before contacting me. They just wanted to figure out “how to make it”.
From the rough prototype. I came up with visuals, character vectors and ideas how it would look and what was going on.
I had the joy of designing the box art, the game cards, conceptualising and creating the dinosaurs, the caveman, tokens, and the board!
This is an example of what you can do if you decide to go down the self-publish route.
Having something physical to show looks both professional and that you are serious and passionate about the board game industry. This will be your early steps of how to get into the board game design industry
People are often tactile and like to look by touch also.
How to get into the board game design industry – The final answer
To consolidate and simplify the answer, there are a couple of main routes on how to work in the board games industry.
The main path is by making the right contacts at shows, conventions, and events – meeting the right people in senior positions at board game companies will put you at a strong advantage.
Another alternative way of getting into the board game industry is by creating and publishing your own game and making yourself part of the industry.
The final point for you to get into the industry is by looking at niche board game job boards or job boards in creative industries. Look on Facebook and Board Game Geek also
With many creative businesses – a big part of it is, who you know, what you can do.
Love (or like) what you do!
that is how you can get into the board game industry. Persistence, passion, and having a lot of good relevant business contacts in the business. And trial and error, luck and determination.
If you have found this post helpful, feel free to share. All the best in your board game creation career.
In your journey into getting into the Boardgame design business you may also find some of the following articles helpful.
Other helpful topics to help you get into the industry
The games and images in this article are all copyrighted, please do not use or distribute. Handy tips – how to get into the board game design industry and how to work for a board game company.
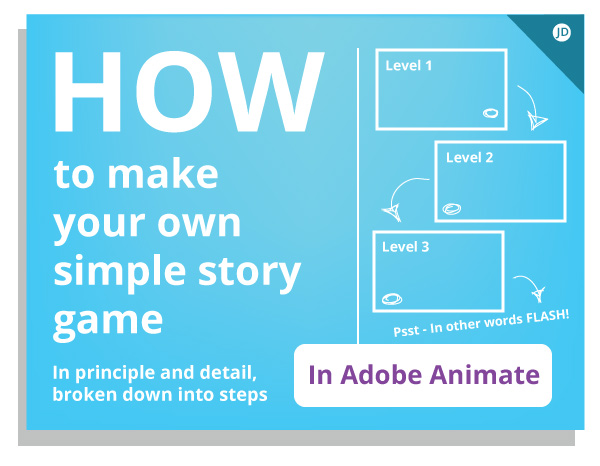
Creating an interactive story, or game can be tricky! This post has been written to show how to make an interactive story game in Flash (Adobe Animate) – described using simple (less non-tectie) methods.
Make an interactive story or, in my case – an interactive museum!
How I created an interactive museum
If you are completely new to creating games or making interactive gaming experiences, then I would advise looking posts such as this: creating a STEM game that was also made in flash. This is from another project I worked on in the past.
Flash, if you are unaware is the old name for Adobe Animate. All methodologies and approaches in the post are still relevant today and I am sure will help you in your journey creating a cool story type game!
The short answer: How to make an interactive story game in Flash (Adobe Animate)
Artwork | You will need a graphics creation program such as Adobe Photoshop or Illustrator, I have written a detailed post on the graphics programs which you can read here – creating digital artwork.
Build it | In order to build, or develop your game, you will need to use an engine or a platform such as Unity or Adobe Animate (flash) which is what this post and project as all about!
Publish it | Is that all? Sort of, if you want to make a compelling story game you will need to put a lot of time into making some striking visuals and compelling narrative to carry the player through to the end.
If you are just embarking on making games or interactive experiences, I would also consider using a powerful game creation program such as Unity. Unity is powerful, you can create a range of games types with many off the shelf solutions.
Although, Unity does come with a steep learning curve, so be warned!
The interactive museum in this post was built for a client using Adobe Animate and Photoshop. The steps below outline some of the methods and approaches to creating an interactive project.
Using Adobe Animate to build a game (or museum)
My core training was based around using Adobe Animate to make 2D games, animations, and rich media experiences – it was my major!
Now, I don’t wish to go into the opinions of why or why not to use Animate in this day and age. I will assume for whichever purpose, you either need or want to use the application to build an awesome experience and that is okay! None should judge.
You should know this when you publish with Adobe Animate.
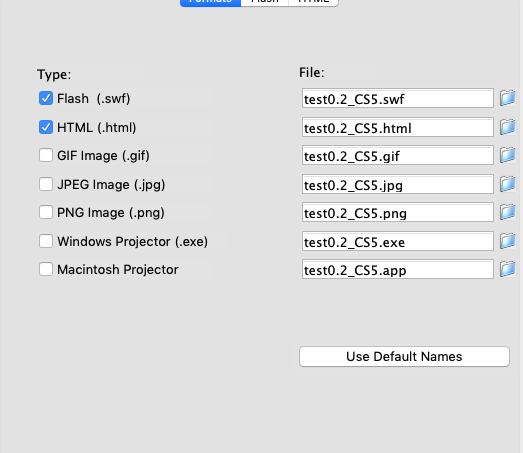
When you publish a game in Animate, it can be created in the following formats and platforms:
.SWF (flash player browser) ( I would avoid this format now due to lack of technical support and accessibility issues – read more reasons on avoiding flash player on this blog ) .
HTML5 – can run straight from your browser.
Projector files for both Mac and PC – similar to making regular program or .exe file.
As an app for Android and Apple.
As an enclosed Adobe Air app that can be downloaded straight to the computer.
FL5 – this is a legacy shot. There are more options today!
My interactive project as shown further down in this article was made by publishing as an Adobe Air application and as a browser-based *SWF format. Old yes, irrelevant? Not at all.
The .SWF format or
flash player for browsers to be specific is an old format and I would
now avoid using it.
If you are undecided which is best if you are intending on making a game solely for a browser – use HTML5, WEB GL, or if you download your game, use Adobe Air.
Publishing to Adobe Air applications isn’t the only way to create an enclosed stand-alone program or application. You can use .exe or a mac projector also.
Flash Publishing Plus
You can also download
applications that extend the publishing capabilities of flash.
For example, ZINC will make a neat package for your application although it has now taken its servers offline you can still use the legacy format. MDM Zinc
Edit / note : many of the formats Animate can now output is very much capable enough of fulfilling the duties of these programs listed here. eg. Zinc.
You can also create a DMG on an iMac and pack your items inside it for professional distribution. You can also have a lot of creative license for logos and interface artwork.
On a personal note, I would be inclined to stick with *ADOBE AIR ( no longer owned by Adobe ). Adobe air comes with more than enough capabilities for packaging distribution for your game – even to implementing your or desktop icons.
Using Adobe Flash (animate) to publish your interactive story game to a browser
The image above is from a slightly older version of Adobe Flash (now Animate) but it shows that it is mostly a case of ticking the publishing formats you wish to use.
If you are skim reading this, I would advise paying close attention to the next paragraph, especially if you want to put your game on the web.
Using The SWF format and flash player for your game?
The .SWF format is no longer as widely supported as it used to be, especially if you publish it to the web as a flash player. I would advise against using this format.
You may notice on certain websites a notification box appears on the body of a page asking for you to “run flash player”? That is what now happens if you publish to flash player / SWF. As shown below. Or, it should be a case that now Flash Player has gone altogether.
Example of the flash player being blocked by default in Firefox
The image here
illustrates the flash player being put on hold until it is enabled by
the user.
By publishing to the
flash player with your .SWF object – Instead of your movie, you will
get a hollow grey box and notification.
Using the .SWF object
makes for terrible user experience in 2020 and has done for some time
now. Many people are more likely to hit the back button or just
ignore the interactive content as it needs to be enabled or ‘allowed’
by the user.
And how heartbreaking is that feeling after spending all of your time creating a game or animation? Flash player is now stopped by default by many browsers.
With this in mind, I would say it is best to avoid a SWF / flash player for the browser. And, don’t forget how this will also behave on a Smartphone now too. ( This website, should I publish to Flash Player)
Should you both with flash player in 2020 for browsers? I won’t.
Use an alternative format if you want to display your content or show an animation – such as HTML5 if it is a game. This is all opinion based on what I have seen, learned and what is now professionally advised. You may ignore all this if you wish.
You will need to know ActionScript 3.0 to make your game work in Adobe Animate (sorry!)
Did I mention code? I’m afraid so. If you are not a coder you may hit some hurdles here or need to do some homework – or hire and Action Script Developer! ActionScript is the lifeblood for Flash games.
There are not many ways around not using ActionScript.
Adobe Flash, which was renamed to Adobe Animate a few years back, uses a coding language called Action Script 3 (AS3) to add interaction to games and applications.
Without being able to code or at least being able to bash some ActionScript together, you will not be able to create a somewhat sophisticated interactive project in Adobe Animate, unless you are making an HTML5 game.
Making a game or an interactive experience will require getting into some script, even just to make a level change, a speech bubble appears or simple player interaction.
Interaction in Adobe will require you to program. It is not the hardest language but if coding really isn’t your thing… perhaps consider an alternative means or more visual-based engine?
Or why not just jump in with both feet and find out if you can code?
You can start to learn
Action Script 3 here or by purchasing a cookbook and getting your
teeth sunk into it.
If you want to write Action Script 3 this is a good start
You can find these
types of books on eBay at a relatively low cost.
It should be noted that
if you do decide to buy one of the ActionScript books from eBay I may
get a small commission at no additional cost to you.
Failing this, if you do
not wish to read how to use Action Script you may find tutorials to
watch instead or ask for help on forums.
How to make an interactive story game in Adobe Animate – The Nitty Gritty
Now you have an idea of
what may be involved with creating your own game application or
immersive experience in Adobe Animate. You may be ready to delve a
little deeper … or run for the hills
To summarise what has
been written so far you will need to do the following for your game
:
– Rough / plan out your game or story – although be prepared to edit as you create the actual game
– Write in Action Script for interaction so it reacts to the player, eg: button clicks, movement, transitions to levels for your story.
– Publish it, and get your game out there.
That is a simplified
way of summing up what has been covered so far. In essence that is a
rough guide of what you need to do in layperson.
– Plan
– Roughout artwork
– Build
– Test / Publish
Whether you are intending on making a 2D gaming application, a story or an interactive museum as shown in this post, come at your project prepared.
Morale boost: As a warning, those milestones can seem a long way from time to time. One foot in front of the other! You will get across those desert coding plains.
Coding or not coding your story game
If coding really isn’t
your thing and you are more or a designer than a developer – you
should consider using an application such as Stencyl to take some
smaller steps into game development.
Stencyl works like lego
building blocks in which you can click together the functions and
behaviours of your game. The image below is an example.
Example of coding game in Stencyl
You can also read an example tutorial here on how to make a Cursor in Stencyl. Which was written by me when I used Stencyl a little bit more often.
Unity software is another option but it is a more advanced option if you are new to creating games and applications.
The next section of the post covers how I created an interactive museum for the client.
The Client Brief | Promote the museum (interactive experience)
After setting up a
meeting and discussing the budget and the requirements, I set about
what could be done to create an experience that would promote a local
museum in Cornwall.
The website part of the
project was built to inform and educate potential visitors. The
interactive part of the website was built to ‘excite’ visitors and
offer an e-learning experience.
The e-Learning part of
the website is what I have focused on in the article – “How to make
an interactive story game in flash”, or in this instance.
Caption from the interactive Museum
How to make an interactive museum experience that can be played from a web browser.
How I created an Interactive Museum in Flash | The Steps
Being a fan of all things to do with history and using my new found technical knowledge as a graduate, I jumped feet first into this project. This project allowed me to use my imagination and critical thinking to offer an experience that would entertain, entice and educate!
I was thrilled!
It was a challenge, but
a great one to embark on so early on in my professional career.
Designing the interactive museum | pre-development stages
Before opening up flash
or writing a line of code, I sketched down my ideas of what I was
intending to do and proposed it to the client.
After getting approval for the initial design, I started to conjure ways to make this project come to life both visually and technically.
The interactive museum,
which would work similar to a point and click style game or a graphic
adventure would be launched at the same time as the website, which I
also created.
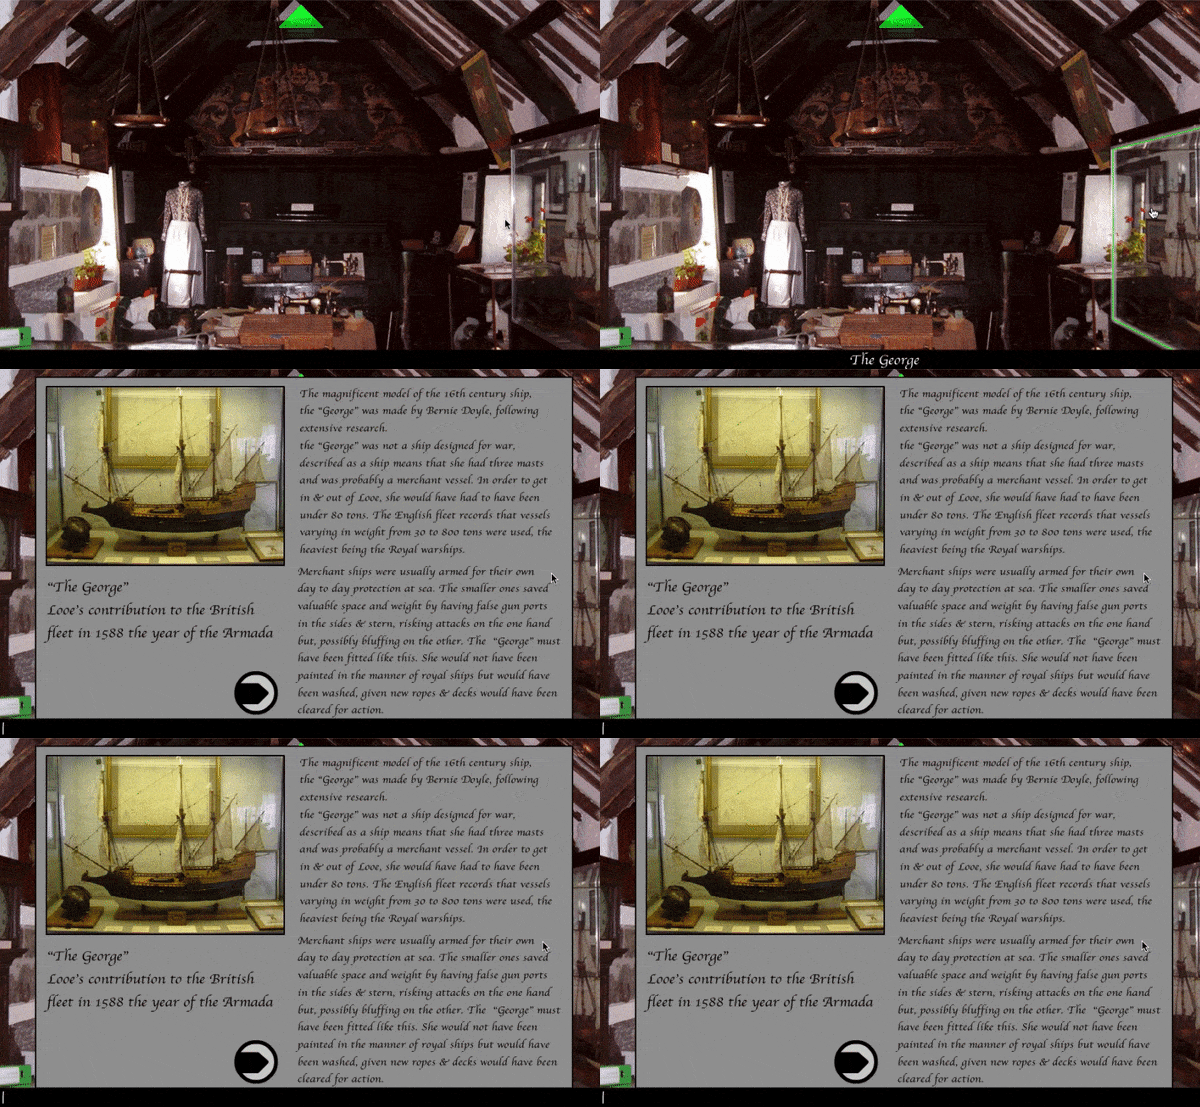
The interactive museum was 2 stages – levels – where you could stand at two opposite ends of a large courtroom. This was the main stage of the hall, both in real life and in an interactive experience.
In early concepts, I
toyed with the idea of creating other rooms but with time constraints
and budget limitations, the 2 levels were more than enough and
difficult enough in all honesty at an early stage in my career.
Interactive Museum in Action!
It is worth noting here if you are also thinking of designing and developing an app or game, add some wiggle room on the timeline.
You don’t want to be
crushed by the deadline, worse still if you get stuck!
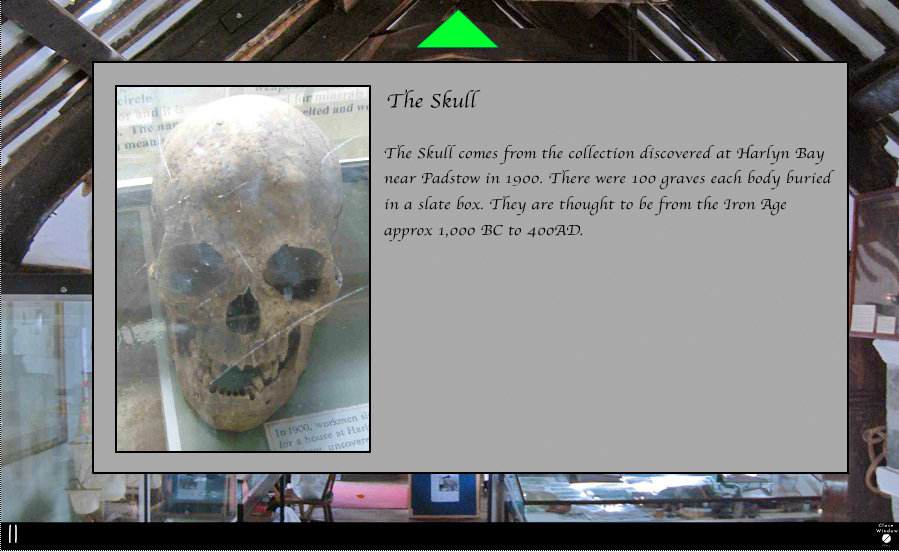
Under a supervised out of season and out of hours visit to the museum, I collected together as much knowledge as I could about my topic and environment. I wanted to create an authentic piece of work that would immerse the players.
I took pictures of the
environment which would later become the interactive parts of my
flash project. With the interaction in mind, I took plenty of
interesting close-ups of Cannonballs, skulls, puppets, etc which
would later be cut out and used.
Taking Photos of the Environment
The purpose of these PNGs allows for a transparent background on the objects. When the player ‘hovered’ over the PNG’s with their cursor in the interactive museum, a green outline would appear around the objects to show that it was ‘live’.
This small visual
representation is a good way of showing to the player that the item
was selectable or interactive in some way. Player or user experience
was paramount to the project as it should always be when creating an
experience.
After all of the
content was collected together, edited and prepared it was imported
into the project library in Flash and coded to life!
Yes, almost like a mad
scientist.
Interactive Museum | The building & development stages
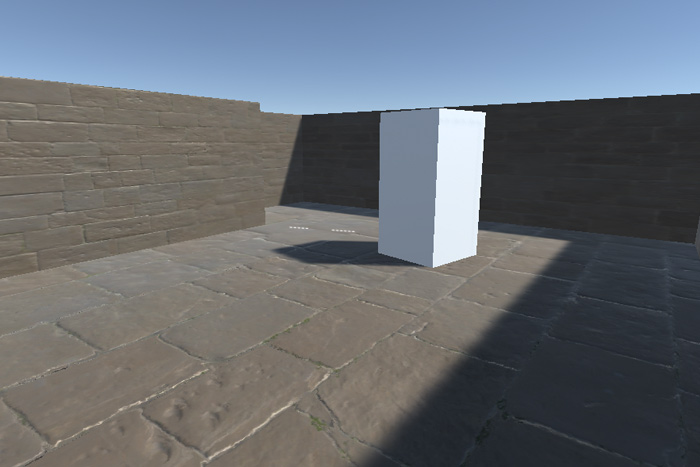
Heads up, consider ‘white boxing’ your game
White boxing? What am I talking about!
By this point, I had
taken my photos and created the bits and pieces as I needed to –
based on my artistic and creative vision.
All the artwork was
finished cut out etc.
As a more modern
method, I would actually advise against making your app this way.
Don’t worry about all
the nice polished artwork first. Focus on the function of the game.
Why?
It’s not an art project
for starters even though that is how I treated it. It’s a learning
experience for “others” to use. It’s for the client to promote
the museum. Not for me to show my skills, that comes second to the
brief.
Also, if you are new to
a program, and you have no outside help, you can throw away a lot of
time focussing on aesthetics that you may not be able to use due to
technical issues and programming hurdles which you cannot overcome.
And guess what happened to those piece’s artwork or assets because of that technical issue?
Or things I couldn’t
overcome – despite the fact I had created the final artwork?
They were canned.
I didn’t get to use it. All that time photographing, trimming, prepping, etc and I couldn’t use them because whilst I was overconfident I could code it into existence – I did meet with time and technical hurdles.
Save time!
I would advise using a method called “white boxing” and this carries across many gaming or interaction projects.
Okay, what is “White boxing!?”
White boxing is a stage in which you are testing and designing how your game or interactive museum may work.
It’s a case of
designing the function before the form and seeing what constitutes as
an actual viable gaming experience.
In other words it a bit like mocking your game up first, or loosely sketching out what goes where and seeing how it works and behaves.
If you are curious and
just want to find out a bit more on where I learned the term “White
Boxing” read the book ‘Unity in Action’ – good book in my
opinion!
You can find out a bit more about it here on eBay. It should be noted that if you do decide to purchase the book through eBay, I may get a commission at no additional cost to you.
The code for the museum
In order to make this interactive museum work, I developed it in a language called ActionScript 2. Action script 2 is now a very defunct language and I would advise against learning that version of Actionscript now.
Unless you otherwise enjoy reading obsolete languages or need to edit the code in a very old project! And if you are editing the code in an old project it in AS2 – it needs to pulled out of the dark ages ( I can talk)
For which ever reason, stick with AS3 (Action Script 3) by default when working in Animate
And, for the sake of keeping my shared knowledge more relevant, I will share with you a piece of Action Script 3.0 instead which was the closest match to my AS2 script.
Now, if you are completely new to using Adobe Animate, I would advise downloading a demo from Creative Cloud and getting stuck in from there. The Demo is free!
Note: Remember that is a general overview of how I created an interactive museum. To go into greater depth I would advise looking for step by step tutorials on using Action Script 3. You would need a lot more than this post to discuss how all aspects of the code makes the museum work.
After I imported my artwork to the library it was essentially broken down into core elements – the background and the interactive elements – the clickable bits!
In order to make my
content interactive, I needed to make things happen when they were
pressed. A Scene change, a speech bubble or all trigger by Action
Script 3.0
For example, this
snippet of code is what makes a button take a player to the next
scene when it is clicked.
How to go to a next scene in Action Script 3.0
After I imported my artwork to the library it was essentially broken down into core elements – the background and the interactive elements – the clickable bits!
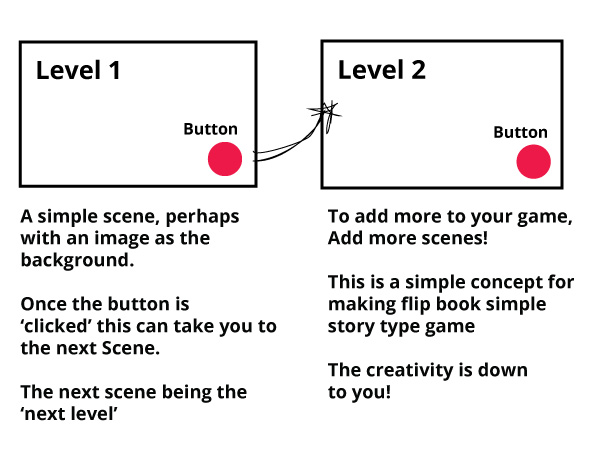
when this button is clicked, go to the next scene, the next scene would represent the next level.
For your own knowledge,
and for my personal reference – I will call this a simple click and
go to the next scene.
And it just that, when the “arrowBTN” was pressed in the scene, it would take the player to the next stage or level – or Scene 2. There is nothing stopping you from adding multiple scenes to your game and having multiple click arrows!
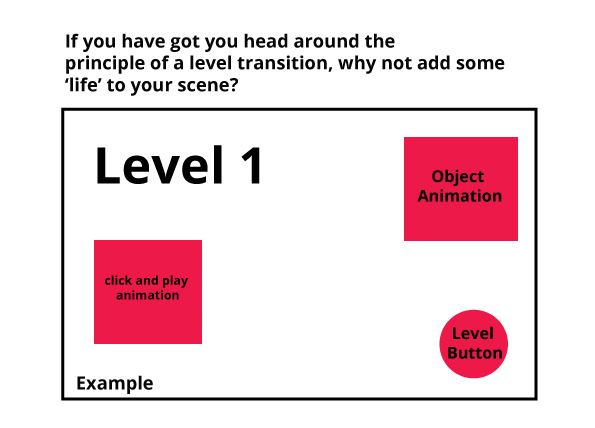
Illustrations showing how to make a level change in principle
How to make an interactive story game in Flash (Adobe Animate)
Click a button, go to Scene2.
Interactive story game / Museum | Hide and Unhide
The essence of this hide and unhide would be along these lines in Action Script
When I ‘hid’ or ‘unhid’ objects in a Scene, I used Action Script to do so – Object Orientated Programming.
This is the principle
of what I used with Action Script 3.0
MovieClipname.visible = false;
That little snippet of code (ActionScript 3) was employed a lot when creating a project.
That single short line
of code is telling Adobe Animate (flash) to hide the object when it
comes to runtime ( when you publish your app).
When It’s visibility is
‘false’. It will not be seen by the player. At some stage, you will
need to make it’s visibility true!
Now, in order to make
the movie clip become visible – it would have been attached to a
button like so. And this would have been written.
ActionScript 3.0 really honed in on something called Object Orientated Programming or OOP – now being a bashful designer.
At heart, a part of me didn’t want to discuss what Object Oriented Programming is – the notion of having me describe it here brings me out in schoolboy sweat
Object Orientated
Programming is something I make use of lot these days whether it is
piece of script in C Sharp or something to be created in Animate. OOP
works with elements and animations inside your game, level or scene.
It is dedicated to working more fluidly with objects and classes.
Here is the Adobe definition for OOP.
“Object-oriented programming (OOP) is a way of organizing the code in a program by grouping it into objects. The term object in this sense means an individual element that includes information (data values) and functionality.”
– Source : Adobe
I hope my simplified approach helps with some principles of How to make an interactive story game in flash (Adobe Animate). Although this was used on the older museum project, the method still carries today.
That is a principle and
condensed overview of steps I used to build this interactive museum.
There was more involved
in my version such as point scoring but I won’t share that in this
post, as this post talks about the project as a whole and why it was
created and what it wanted to achieve – not the development stages.
Designing an interactive museum | The final Product
Up to this point, I
have covered some of the technical steps I used to create the
application along with discussing the core principles in both the
artwork and the main behaviours in the code.
To the all-important stage, the final product.
Looking back | What was
this for and did it stay on track?
This browser game was created to educate, entertain and draw attention to the real museum located in the town.
Did I feel that I stayed on track and met the brief as one of my early projects as a postgraduate and a freelancer? Mostly, but there are things I would do very differently now. In particular on the website and the UI to capture the core look at feel.
The is museum was
created in conjunction with the new brochure website which set up to
educate and talks to readers about the local trust of whom were my
clients for this project.
If I was to be honest, the one thing I would say is that parts of the website was OTT for the client’s objectives and budgets.
This browser game was created to educate, entertain and draw attention to the real museum located in the town.
The interactive museum itself offers a great addition to the project as a whole… that is where the project was arguably unbalanced from a web entrepreneurs perspective. The interactive museum was an addition but that is where most of the money and time were invested instead of the website which should have been the ultimate focus in my opinion.
The museum dominated too much.
To come at this again,
I would invest much more into getting some enquires and activity from
the brochure website. That would at least balance it from a business
perspective.
All experience in hindsight from 11 years past! A lot happens in a design career in that time.
And it also contributes to what I am writing today. How to make an interactive story game in Flash (Adobe Animate)
What I would also do differently on my museum | personal note
The project on a personal note gave me a tremendous amount of experience in interaction design and creating applications in Flash. This was a follow on from creating games in flash, for example like the STEM / E-learning game I created which you can read more about.
From memory, the museum
project was a challenge – mostly coming from how long it took to
animate all the little elements and bug test it.
In the end, I felt it gave a result that I was proud to be part of and that was making an E-learning experience which was educational and fun.
There are a few things I would do differently from an art director’s perspective. As it was a project of limited financial resources, there is only so far you can g, sadly.
If this post has inspired you to create a game in Adobe Animate and how to make an interactive story game (not strictly in flash) then please refer back to this post, or feel free to ask any questions.
Below are some other additional links which cover topics such as; how to create and E-learning game, tip for website design and even some insights into alternative game engines!
How to make an interactive story game in Flash (Adobe Animate) – other resources
Don’t use the .SWF (Flash Player) format for web | Link
* Flash is now Adobe Animate. Animate is still, in essence, the same program.
* ActionScript 2.0 is now defunct language. ActionScript 3 is now the more modern Object Orientated language used in Adobe Animate.
* .SWF format for web is an essentially old and almost redundant format to publish to. I would advise against publishing for the flash player for web – especially in 2020.
How to make an interactive story game in Flash (Adobe Animate) – Useful Resources
To create a digital STEM or E-learning game ‘app’ you will need to make a plan, download software to construct the game and have access to or own software to create the artwork and ‘assets’ for the game. This post covers all of the details on how to create a STEM game or application in a step by step process from software suggestions, to hints and tips.
Caption from E-learning game
The steps I used to create an E-learning / STEM game.
This post covers the
steps and stages I undertook to create a STEM game or what was then
an E-Learning game that could be played on a computer, be it either
an iMac or PC.
I would like to mention now that I am not a teacher or a STEM specialist. I took what was a principle and applied it to my game design for a major project. This article focuses more on the creation of the application itself, opposed the focus of STEM subject matter itself. If you wish to read more specifically on the subject of STEM you can find out more here : source
Why Create an E-learning (STEM) Game?
Before STEM was a term I had heard of, I wanted to create an application that was both entertaining and educational for young children. Games or gaming has a bad rap for being mindless and many are (I do like a mindless shooter as much as the next person). I was also a fan of the classic puzzlers growing up such as Monkey Island and Fate of Atlantis.
I wanted to create a
fun purposeful experience through the medium of gaming that will help
children.
And…
When the project was
assigned to create a big experience I wanted to create a game that
would utilise some of my existing skills as a young designer and
illustrator (as a student) and create a product that I would be proud
of. I wanted the E-learning game to have engaging puzzles and
characters that would pull the children in and compel them to explore
through the levels. They also had a mission, they needed to save a
friend.
Crooked Castle for E-learning
About this E-learning game – Blossom Tree
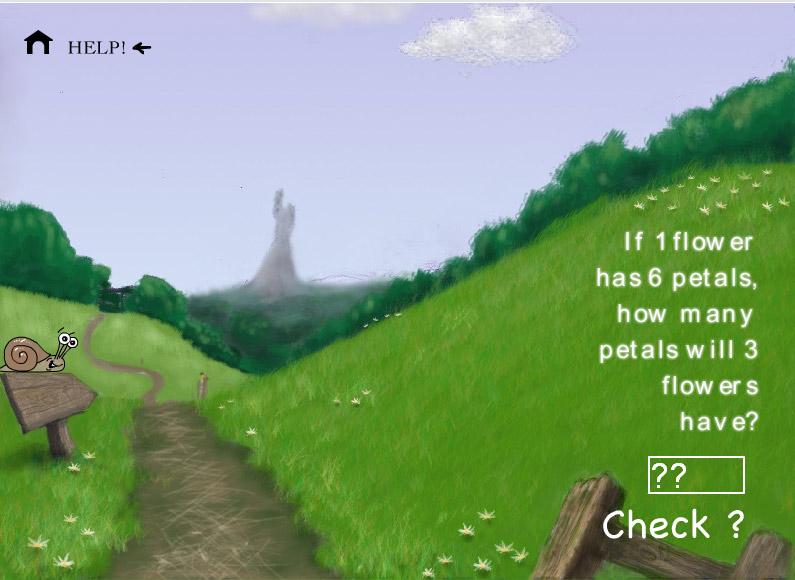
The game was aimed towards children aged 7 +. As the player progresses through the game, they would have to answer questions of varying difficulty until they arrive at the final stage and save their friend. There were 2 main paths that had 2 types of questions.
Path 1 = Sums
Path 2 = Spelling
It should be noted that you can pick any of the core STEM subjects for your own project.
Both paths converge at
the end to logic and problem-solving questions which broke format
from traditional ‘yes” and ‘no’ English and maths.
Blank background for level
The steps used to create the E-learning game whilst adopting STEM
After studying design
this was my first venture into developing websites, apps and 2D games
in Adobe Flash. From the start, I planned the project from the look
and feel to how it would play. I also made a level randomiser but the
concept ran into technical difficulties late into the game
development – get into your “white boxing people” please. It is
such a valuable stage for the process. I have mentioned in detail
below what “White boxing” is.
1 ) The idea for the E-learning Game
Sounds obvious, but the
idea was an important step. I had a vision and idea for what I wanted
the game o achieve and how it may look! After developing a viable
idea I set about doing some research online into “pedagogy” and
how it could be applied to the design of my e-learning game.
2 ) Game Objectives – “The Mission”
So you have an idea,
now what do you want it to achieve? You will need to consider the age
range for your game, whether it will be for all educational subjects
or will it just 1. If this going to be for free? Etc. As a teacher or
somebody looking to make a STEM game grab a piece of paper or open
word and start jotting down what you would like your application to
do for the world.
3 ) Planning your STEM / e-learning game
Great, so you have
established what you want your game to achieve and what will happen
in the game. I approached a more narrative approach to my game which
lent itself well to word challenges and maths questions. If you are
making a Science themed game maybe you could have a lab and you need
to find the secret ingredient for a concoction? Of you have
calculated sums and outwit an evil computer! The ideas are endless.
Start to the application – you game, how many levels, how many
characters, sound, animations, and try to do a rough cutting list of
what will need to be created. This may change as time goes along.
* note: the more ideas you have the longer it will take finish
Level map for game
4 ) Your Game Project Timeline
If this is your first
venture into creating a game project it’s tricky to gauge how long it
will take to create a fully-fledged game. If you are building it all
yourself – and learning all of yourself it could be a steep old
slope = a lot of time. None the less, in order to get your STEM game
live you need to set up milestones. I would advise breaking your
milestone down into smaller steps if not for timekeeping, then for
your own morale.
So, with your idea
ready and your research finished and plan set to be into motion. Now
is the time to roll up your sleeves and start building. The next set
of steps covers the more technical steps for getting started.
Technical steps on “how to create your STEM game”
The game that you see displayed was created by me in Adobe Flash (See product here). To create this game, I had learned how to code in a language called “Action Script”. Action Script is what made the nuts and bolts of the game tick, from the scene transitions to the answers boxes checking to see if the question is right or wrong. I have attempted to break down the process of making your game.
1) What gaming program should I use? Select a program to start making your game
Example of game engines you could use for your STEM project
Stencyl (great for beginners with no programming knowledge)
Stencyl is great for complete coding novices. The coding system works similar in principle to Lego Bricks, where you can stack and click together the functions and activities in your game. I have attached an example of what you can do in Stencyl. Or if you would like to, you can navigate to the post here and get an idea of how it works – (Stencyl post, custom cursor) Although Stencyl is good and has merits it has many limitations in my opinion. It should also be noted, that this engine is 2D only.
Unity Software (great for someone with some coding skills, create powerful games)
Unity software is everywhere and with large developer communities constantly improving the assets and the software but, be warned – it can have a steeper learning curve if you are wanting to create e-learning or STEM games this is truly a powerful piece of kit. One great advantage is that Unity comes with LOTS of tutorials, assets and game templates to bump up your game into completion.
Adobe Animate (Used to be king of the game makers, still good but not the most powerful)
The E-learning / Stem game shown throughout this post was created in what was known as Flash. Flash, now Adobe Animate has somewhat fallen out of favour with powerful programs such as Unity bumping it out of top position and accessibility issues for Smartphones driving in the wedge.
It’s a misconception that you can’t use Animate anymore to create rich-media applications – it’s not true. You can still create phone apps, HTML 5, animations, video indents, and games!
2) ‘White Box’ your game first
White boxing is
single-handedly one of the best modern techniques I have been taught
in recent years as it can save so much time. When I say ‘white box’
its a case of roughing out functionality and lose the form of your
game. Worry about the function and how the game plays first and use
place holder graphics in the early stages of development.
One terrible mistake I
have made in the past with utilising time is to create artwork for a
component (part) of a game that will not work and you end up having
to junk not only the component but the artwork/animation also.
Rough it, test it, play it and then make it beautiful!
3) Find a game Artist or Designer
A very important step
for your STEM Learning game is creating artwork that will be visually
appealing to children (and adults) when they interact with your
awesome puzzles. I tried to make the artwork for my game appealing to
a younger audience, to keep them engaged in the topic. You can either
create the visuals yourself, hire an artist (link) or look for free
and open-source artwork and make a Frankenstein monster of moving
stock graphics! (yes, a pinch of sarcasm)
4) Test, test again and assess – then develop your game further
Test your game on players that have never heard of it or played it. Although, I have to confess that I had trouble finding young testers and the youngest I could go to was 9 years old. Watch how people play your game and take notes on what you can improve. This is a valuable step, more so if this is being created for commercial purposes.
5) Publish your STEM application / E-learning game
You’ve done it! Depending on the size of your game, you have spent a year, 6 months, 2 weeks and you have published the application ready to go out to your classroom. You have created a game with a purpose that will hopefully help with learning and STEM development. – Well, in theory, you have made it, now you need to put it into practice.
How “I” created my STEM / E-learning game
I have outlined how you can create a STEM or E-learning game based on my experience and playtesting. I have attached a few conceptual details and visuals of the original game – Called “Blossom Tree” which was my first major foray into interaction and game design at the University of Cumbria.
Static visual for field
I wanted the game to feel warm, friendly and filled with the freshness or being the outside, you never know – the artwork my spur children to go play outside, maybe build a den. You may also notice in the background there is a twisted silhouette of a castle. That is the final destination for the player.
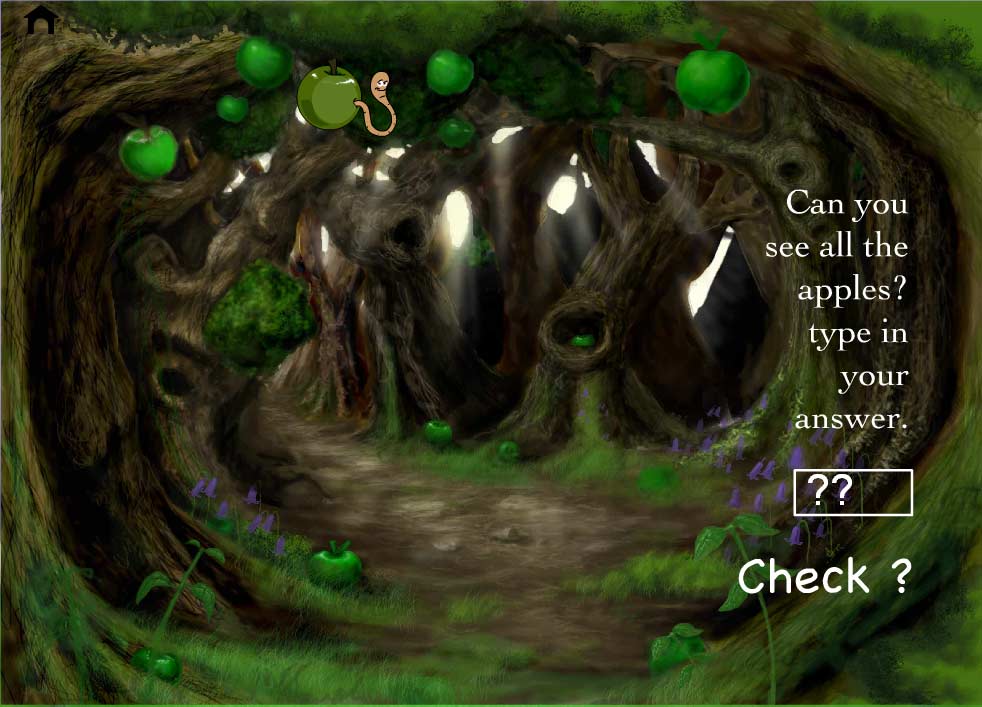
E-learning game spoiler alert!
(Wilber Worm)
Speed rounds and classroom chalkboard.
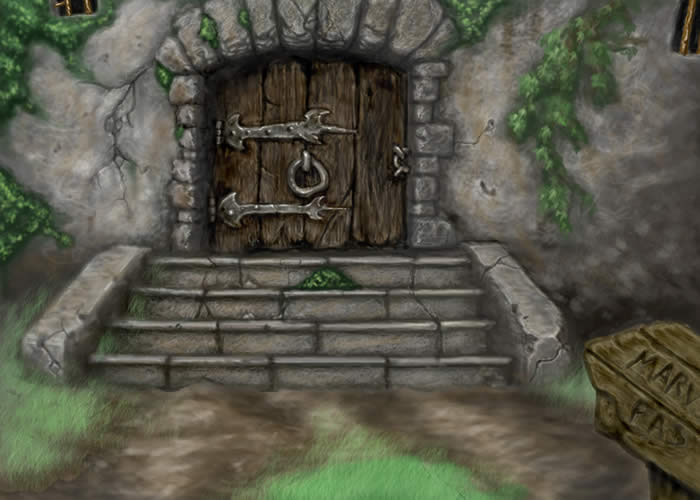
Speed Round from e-learning game. (Do you reckon children will know what a blackboard is 20 years? Probably not. Castle level Background – getting near the end of the game.Dungeon
Looking back
I feel I may have constructed this game slightly ahead of its time. This game was created as part of a final major project whilst studying at the Cumbria Institute of the Arts in my final year of study. This would have pre-dated the surge in the smartphone and the tablet technology and well before the surge in digital downloading platforms such as Steam, Google Play, Apple Store, PS4 network etc.
This e-learning game
was created to be a web application or CD ROM .exe. The platforms for
downloading such games weren’t as prevalent then, whether they
existed at all. The commercial standpoint if I was to create this
game again I do a lot of things differently.
things I would do differently, for my STEM / E-learning game
If I was to remake this game I would add so much more interaction into the game, maybe some quicklimes scenes, a bit more movement and generally make feel a little less static, but hey, this was my first ever go at making something like this. I look at many aspects of the project – especially on the design side of things and hiss through my teeth or feel my toes curl as some of the aesthetics but still proud to this day to hear this from around the corner.
“This is F*****g ace!”
in a Cumbrian accent. And that was directed at what I had learned, what I had created and I had hoped would be an of a benefit to a few.
The take way on how to create a STEM game application
I hope my project and
how to post has motivated you and given some insight on how to create
a STEM application or learning game. The process of creating a game
such as this can be incredibly rewarding. It can also be a big
undertaking and if you need any help or have any questions. Well, you
know where I am.
If the found this post on “how to create a stem game application” useful please share. It could be helpful for those looking to create an educational game or something for friends and family.
This website uses cookies to improve your experience. We'll assume you're ok with this, but you can opt-out if you wish. Cookie settingsACCEPT
Privacy & Cookies Policy
Privacy Overview
This website uses cookies to improve your experience while you navigate through the website. Out of these cookies, the cookies that are categorized as necessary are stored on your browser as they are essential for the working of basic functionalities of the website. We also use third-party cookies that help us analyze and understand how you use this website. These cookies will be stored in your browser only with your consent. You also have the option to opt-out of these cookies. But opting out of some of these cookies may have an effect on your browsing experience.
Necessary cookies are absolutely essential for the website to function properly. This category only includes cookies that ensures basic functionalities and security features of the website. These cookies do not store any personal information.
Any cookies that may not be particularly necessary for the website to function and is used specifically to collect user personal data via analytics, ads, other embedded contents are termed as non-necessary cookies. It is mandatory to procure user consent prior to running these cookies on your website.