Here are some of my example animated gifs created using Adobe Animate – the successor to Flash.
Whether you pronounce it ‘JIF’ or ‘GIF’ ( I’m in camp GIF, with a ‘G’ by the way!) the humble .gif format has been around for decades. It’s simple, fun and universal. Gifs are great, and you can use Adobe Animate to create them.
For the sake of show and tell, I wanted to share some of my smaller animated projects. A batch of animated Gifs I made using Adobe Animate CC and its predecessor Adobe Flash.
I have already shared other types of example projects created using Adobe Animate. Such as what you can make using Adobe Animate ( formerly Flash ).
Adobe Animate, or when it was called ‘Flash’, was the 2D animation software of choice in its heyday. I’ve used Adobe Animate for making web components, animations, small games, and various other forms of multimedia before it lost its popularity. Adobe Animate still has plenty to offer in my professional opinion. From creating 2D animations to very simple games, videos, and general multi-media in the form of HTML5.
Another benefit of Adobe Animate – it comes as part of the Adobe Creative Suite ( Creative Cloud ). So if you are already a license holder, this is another tool in your arsenal.
A distinction that I like in the way Adobe Animates works for motion graphics, is its granular approach to frame-by-frame animation.
It adheres more closely to traditional methods of frame-by-frame animation.
Example Gifs created in Adobe Animate – My Animations
My example animated gifs created in Adobe Animate.
My history with Adobe Animate
After studying for an HND in Graphic Design, I decided to embark on another course that built upon my knowledge of working with Adobe Animate – Multi-media design and digital animation.
I still use Adobe Animate for ‘small-scale’ animation projects from time to time, as it is well-suited to creating frame-by-frame animations and small-scale projects.
But, it is no longer my default motion tool for making multi-media applications and animations.
Example GIFS created in Adobe Animate – Shorthand overview of the process
To create the example animated GIFs (or gif) as shown in this post, I did the following:
Mocked up some very rough ideas on paper to help brainstorm and visualise my ideas.
Created the vector illustrations in Adobe Illustrator.
Imported the Illustrator artwork into Adobe Animate.
Created the animations through a mix of frame-by-frame animation and ‘tweens’.
Exported the GIFs from Adobe Animate – ready to be distributed.
In the paragraphs below, I go to more exact detail of what of what I did in each paragraph.
Drawing the artwork in Adobe Illustrator
I didn’t illustrate the artwork in Adobe Animate. These examples shown in this post were created in Adobe Illustrator first and then imported into the project library in Adobe Animate.
In the early stages, I created the drawings the way I wanted. I then drew them in such a way that parts of the illustrations could be pieced together and broken apart according to how I wanted the animations to work.
I can do some basic drawing in Animate, but Illustrator is a lot more capable as far as I’m concerned for drawing, and fortunately, these 2 applications are good bedfellows now they are part of the Adobe Creative Suite. This has not always been the case.
Example GIFs created in Adobe Animated | The ‘importing’ stage
Adobe Illustrator enabled me to have greater control of how I wanted the artwork to look. Gradient shading on the artwork, bold highlights, crisp lines etc.
Once I had created the initial illustrations, I then exported these from Adobe Illustrator – some pieces of artwork were direct imports from either single or multiple artboards.
I then got animating the artwork.
Creating the animations on the main root timeline
Importing complete, assets ready.
This is a similar process I have been using since I was taught how to use Adobe Flash ( Now Animate ) back in 2007. Although the process has changed to some degree and I have streamlined it substantially, the essence of this is more or less the same.
Before using Adobe Animate, I used it to draw it all in Animate – Formerly Flash.
Working on one animation at a time, I pull the components of individual drawings onto the main stage. The white background. I then commence the process of creating animations via a combination of tweens, keyframes, and incorporating simple effects.
When creating the . GIF animations, I try to stay conscious of their intents and purposes. To be used on websites as loops and to be multi-purpose.
I then ‘Exported’ the gifs from Adobe Animate, doing a certain amount of testing and measuring, and tweaking as and when needed.
Caveats – don’t bury in sub animations
Note to self and a lesson to the reader.
Don’t insert the animations into animations. Eg, from the main timeline. And don’t create an animated clip inside another animated Movie Clip.
These don’t tend to work correctly when exporting from Adobe Animate in most cases.
A strong USP ( Unique Selling Point ) for Adobe Animate
The ability to create frame-by-frame animation is one of the best and most unique selling points when it comes to using Adobe Animate. For me, this is also incidental, as Animate, which was formerly “Flash”, comes as part of the Abobe Creative Suite. No need for extra or new licenses for 2D animation.
Thank you for taking the time to read my post on example gifs created in Adobe Animate and taking the time to watch my animations. Animate, in my opinion, was and still is a great little program for creating animated gifs or 2D animation in general. If you know how to use it.
If you would like any help in creating animated gifs be it for a website or something else, then please do get in touch.
Other topics around example animated gifs created using Adobe Animate
You may also find these subjects interesting around using Adobe Animate.
Creating a board game prototype. It was past time I shared a new project on my blog, and in this post, I wanted to share my efforts in making a board game prototype.
These are some of the processes used for creating a board game prototype for a past client – ( Conway Council ).
I would like to say that the initial brief was simple, and in truth, it was simple, on paper at least. But it was also simple to point out vague.
Nuances came up that I had never experienced in my career so far. I could tell that the people commissioning the project, were not familiar with working with board game designers, and that was fine.
I was also there to help and guide them.
From the outset, I knew I would need to roll my sleeves up to make a playable game. Like the image shows.
What I gleaned from the initial brief:
The board game needed to be educational
Palatable for teenagers
And teaches teens about the hard knocks of life ( and youth homelessness )
Conwy Council was going to use this game with charity organisations such as Shelter and other companies based in Wales.
“teach children about youth homelessness”
Core steps and processes used in making this prototype
Discussed the initial brief. After a basic telephone call.
Create the first brief ( the entirety of the project was actually several smaller projects ).
Created very rough rules
Creating the initial game mechanics based on the rules
Visual design, characters, rules, packaging, and general graphic design art direction
Create a design-ready prototype for photography and further development
Worked as the middleman, project manager, and between client and ad prototype manufacturer
Creating a board game prototype ( overview )
The aim of the game was to create something that teaches children and teenagers the dangers of youth homelessness. It is the ‘gamification’ of how to better manage personal finances, and work with general property pitfalls and debt. All these situations can lead to you losing your house and home.
For the brief, I was initially given a spreadsheet of depressing phrases that were more akin to a sad flashcard game than a board game. I used these phrases and situations as inspiration for the game mechanics. These phrases acted as a springboard.
After all, the main purpose was to create an educational game with a root meaning: try to look after yourself and not end up homeless.That, would be my hook for how you lose the game.
“I didn’t want to make the game so hard and depressing that it completely crushed the players’ souls. The game ‘could’ be beaten.”
But even with the best-laid plans, and being careful with money, things can occur. That is another core mechanic built into the rules. It was another lesson subliminally buried in the core game play.
1 ) Crafting the basic rules
When creating a board game prototype, a viable game mechanic and rules are essential to a game that is both playable and fun.
I hate it when you buy a board game and realise that gameplay is not only flawed but utterly broken. I feel cheated.
When making the rules, I didn’t want to make the game so hard and depressing that it completely crushed the players’ souls. The game ‘could’ be beaten.
Notes were taken, the game was enhanced, and artwork was then ( Note then, after making a playable mock-up) created.
Here is more on creating a mock-up for creating a board game prototype.
2 )The first iteration of the game
In the very early form of the game, I constructed it from bits and pieces from my studio and my partner’s office. Nothing fancy.
Photo taken from the earliest iteration of the game.
When creating the early form of the board game prototype, here is an example of those bits and pieces.
Creating a board game prototype – Alpha Scrap Components
Post-it notes
Bits of bric-a-brac as game pieces
A sheet of white A3 paper
Note paper
Scraps of paper as currency
As I said, nothing fancy at all when developing the game mechanics.
It was whatever I could fashion together to make a playable game. For this project, this was all that was required, but you can buy prototype kits also.
Once I had established some very basic rules and core game mechanics. I then set about testing what some of the different cards might work and play like.
Seeing what components you need earlier in the development process rather than later, will save time, money, and headaches. You can then move on to the graphic design stages and artwork. Which brings me to the next part.
3 ) Characters & the visual design for creating a board game prototype
Once the first iteration of a playable game was created, I stress-tested the rules. I then set about creating some initial visual design for the game – the graphic design.
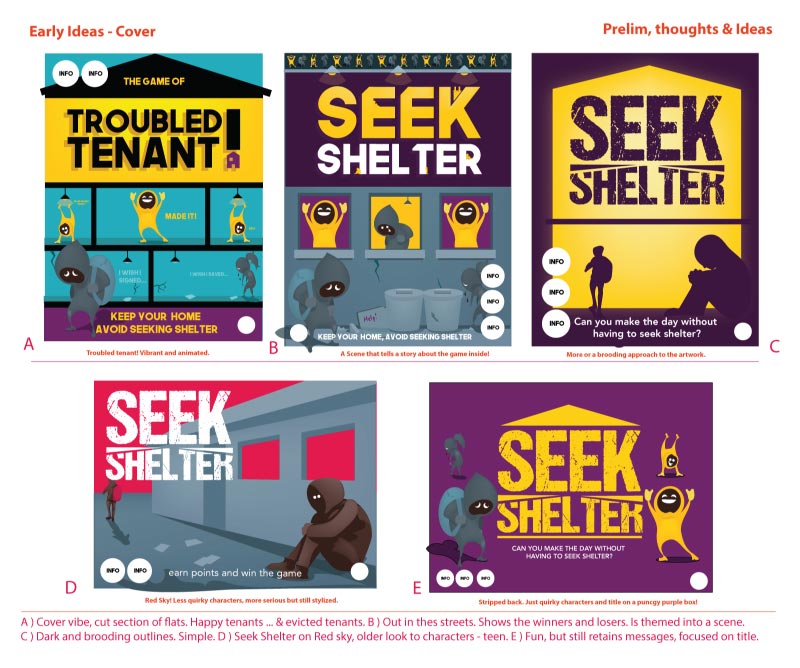
I sketched out some characters, titles, the general look and feel of the game, and the cover of the box of which there were several iterations. And a segment for the game board for the client to see. I will often refer to this stage as ‘Early design, design roughs, early development or first phase of development’.
There is no use in creating an entire project only to show the client at the end something they don’t like. Make life easier on yourself, and create a sample. Speaking of which, here is a sample from this projects of some of my process and journey.
Initial artwork for a board game ( design ideas )
in this part, you can see me experimenting with different card designs to present to the client. The preferred cards would be funneled and developed further in later stages.
Creating a general look and feel for the cover and some of the typographic experimentation. This is in essence part of the cover and box packaging ( including the cover art )
4 ) Graphic Design & Core Components ( Development )
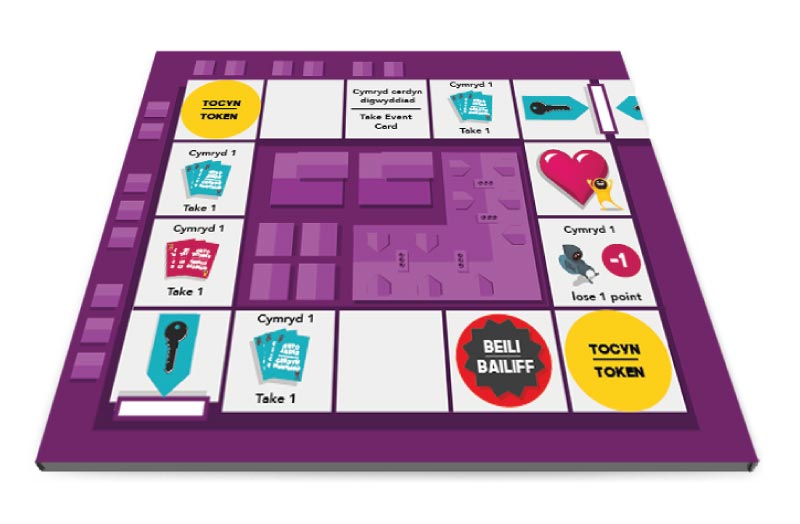
Below are some of the components I designed and illustrated for the prototype. After the first stages of the visual design which was a large part of the project, the ideas that were short-listed were developed further.
These designs were readied in Adobe Illustrator before being imported into a cutter guide. These cutter guide templates and PDF’s were then sent off to a factory for a batch print. ( although I made a more basic version for further playtesting )
The same premise was similar to the cards, rules and the first designs, only polished and developed further.
“Then playtest it again. And then… when you have had enough. Playtest it once or twice more. “
5 ) Playtesting
When creating a whole game, I always advise my clients to play test their games, and this project was no different.
Being the one at the helm of making a fully working game, I wanted to practice what I preach. And if money would have allowed, I would have carried out more player testing on a wider audience.
Then playtest it again. And then… when you have had enough. Playtest it once or twice more.
I have a post here ( the play test of a client project ) that goes into greater detail. This is another important stage when creating a board game prototype.
6 ) Take notes from the playtest, and adjust accordingly
After watching real players play the game on 3 separate occasions, I took notes on people’s play styles.
People playing board games try to break the rules. Many players I have witnessed when creating a game will try and break or circumnavigate ( cheat ) the core rules or ‘interpret’ the rules differently. There is no right or wrong here, you need to observe and shut up as a board gamer developer and see how people may realistically play your game.
Remember this when making a board game.
For this project, I had to tweak some of the rules, re-jig the board, and amend the artwork after running the latter playtests.
Although I was by and large relieved, not much needed to be amended. Mostly re-working and some graphical aspects of the board, and rewording. This comes under “development”.
7 ) Final Stage – helping the client get a prototype made
In addition to coming up with the core design, the rules, making a playable prototype, play testing, and everything else in-between, that is involved with making this game. I was commissioned to liaise and organise a prototype production of the game.
Basically, I helped to guide the client through the first iterations of making a viable, polished prototype. ( and the batch production ) I amended or prepared the artwork as was necessary for prototype makers.
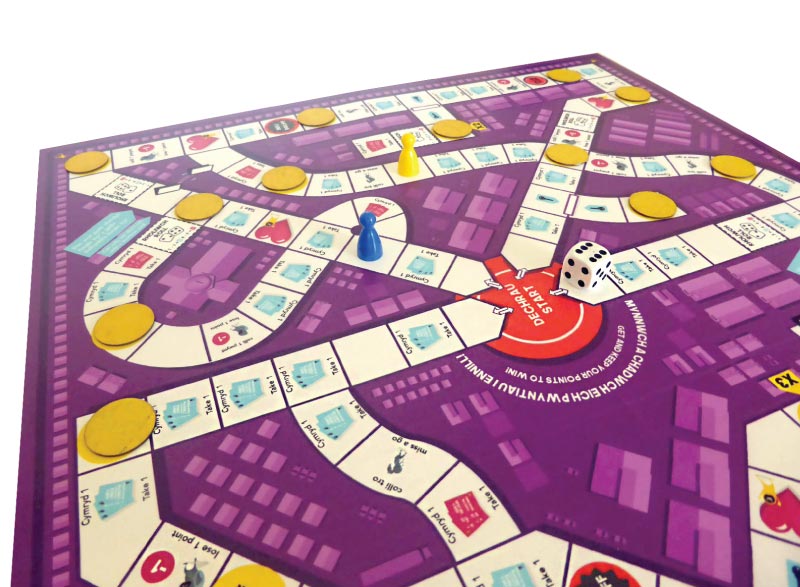
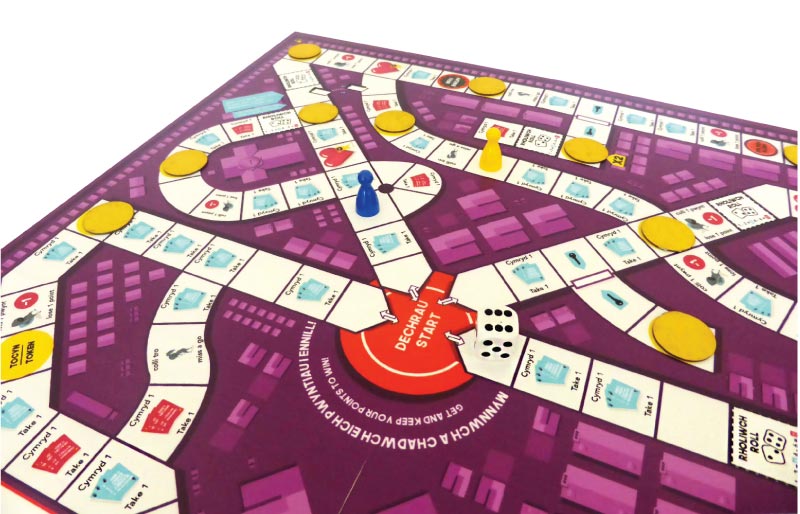
Here are some photos of the board which I took on my bridge camera, and isolated on white in Photoshop.
Creating a board game prototype | The Unique Challenges
This project came with a range of different and unique challenges that I’ve never encountered before.
Initially, I wasn’t given an exact brief outside of “make a game”. The initial brief that was given to me amounted to little more than a set of unfortunate key phrases listed inside an Excel spreadsheet.
This did not amount to a full brief. I had to convert these statements listed in Excel, from a long list of misery into a playable game to educate children and teenagers about youth homelessness.
Here are some details about the projects, and lessons I may have learned!
Wordy
Fundamentally this is an educational game and not a game for fun sake.
Instead of creating 2 different languages for the game, 2 languages were usually next to or near to each other which did offer some unique challenges for the graphic design. This was carried through not only on the cards but all visual and written components of the game. I feel I managed to make it work though – just. Please observe this card again with the double language on a single face.
Unable to read Welsh
I have nothing against the Welsh language, I just don’t know how to read or write it.
With this in mind, this is potentially one of the most unusual challenges I’ve had to work with on a project. Not being able to read or write the copy whatsoever, even at a superficial level posed a significant challenge for this project.
By and large, I technically didn’t need to know how to speak, read or write in Welsh. But, when copying and pasting the Welsh language onto the cards, even by happenstance, I couldn’t flag any issues.
You may be correct in assuming as I am not the copywriter, that I don’t need to worry about it. But in the same breath, I needed my client to complete and finish this project. I needed to be paid. And generally the more eyes on a project, the more likely you are to pick things up and share your concerns. I was unable to do this here.
Waiting and relying on their team to spot or change their mind with the wording on an already very wordy game, made this very challenging to work on in the latter stages.
A member of their team could amend the text on their side, For me to spot these edits was near impossible and impractical in both capability, time, and budget.
As a designer, I was sympathetic to the product and helping a business make a sale, not all designers think like this, especially junior designers or design generalists. Not all graphic designers, think and operate in the same way. I was taught how to design for retail, build a brand, etc.
I understood that the packaging needed areas for barcodes, addresses, strap lines, age badges, warnings etc. In addition to all of this, making games appealing to the masses and shelf-ready.
For this project, the above didn’t necessarily apply, as it was for demonstration purposes mostly in an educational setting such as a school or town hall.
I hope that Conwy Council took care of this game and that children are enjoying it, and playing today… and perhaps better off than some of the characters I created for the project as part of the vector art.
Project Post | Creating a board game prototype, Testimonial
“Jimmdesigns is the perfect partner for anyone interested in creating a board game. Jimm supports with all aspects of creation from the initial concept, design process, development, play test sessions, through to the production of the prototype and manufacture. Jimm is able to break down the complex processes into easy to follow step-by-step actions for individuals who are new to the game making process.
Jimm has essential contacts in the industry and is able to manage all stages of the process. We highly recommend Jimm’s services, he is extremely patient and flexible with timescales and concepts” 5****
For those of you who don’t already know, at the start of the lockdown, I set myself the task of creating a graphic adventure game! Or, I should say, I started to learn how to make a graphic adventure game in Unity.
There was a time in Lockdown – what can I say!
For those of you who don’t know me, I studied Multimedia Design and Digital Animation as a follow-up course to my HND in Graphic Design at university. All those years ago! I also have a yellow belt cert in Unity too.
In the early days of the 2000s, Adobe Flash was king, ( Check this blog post out on why to avoid Flash player on another website ) and I used to make a lot of multimedia applications, both personal and commercial. Most of these early projects were micro games or small interactive animations – all of this stuff was pre-smartphone.
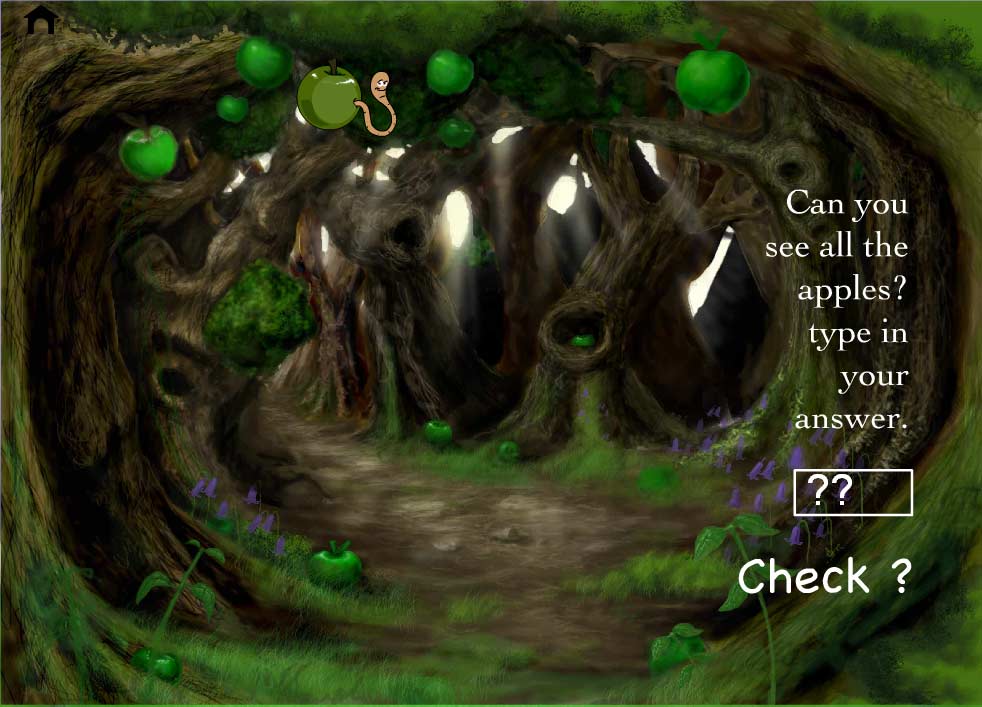
My first project on this sort of scale, where I had to try and create my own project, was at University. I set about making an e-learning game for children, which was all built in Flash. Sadly, with the demise of Flash Player, this is tricky to play now although I may still have a projector for the game somewhere.
Here is a picture of it.
Adventure Creator Project – My first project of this scale was in Flash.
From a game creation perspective, In hindsight, really it was a narrative game with educational elements to it. You may also be interested to see in theory how to make a story game in Adobe Animate.
But now to the crunch.
Adventure Creator Project.
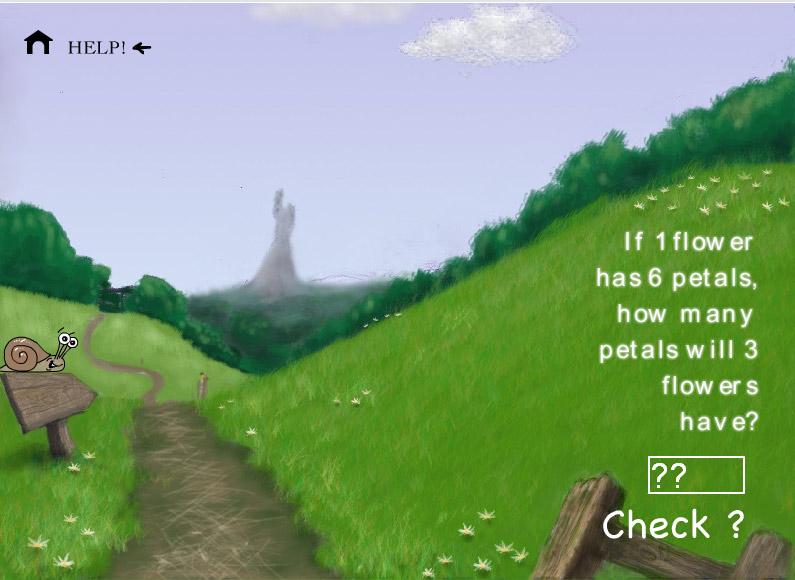
Adventure Creator Project | Fools Errand
A name for a game that exists solely as a learning exercise – it could have been called anything really, as I had no intention of monetizing it. The game was based on classic 2D point-and-click graphic adventures that you could buy in the 90’s – the humble point and click game.
You point… and you click.
I created this game a greybox prototype to see how Adventure Creator works. It was something to learn during the Lockdown.
If you are interested, you can play the game on itch.io. It is free to play with bugs and all. ( however, it should be noted that you can’t save it via the browser version )
Do I think Adventure Creator with Unity is good?
‘I’ think it is great.
Actually, saying AC ( Adventure Creator ) is good is a massive understatement. It is excellent, I have never been able to assemble a graphic adventure game in the most time and cost-effective way until I used AC. The standard that Adventure Creator offers is just excellent compared to some of the game engines or tool sets I have used in the past.
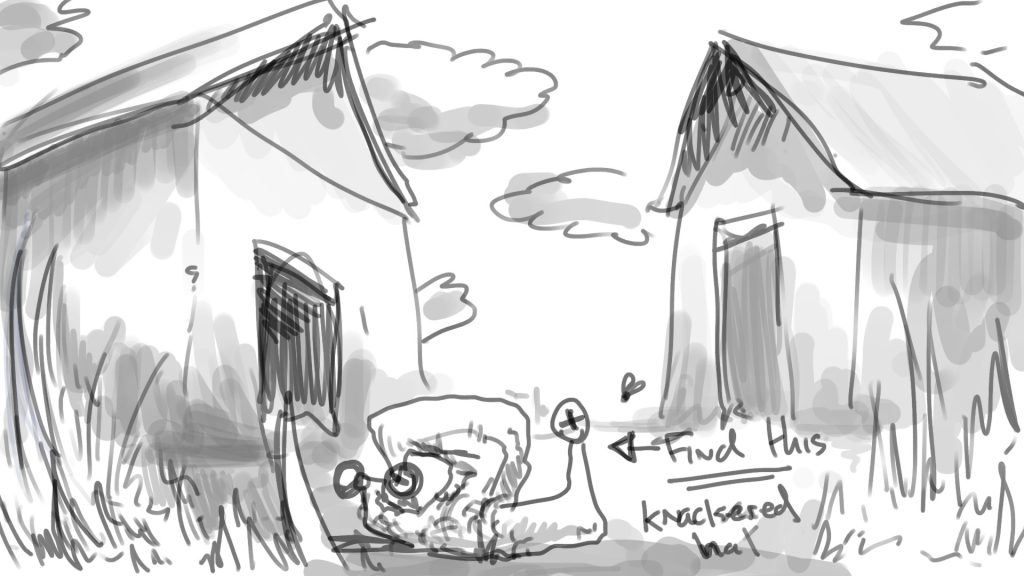
I called it Lost Hat, AKA Fools Errand. The title leaves very little to the imagination of what you need to do.
Who knows where the hat got to?
Or who could be wearing it!
Oh, the trifles of life.
You will need to use your wits to get through this 3 level game to find your hat. Perhaps if I see enough people play it, I might write up a shot hints and tips guide. But I have largely moved on to other things.
Mock up application icon
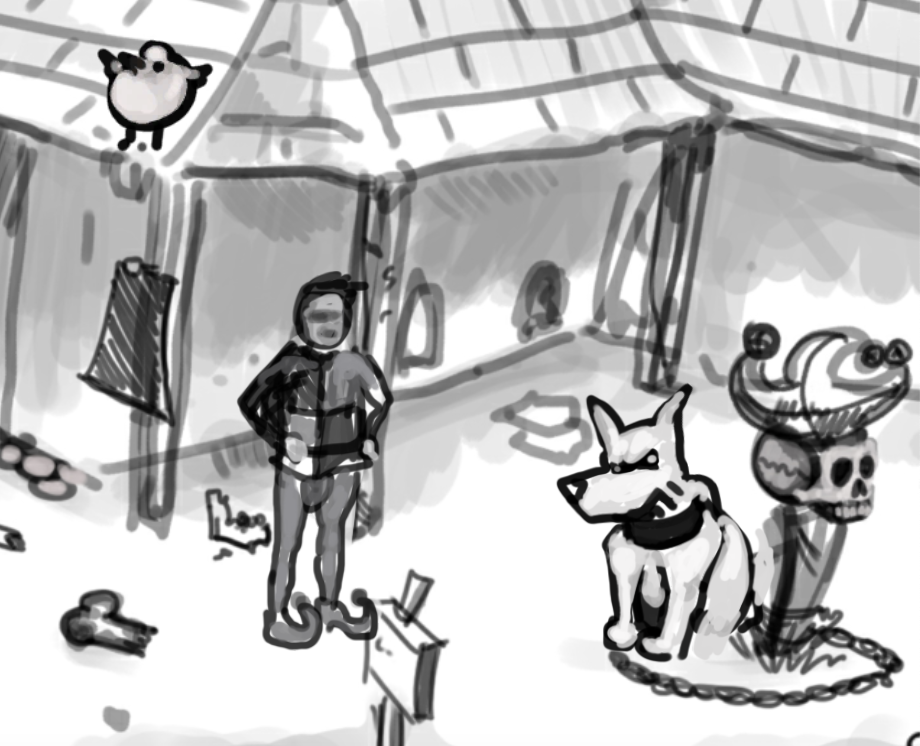
In-game background – my Adventure Creator Project
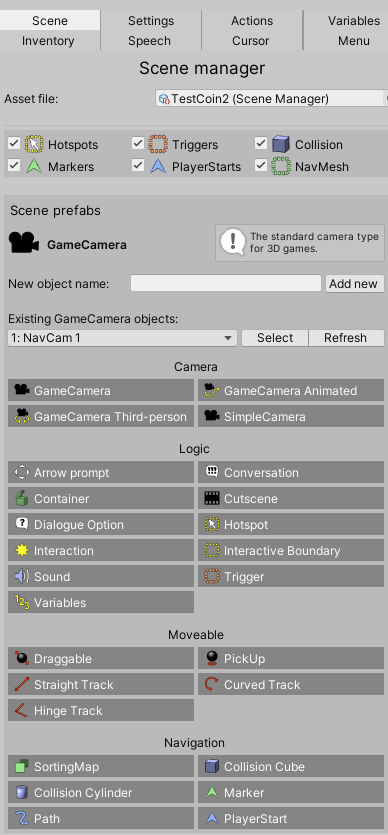
The components of the project – AC ( What was involved )
For a personal development project – more than I would care to admit.
This project has a of artwork, basic 2D animation created in Photoshop, some rough and ready characters, Sprites and sprite sheets, sound effects, dialogue, conversations, and logic, and I’ve even decided on a small video clip at the end of the project to see how that would work too. And, of course, Adventure Creator. To summerise it is best to mention it this way.
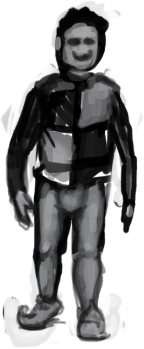
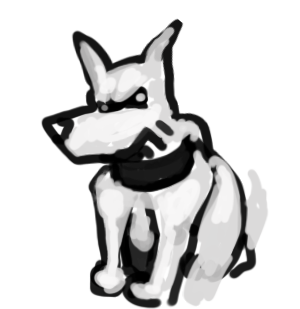
NPC character sprites
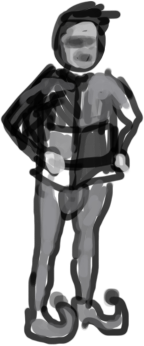
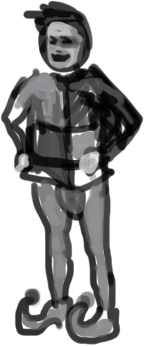
Player character sprites + and custom animations spites
The AC logo for every object and item that can be interacted with in the game
The Icon artwork
Writing all the dialogue for the game
SFX
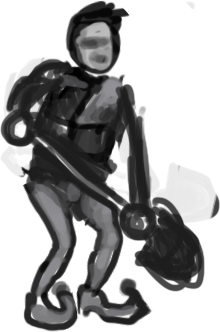
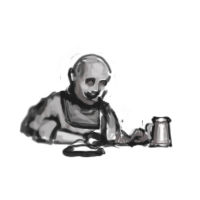
Adventure Creator Project | Sprites
The sprites, or the characters, however you’d prefer to see them, comprise of all NPCs, the animals, the main player, and various other bits and pieces that were used in the environment. If it moved or was animated, it was probably a sprite.
To quickly paint these characters in various states of animation, I used Photoshop to sketch and brush in the black and white ‘wash’.
The main player in particular has a 4-way direction and various other obscure animations in its repertoire!
The main player was the most time-consuming to create, even as a rough sketch. 8-direction would have taken more time still.
Adventure Creator Project | The Scenes
I don’t wish to spoil too much of the game just in case you do decide to play it, as there are only three levels. But in each level, there was a background image that was quickly drawn in Photoshop and then imported as an asset to my project.
Adventure Creator Project | Motion & Animation
I gave very little time to the motion graphics and animation sadly.
After all, I needed to think about the project as a whole and produce this game it quickly. I was invested more in the learning of Adventure Creator than the actual product itself. However, creating some basic frame-by-frame animations was still essential for making the sprites.
To create basic in-game animations, I used Photoshop and painted a couple of layers with my Wacom Tablet as if I were to make a GIF before exporting out the layers as frames.
How did I feel about the project?
As a semi-personal project learning experience, I feel pretty good about it. This was never going to be a polished game for the whole world to play. I created it so I could learn and share. It was undertaken during the Lockdowns. It was a grey boxing experiment.
The project as a whole, taught me more about AC and how I could potentially create a bigger and bolder game in the future using Adventure Creator.
You can play the game here on Itch.io if interested. Warts and bugs included ( you can’t save via the browser version ). It should be noted that the browser version of the game won’t allow you to save! Enjoy. Or you may find some information on this website interesting if you are at game projects.
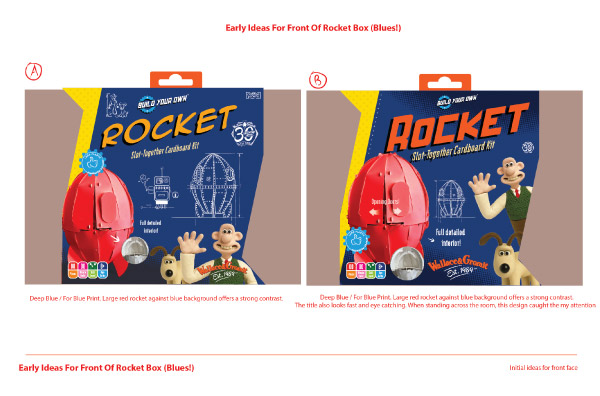
Aardman Wallace & Gromit Project – flex those Adobe Illustrator muscles. I have a new post to share… kindly, the team over at Paper Engine has now said that I can share and discuss my part in creating some of the packaging concepts for a new range of Wallace & Gromit themed products.
The artwork shown in this post was used to pitch to Aardman for a new range of British designed card products, otherwise known as – Build Your Own, For Paper Engine.
Aardman Project | The Brief
The Brief | I was commissioned by Paper Engine to help create the core design for the packaging concepts for a new range of of Wallace and Gromit themed paper products.
Aardman had set up an agreement with Paper Engine for them to come up with a range of products, themed around Wallace & Gromit.
If you don’t know Aardman, they are the animation studio behind Wallace & Gromit, Chicken Run, Arthur Christmas, and Shaun the Sheep to name a few.
Paper Engine got in touch with me and asked for assistance in coming up with the core packaging concept to pitch to Aardman.
I won’t lie, I was excited and honoured.
Under a strict NDA, I was called in to help come up with some of the core concepts for the new eye-catching packaging.
The NDA has been relaxed now, as the products have been released onto the market. So don’t worry. And I asked the crew over at Paper Engine and they were happy to allow me to show my my part!
(All artwork on this page is the intellectual property of Aardman and Paper Engine. Do not copy, save, or download any of this content for commercial use ).
Packaging For Paper Engine… Which was actually for Aardman
To spill the beans on the projects.
Here is a bit of extra information on the project process. Once Paper Engine had sent the brief across to me, and we did all the admin, the project was set in motion!
Aardman Wallace & Gromit Project | The design process involved…
Coming up with some very early ideas for speech bubbles, titles, typography, backgrounds, and other accents and parts for the project.
It should also be said that this project was quite particular and that there were 2 companies involved in the approval process. Nonetheless, it still allowed room for design creativity.
Aardman Wallace & Gromit Project | Developing The Design
While I was allowed to work conceptually and creatively, I also had to adhere to 2 sets brand guidelines! One set was supplied by Paper Engine for Paper Engine and, the other was for Aardman!
Aardman Wallace & Gromit Project | The Delivery
After working on the polished designs, Paper Engine pitched the artwork to Aardman. I was told on the grapevine that they were pleased with the project – with very few changes to the pitch!
Thank you Paper Engine, it was an honour! From there the look and feel for the range was set. It was an awesome project.
How I approached the project
When creating the packaging, I tried to create artwork that was exciting and matched the tone of Wallace & Gromit. I also tried to create packaging concepts that would excite both children and adults if they saw them on the shelf!
‘wow look at that!’
type of thinking with the hopes somebody would pick the product up and purchase it. The product did most of the selling in all fairness, these are very cool products.
Aardman Wallace & Gromit Project | Paper Engine Testimonial
‘We worked with Jimm on some early packaging concepts for our collaboration with Aardman on three Build Your Own kits. He delivered some superb designs which enabled us to get ahead of the curve by keeping the client on board with approvals and saved us some valuable in-house studio hours. We would definitely work with Jimm again in the future when the occasion arises. Top marks. 5 stars.’
Geff – Creative Director, Paper Engine Ltd.
Aardman Wallace & Gromit Project | You may be interested in some of the following
Working with beta testers… creating board games isn’t easy! A crucial and oftentimes overlooked stage for creating a commercial board game is the beta and alpha testing.
I was commissioned to create a board game prototype to teach children about youth homelessness. My primary role was – mostly – visual design and gameplay, and illustration. And… consulting and guidance on creating a game.
When working with Beta testers, I tried to create an environment that was open and invited constructive feedback.
While I took notes, I allowed the Beta testers to play how it suited them to play. Down to opening up the initial black packaging box to reading the rules, in whichever order they chose.
Setting up the Playtests for a board game prototype
This was my first playtest in quite a while. In the past, I have been involved in both helping to set up alpha testing and the follow-up stages of a Beta test. Beta testing on behalf of a 3rd party client was a new experience for me. And there was a lot involved.
Before preparing 2 different environments for beta testing. I had to get the testers to sign NDAs on behalf of the client.
It should also be noted that a large amount of effort was involved to find both beta testers, and finding a space to carry out the beta testing. Money also needed to be paid to the venue for lunch.
Alpha Testing vs Beta Testing
There are some key differences in the alpha and beta testing stages. With alpha testing, this is often a case of a game or game prototype being experimented with and developed internally. In my case, I was the first tester of the rules. I created the rough rules to see how the game mechanics may work and wrote these down as I went along. This is typically the very early stages of creating a working board or card game. The more alpha testing you can do before going to external beta testing, the better.
This is a photo of some of the first game components and alpha
Beta testing the game involved finding other parties to look at and play the game. These people had never read the rules or knew what the game was or anything. Once I sourced the beta testers, found spaces to play the game – this then set about into motion the gameplay.
The beta stage is the more developed stage of creating the game prototype.
Creating the gameplay | My experience of working with beta testers
I was involved in creating the initial gameplay as well as working on all the visual design for game. This was part and parcel of the commission of the game project – from top to bottom. Finding board game testers can be tricky ( external website on finding beta testers ) , but I feel that these beta testers offered tremendous value to creating the board game prototype.
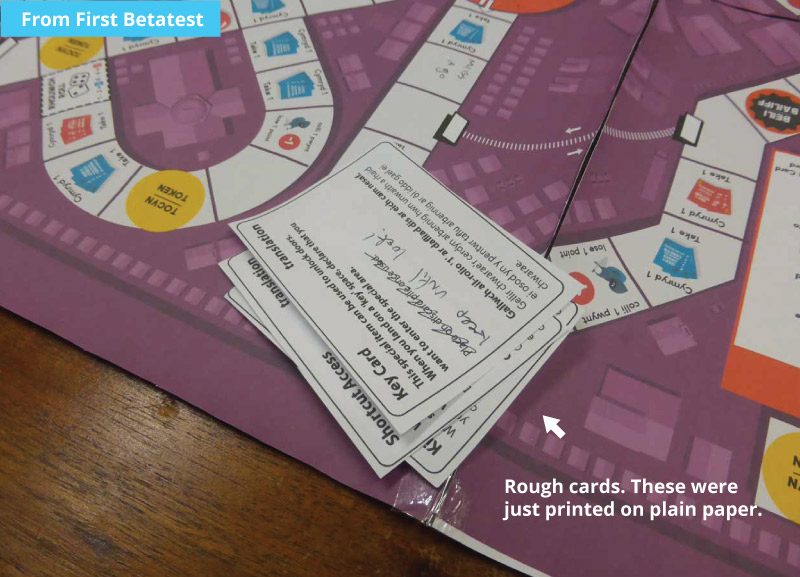
Here are some initial screen grabs from the playtest. An important stage when creating a board game prototype.
The first draft low-fidelity prototype
The later stages of the playtest | working with ‘other’ beta testers
I would advise when doing a playtest of your game, to try the game on people you don’t know. ( although I do know Paul here – thanks Paul, Paul is also a drummer I’ll have you know! ) The wider the pool of people… the better. Below are some visuals of the playtesters in action doing their thing!
And me… taking notes on how the game is being played.
Doing these live tests is not always easy on the ears. But they can be essential for making a better and more rounded board game.
A special thank you to the playtesters for this game
This lot should be proud – although the Conwy Council may not know the names of the playtesters I would like to announce who helped make the prototype a more rounded and playable experience.
( me, I was the first tester ) Faye Willets + Family, Helen Edmonds, Jake Joung, Paul Whibley, Steve – and a Special thank you to Liz Chadwick for introducing me to some fellow playtesters!
If you would like any advice or a design service to design your board game you can read more here – freelance board game designer
Are you a playtester?
If you are a playtester for board or card games? Feel free to drop a message across with a bit about you, what you do, where you are based, age, your demographic, and the types of games you like to play. ( please note that many of my playtesters are currently based in the South East – UK )
Are you looking for playtesters?
Playtesters or beta testers can be tricky to find if you are just starting out. This article here on Dragon Bone games About finding playtesters may be helpful – ( Alpha ). Or if in the later stages of development – where to find Beta Testers. ( external website )
Notes – On Prototype
It was a fun project to work on. I would like to say I have no idea what the mass production or future edition of the game will look like but either way – I was happy to be part of the pre-first edition of the gameplay.
Are you looking to create a board game? I was involved in the visual look and feel of the game along with the vector character illustration. Feel free to get in touch if you want to discuss your game project!
Jimmsdesign – Game content and design Copyright Conwy Council and its respective partners ( artwork shown for portfolio purposes only )
This website uses cookies to improve your experience. We'll assume you're ok with this, but you can opt-out if you wish. Cookie settingsACCEPT
Privacy & Cookies Policy
Privacy Overview
This website uses cookies to improve your experience while you navigate through the website. Out of these cookies, the cookies that are categorized as necessary are stored on your browser as they are essential for the working of basic functionalities of the website. We also use third-party cookies that help us analyze and understand how you use this website. These cookies will be stored in your browser only with your consent. You also have the option to opt-out of these cookies. But opting out of some of these cookies may have an effect on your browsing experience.
Necessary cookies are absolutely essential for the website to function properly. This category only includes cookies that ensures basic functionalities and security features of the website. These cookies do not store any personal information.
Any cookies that may not be particularly necessary for the website to function and is used specifically to collect user personal data via analytics, ads, other embedded contents are termed as non-necessary cookies. It is mandatory to procure user consent prior to running these cookies on your website.