My Creative Graphic Design Process | Explained In 7 Stages

Let me share my secrets.

For those who are interested in knowing more about my design process and workflow, this post is for you.

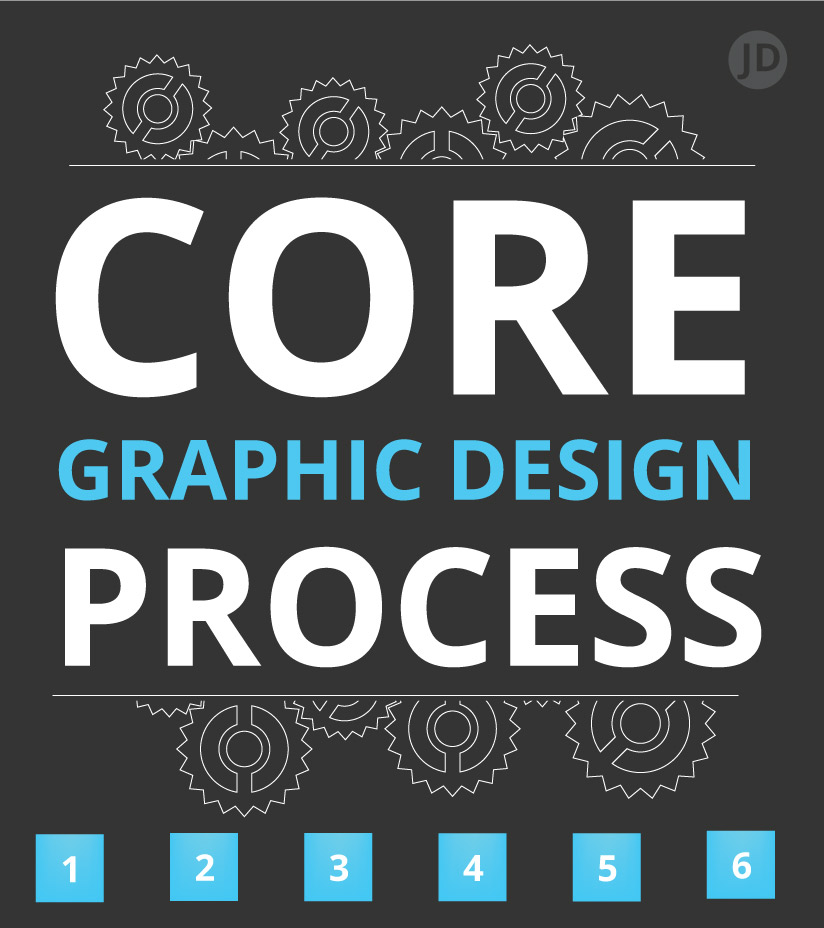
My creative graphic design process is explained in 7 easy-to-follow stages.

This post offers an inside look at how I approach design projects. From designing an eye-catching theme for a board game to creating a compelling landing page for a website, this step-by-step overview highlights my workflow and processes as a designer.

Design is a journey, and this is how I travel.

I advise anybody who is showing an active interest in working with me to take note of this post and try to read and consume as much of the information as possible. This post can also be hugely beneficial to those who have never worked with designers before and would like to understand the creative process.

For those of you new to working with designers, you may find this post interesting: What is a creative design process?

Title - Creative Graphic Design Process

You also jump straight into the steps of my design process from here.

Now let me spill the beans and share my secrets…

How My Creative Approach Differs

I believe much of my design process is not too dissimilar to that of many other ‘creative’ and idea-based designers. However, I would also like to add that not all designers are the same. Our minds, education, and career paths can shape how we approach creative challenges.

I like to present myself as a ‘conceptual designer’ in a freelance and business setting. Offering ideas and solutions with a capable hand in delivering these ideas.

Having worked with a mixture of start-ups and companies with a history in product development, this has sculpted my approach and techniques when it comes to graphic design.

Does Graphic Design Have & Structure?


It should! Design for the most part, is applied and used in commercial environments. Be it for selling a product, an idea, or to convey some sort of message through the visual medium.

Graphic design can also play a pivotal part in the product itself. With this in mind, it should have some form of workflow and process and not be left to chaotic creativity alone. The creative process of design should, adhere to a structure that enables it to meet a brief with a precise outcome.


This need not inhibit creativity… On the contrary! A process can help the design with a mutually assured aim between the client setting the brief and the designer!

Box design - packaging


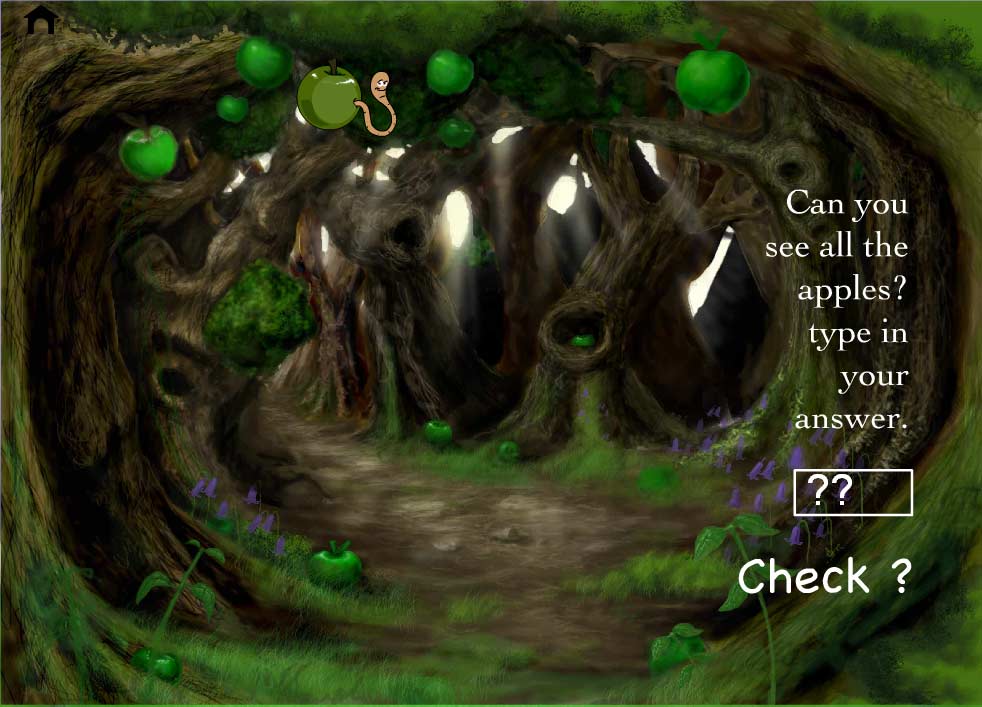
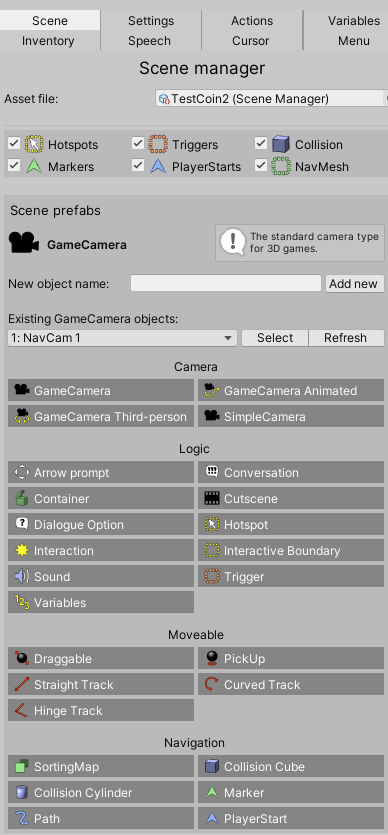
As an example, I have attached an image from the Aardman project were involved with. You can read more in the post.


My design process, whether for a board game, a crowdfunding campaign page, or digital content! Relies on a professional structure for both creating something that is ‘on brief’ and manages the project and client’s expectations in a piecemeal and controlled manner. As a designer and business owner, I try to avoid unexpected surprises.

Divider

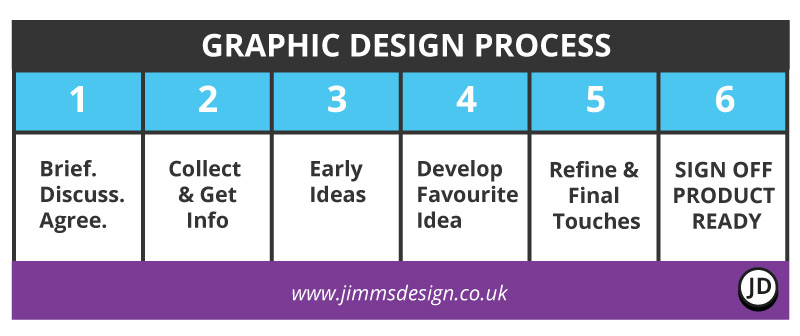
My Creative Graphic Design Process – Table Of Contents

  1. ) Admin, set-up, learning brief
  2. ) Research, find Inspiration, collect data
  3. ) Early ideas, and very rough artwork
  4. ) Develop ideas
  5. ) Refine, polish, and finishing touches
  6. ) Final artwork sent for ‘final approval’
  7. ) Handover of artwork
My General Graphic Design Process Table Diagram

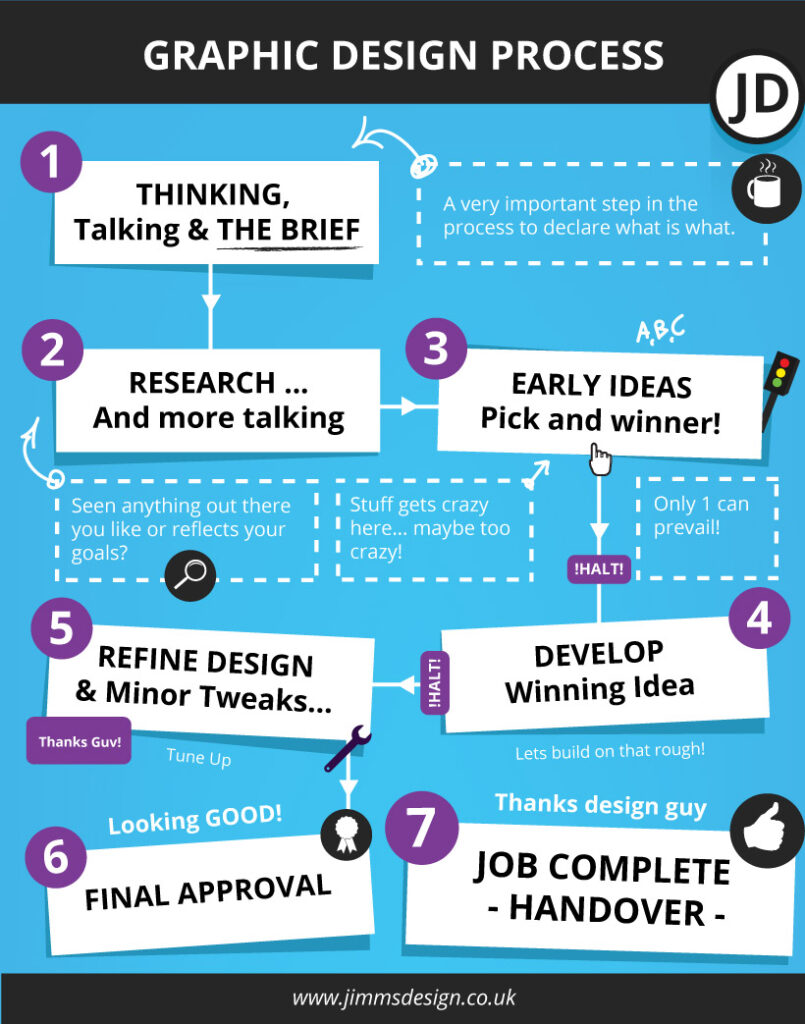
Infographic For My Creative Design Process

At the mid to latter stages of the creative process, a form of control is introduced that funnels decision-making.

At these junctions, I encourage the client to approve what is shown and discussed before proceeding with the journey. You can imagine this as a fork in the road or a crossroads in which I will also act as a guide and sherpa. This method enables me to put my best foot forward and enables the design direction to remain focused. ( We don’t want to veer too far off the beaten path! )

Please see my information graphic for this stage of my creative design process!

My General Graphic Design Process info graphic and flow chart.


1 ) Getting To Know The Client – Admin & Project Set Up

This is a crucial step in the process as with the rest of the steps. This also forms part of the pre-preparation stage.

This very first stage – which could easily be called step ‘0’ – is where all paperwork is signed, and documents are filled. It is all part of the grand plan.

In this step, I will also try to learn more about the client, their business intentions, and their project.

At this stage, I may or may not have already spoken to a client based on an initial discovery call. This call is to learn more about you or them, and whether I can help with the project.

From this call, I will either advise and offer my paid consultation service first, which can save money in the long term, or act as a bridge stage before the client fully commits to a project and budget. Or if they are ready, the steps will involve moving toward making a full project.

It is also important in this stage to discuss the matter of payment and when these payments need to be made.

Itemised examples of what will / may happen in this stage

  • Signing documents
  • Discussing what documentation needs to be created
  • Arranging payment and payment terms
  • Scope of work
  • Discussing copyright

And other administrative stages.

2 ) Collect Information, Research and Study Competition

After the correct paperwork is completed and signed, the in-depth creative stages of the design process can begin.

At this point, ask if you already have reference materials, images, fonts or pieces of relevant information for the project. I could also ask if you have any more research materials or ideas that could contribute to the design.,

In addition to this, I will likely carry out my own research to further buffer my inspiration and ideas.

I will also utilise this opportunity to study relevant competition to further guide my hand and thought process.

This stage of the creative process paves the way for the next stage – generating the initial roughs and ideas!

Divider

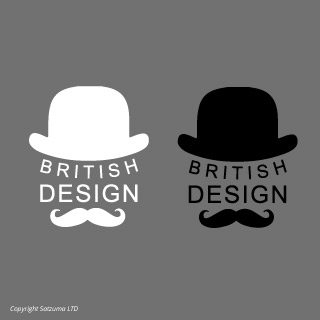
3) Ideas / Early Design Work / Initial Design


There are many synonyms I would like to use to describe this first phase of the design process. However, I feel the most accurate description would be ‘rough designs, iterations, or ideas.


You can also call it :

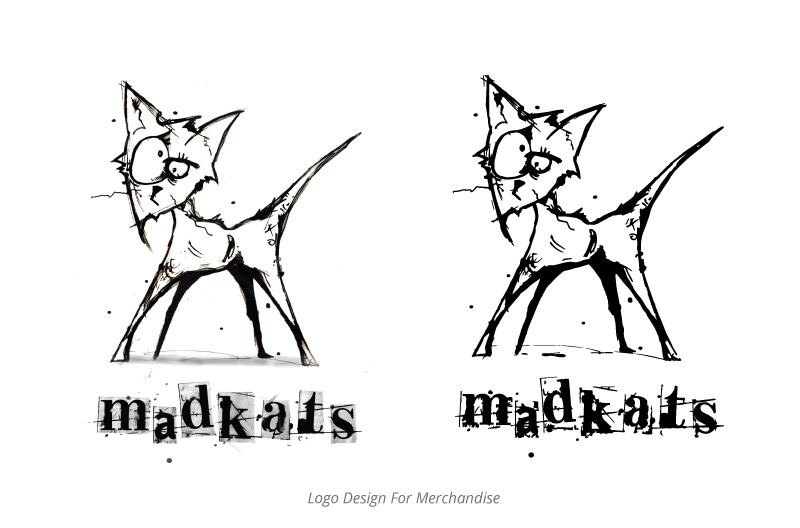
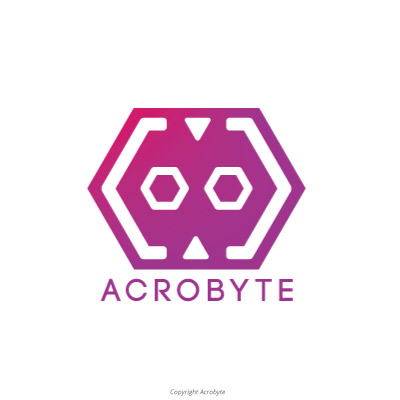
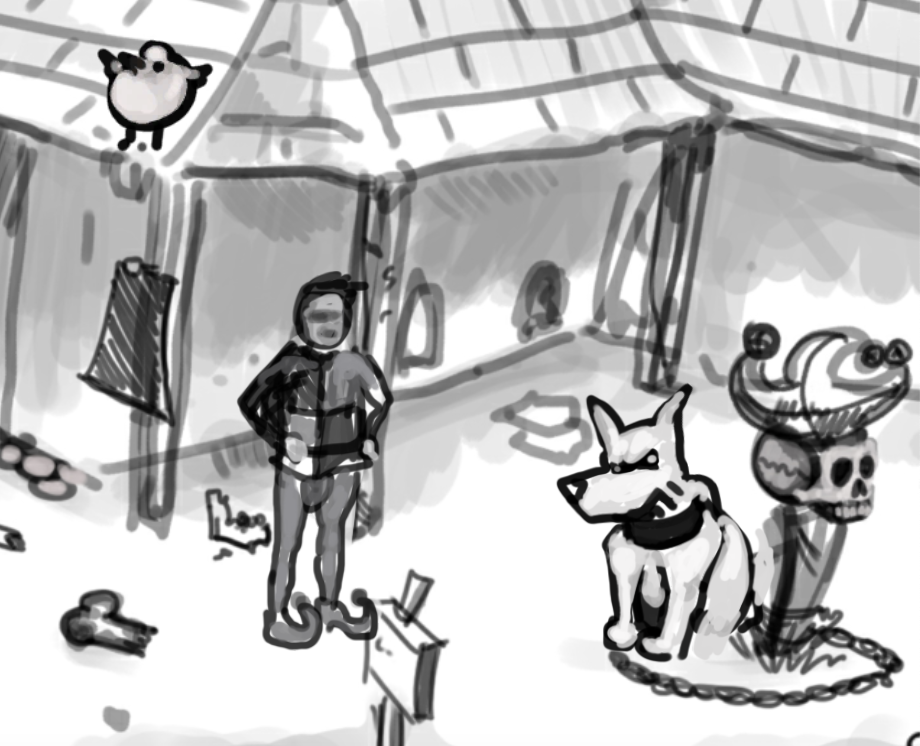
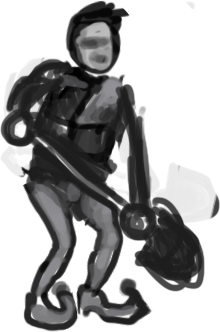
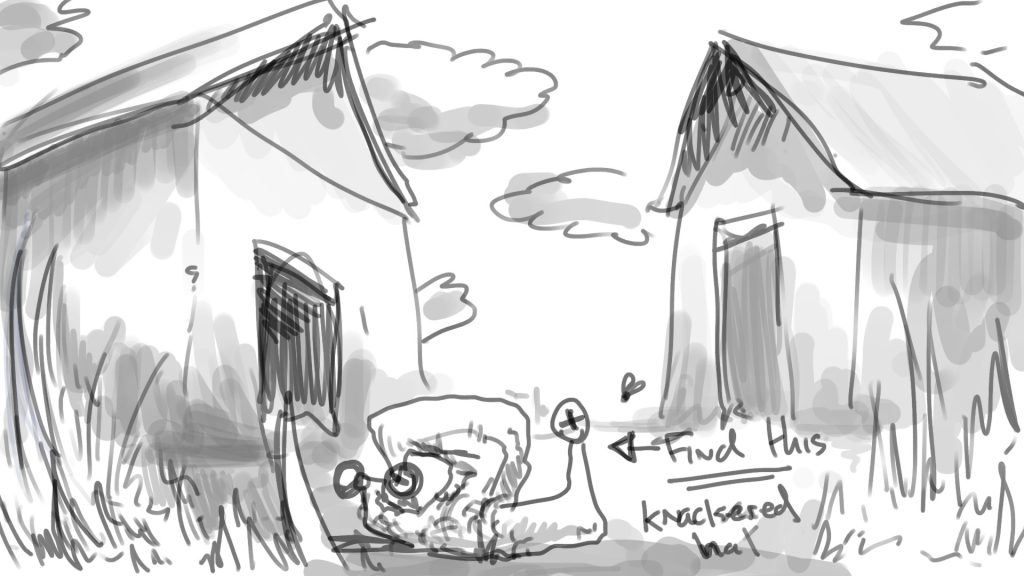
Sketching ideas, creating first roughs, hashing out ideas, getting ideas down on paper – any other associated wording to say ‘Rough’ ideas, and feeling my way through the early phase of a project. It is in this stage that I get into my stride of a project and immerse myself in the project.


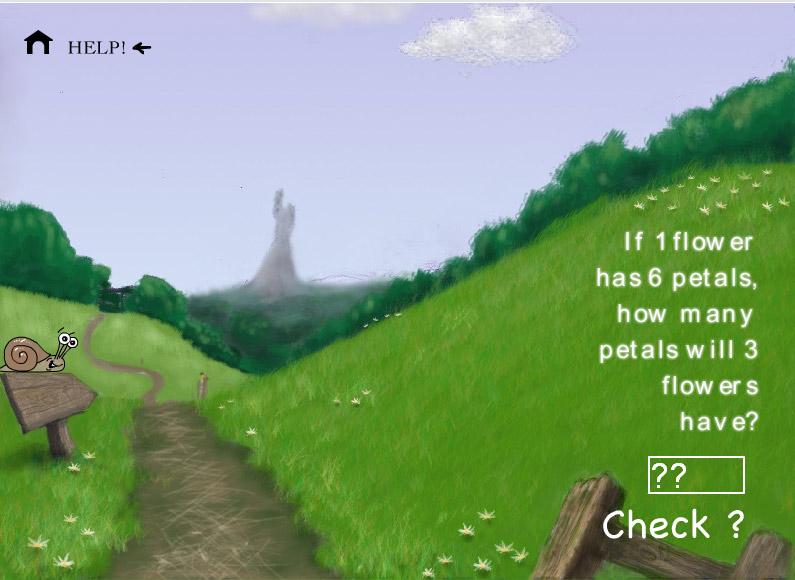
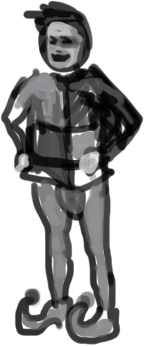
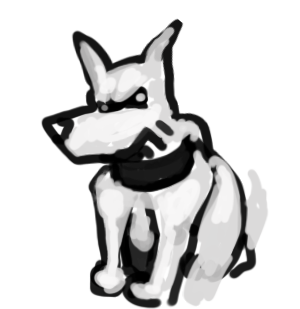
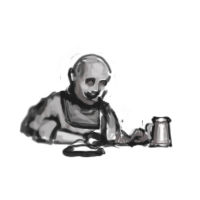
Here are a couple of examples that my past clients were kind enough to allow me to use.

logos
Generating ideas for logo design project examples!

Or cover ideas

Cover artwork Creative Graphic Design Process
Design examples for a box cover design – streetwise
UI process Wimbledon Brewery
This is an example of the website UI I was involved with.

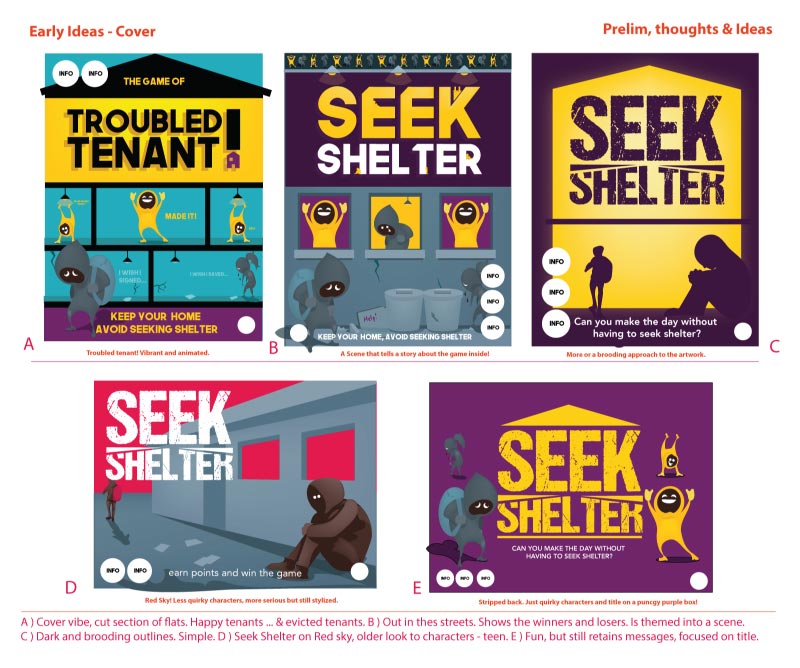
No design drafts at this stage are final or polished, nor am I precious about the proofs presented.

These first drafts are the foundational step in orienting the design direction of the project.

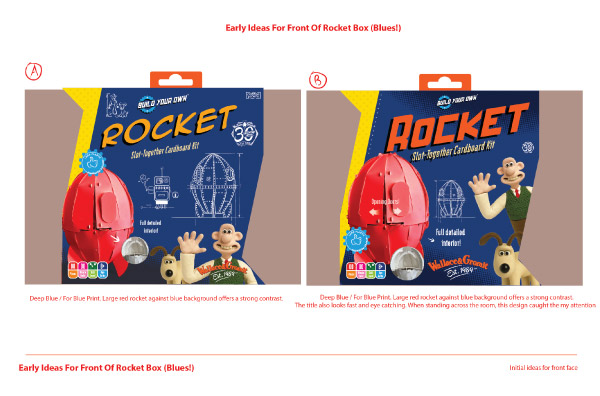
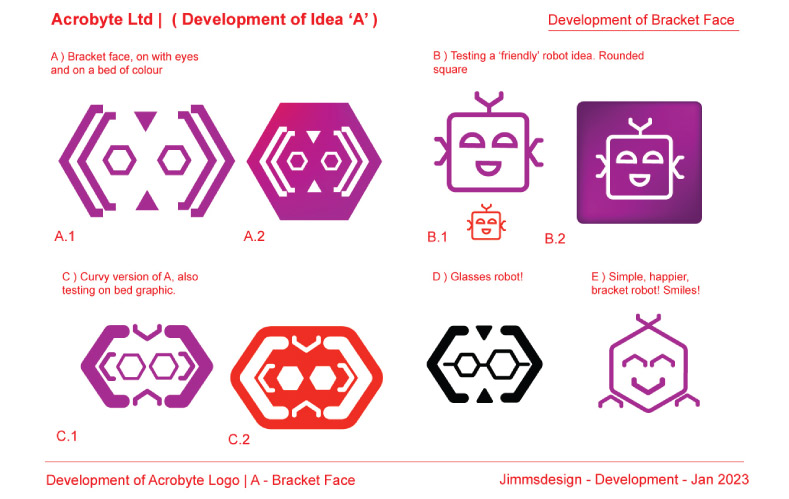
To further illustrate how this step works in the design process…

– With these early drafts, I will often refer to items on an art board with ‘A, B, C, D’. This is to help both me and the client to reference what design or designs we think are the strongest. It helps with communication.

Creative Graphic Design Process - example selection
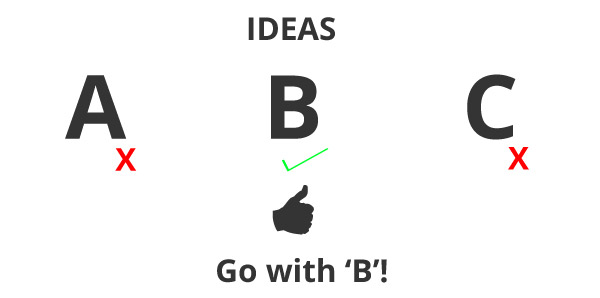
  • Example 1 ) If ‘B’ is selected, I will then ‘develop ‘B’ and invest more time and energy to ‘make good’ that rough idea.
  • Example 2 ) Based on this early stage of creating rough designs, if a client says they like ‘B’ with elements of ‘D’ I will remain in this phase and create another idea based on that feedback. However, the more iterations created, the more time and budget are required. If there is more experimentation, this is likely to inflate time and budget, even more so if this is repeated a couple of times.

Creative Graphic Design Process – More examples of the ‘ideas phase’

To further illustrate this idea phase, here are some more samples of what can take place:-

  • Rough sketches and drawings on paper
  • Rough digital drawings
  • Scribbles ( Very, very early exploration of ideas )
  • Initial digital mock-ups ( as proof of concept )
  • Loose thumbnails ( small drawings )
  • A selection of ideas with labels
  • Annotated concepts showing reasoning

These are all tools and approaches required and used on a case-by-case basis for a client when working on a design project.

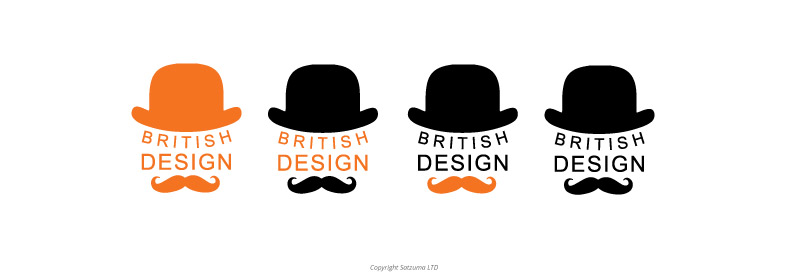
4 ) Developing the Initial Idea Towards A Final Design | Development

This phase is not unlike the 3rd phase on first appearances. There are, however, some key differences in this stage which ought to be mentioned.

1 idea is usually selected and developed ( built upon ). This is not the stage to be hashing out new ideas or rough ideas. If I do find myself or the client trying to create new ideas in this stage, I will inform them that I will need to roll back a step to do this.

I try to steer my clients into making idea decisions early!

As mentioned in stage 3. This is both for my own sanity and the clients, to control the flow and time frame of a project.

This is the stage of building upon the best idea and honing in on that particular idea, not to experiment with new ones. But in reality, eureka moments can come along! That is the nature of the creative journey.

2. simplify the differences between stages 3 and 4 :

  • Ideas generation = to create a range of rough ‘ideas’
  • Develop that idea = to improve one of the short-listed ideas

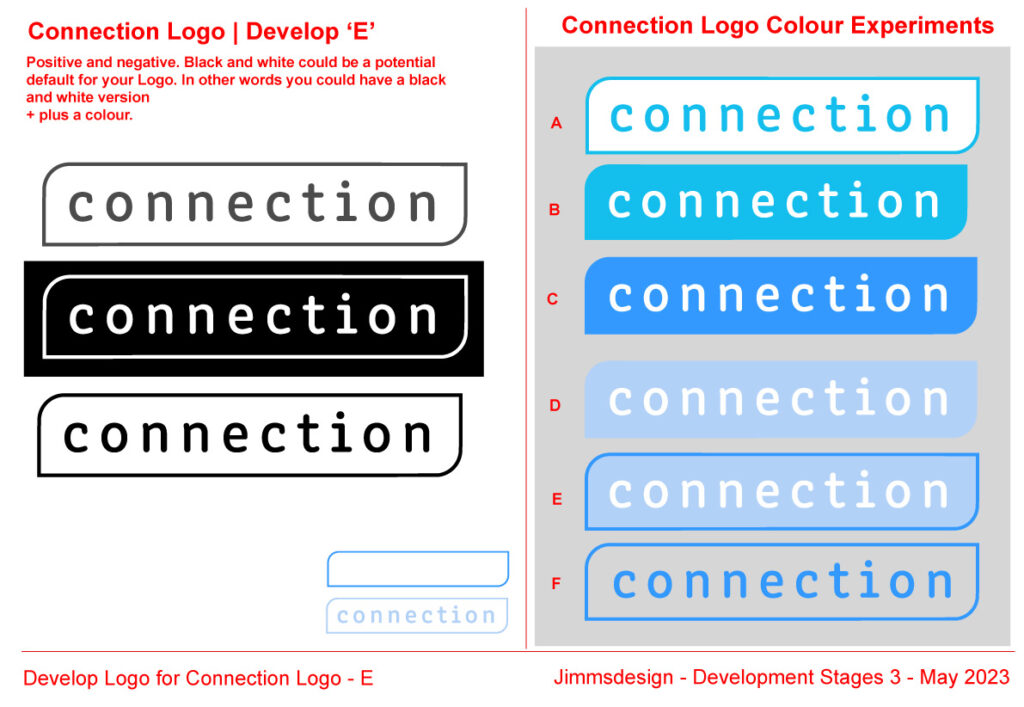
The Creative Graphic Design Process – Developing The Winning Idea!

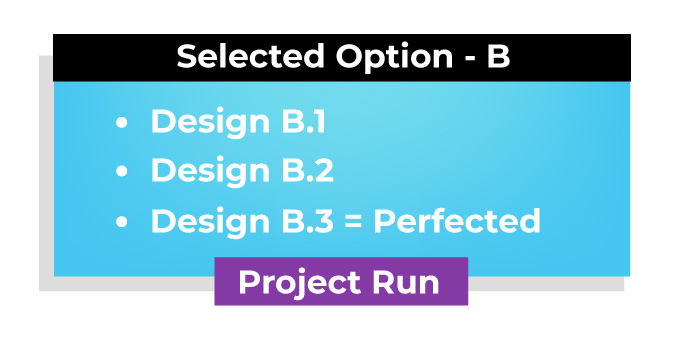
1 idea was selected! That awesome idea for a cover, board game design, box, or something else. Now the sole focus is all in on that single idea. An idea in which all energy and concentration are now focused. The idea that is to be ‘developed’ – made good, in other words.

( Typically ) 1 idea has been short-listed and selected. This is based on client feedback and whether this idea adheres to the brief.

From here, I will take the rough design, either polish it and make good of the artwork for the final stages of the process.

Or

I will amend that design based on the feedback from the ideas stage. I will then present this to the client for approval.

Creative Graphic Design Process Scenario… Based On Past Experiences

I wanted to share a real scenario when explaining my creative graphic design process and spilling the proverbial beans. This is not an exact re-enactment. This fictionalised scenario.

Imagine the following :

Client: “ I really like A, not B. I like elements of idea C… is it possible to combine elements of both A, C and see where this leads?”

Designer ( Me ): “I don’t see why not, I’m happy to send this version across, but it may take a bit of time to mend, and there is no saying if that will work. ”

As a side note, if I think something will look utterly terrible before doing it, I will often voice this – if they are willing to listen.

Client: “ Okay, let’s see what that leads!”

Designer: “Keep in mind that this may add to the cost. if you have more feedback as to why you feel that a mixture of the above applies, let me know.”

Client “Okay… see where it goes. I feel that X and Y work because they are closer to business intentions and, I plan to do X in 6 months.”

In this scenario, I will create another rough version to be sent to the client. Based on client feedback, I proceed from there. If the artwork is given a green light or some seal of approval. I will then take this to what is essentially the final creative stage.

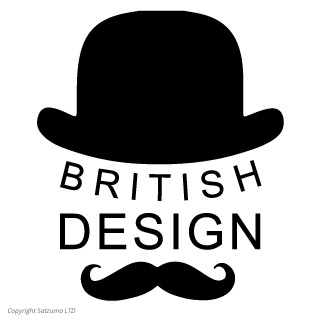
5 ) Refine, Polish, Tweak ( Fine Tuning )

From the previous step, if the core of the work is ‘nearly there,’ I will then progress the design to completion.

This refining or fine-tuning stage may involve the following:-

  • Slight adjustments to the alignment of objects
  • Checking colours are as they should be
  • Minor tweaks to the visuals
  • Checking that images, etc, are embedded
  • The artwork is moving towards the steps for delivery
  • Morning towards file preparation

* Warning – THIS is not the stage for significant changes! *

The latter stages of a design project are not the time for last-minute changes, complete revisions, whims, or overhauls!

Doing so would require me or other designers with a similar design process to go back to stage 2 or 3 and restart from there.

This costs time and money, and big changes are best made at the start and middle, not the end.

So, don’t rewrite the brief at the end or partway through unless absolutely essential! This can be costly and can cause headaches for all concerned!

This is why I request written signs of approval for EACH stage of the creative journey. This is to mitigate and discourage knee-jerk decisions and changes at the 11th hour.

Any significant changes to the design, be it a concept, is in essence a roll-back… and will delay the project and incur costs.

Last-minute design changes happen but are best avoided for those who are conscious of cost.

Here are some reasons why, on rare occasions, this ‘does’ happen.

  • The client has had a change of heart
  • The client has new ideas they want to explore (late)
  • Another person of control has manifested late in the project
  • The client is listening to another person’s opinion ( or too many opinions )
  • Something has been realised later in the project, whereby it requires changes

This is the reality of professional design. Setbacks can also arise from various external factors outside both the client’s and designer’s control.

6 ) Final Draft For Approval ( What Is The Final Draft In Design? )

When referring to graphic design, the final draft will represent the final form and iteration of that particular design. The final green light!

A written sign of approval, such as ‘greenlit’, ‘complete’ ‘finalised’, or anything in written form to say they are explicit in their satisfaction with the work. Then it is the next step of packaging the design project for handover.


*For myself and as part of my professional service. I will require a client to give a sign of explicit written approval.

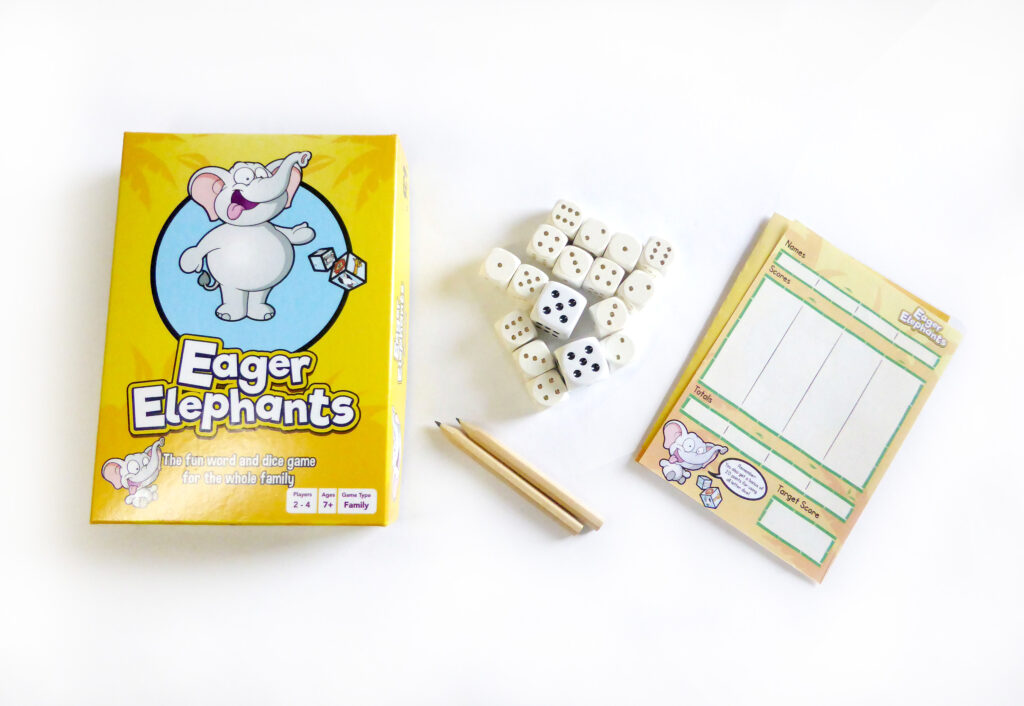
7 ) Package Deliverables – Give it to the client – Handover

The very last step in my creative graphic design process, and something that should be included if the process is to be told in full.

Packaging up your project and handover.

Handover will take place once I have been given the very last sign of approval, and my final invoice has been paid. Once this has all taken place, generally, I will ‘Zip’ the project assets that the client needs and transfer the final artwork to the client.

To further illustrate what this package may contain, it may resemble the following :

JPGs, PNGs, PDFs, Illustrator (AI ) Files, and Photoshop files (PSDs) to name a few. It will depend on what is written in the brief and what the client requires.
This should be stipulated in the ‘specification and agreement’ at the start.

Question | Are there factors that can impact the design process?

My creative graphic design process, like other design processes, can have factors that impact it, as mentioned throughout this post. For example, if there are multiple parties involved in the approval, this can extend the budget required.

Change in project scope partway through a project can impact it, and very human factors can impact it. Such as a client being unable to pay, sickness, or general personal reasons from either party.

Final thoughts about my graphic design process

Avoiding misunderstandings is a priority. Both for my benefit and for the clients. As this post is to highlight and illustrate how my creative process works – I should also draw your attention to how the actual journey and design process can manifest in the real world.

The path is not a straight line…

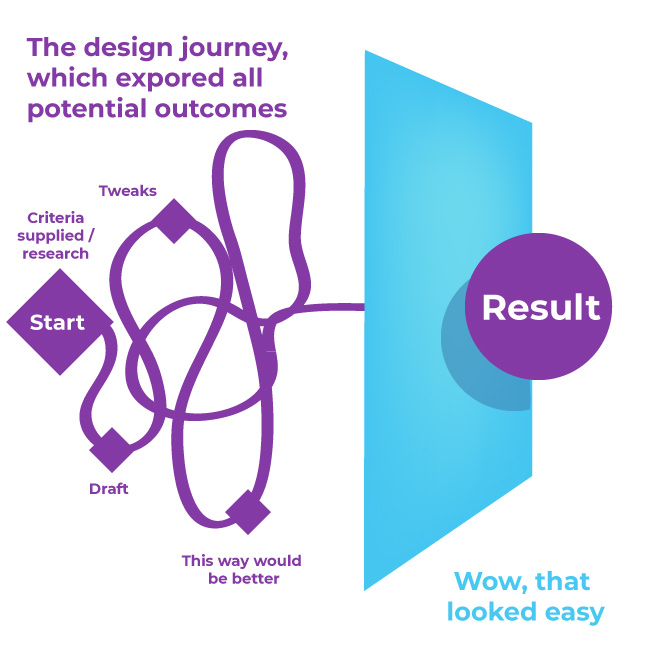
It is more of a meandering path of process of elimination, whittling down the design ideas so only the strongest are left for selection.

You could also say it is reminiscent of a carving. You may begin with building up the materials and layers for the base form. Once this is set, it can be a case of reducing the form until the final artwork emerges.

For those who are interested, you may be interested in reading this article on a design journey or reading a bit more about the design process as a general overview.

Now let’s design something!

Core design process in steps

Creative Graphic Design Process – Other Useful Links

Creative Process 3rd Party Links and Sources

External Design Website – Jimmsdesign.co.uk

Credits & Education
Education Source – https://www.cumbria.ac.uk/
College – https://www.aup.ac.uk/

Example Logo Design Projects | A Showcase Of Logo Projects

Example logo design projects. From tech to healthcare, to British design, to small businesses, this list shows a handful of my identity design projects I have worked on over the years.

This list of logo projects has been compiled together to showcase a variety of logos in the hopes of inspiring any would-be logo designers or for those looking to hire a logo designer. The majority of these logos have been created on behalf of my clients, both freelance and while at my former place of full-time employment.

All the logos in this post were designed by me but are copyrighted to their respective owners, no stealing or lifting these logos from this post please!

Example Logo Design Projects Britishness in all its glory

When I embark on a project, I’m rooting for my client to succeed!


Example Logo Design Projects – About This List


Each logo represents a unique story. From healthcare to technology to gifting, to retail. When assigned to work on this specific faucet of branding, I try my best to both adhere to a brief and offer something unique and creative to my clients. A logo needs to not only be memorable for all the right reasons, but it also needs to function across various applications.

Here are some questions I will ask myself or my client when I create a logo – ( As a rough example. )

  • What service can I offer that a robot can’t?
  • Have I tried to grasp what the client is really working towards?
  • What part of a narrative will this logo form?
  • Will what I have produced work in multiple cases and scenarios?
  • Can the logo work in Print and Web? Does it need to?

When designing a logo, I try to be empathetic towards my clients’ business intentions and needs. One of the biggest challenges is both consulting a client and trying to prevent the client from using their personal tastes in clouding their professional judgment. A logo is not an ‘art’ project for most, it is the visual spearhead of their brand. It needs to be professional and say the right words.

When I embark on a project, I’m rooting for my client to succeed!

Divider


When I Create Logos…

I try to avoid the tickbox solution that barely serves its intended purpose. A cheap solution is fine in the beginning, I get it! I would probably do the same if I were to try and save money. But this approach can only go so far with creating a strong logo.

A cheap price can mean cheap standards and that money that you thought you saved may end up being spent again on a revamp of your logo 2 months later! Remember that!

I would also like to add that when creating logos, I try to avoid turning brands into an innuendo, even if somewhat funny.

As they say, there is no bad publicity – apparently!

Example Logo Design Projects | Primary Industries

The examples in this logo showcase reflect a range of industries in which I have been involved as a brand and logo designer.

Here are some of those industries:-

  • Web Developers/Tech
  • NHS
  • Mental Health and well-being
  • Innovation
  • Retail: audio products
  • Technology & Gifting
  • Transport

From healthcare initiatives to celebrating British design and innovation, I have worked on a variety of logos in technology, retail, and gifting markets. More on this below!


A Logo For A Developer – Acrobyte

Acrobyte - Example Logo Design Projects
Freelance logo designer for developers

Branding must reflect the personality and service offered by that company, individual, or charity. The same goes to those who work in IT, Tech, or Software Development.

A logo needs to be indicative that the person or company is part of a certain industry. In this particular instance – development ( coding ).

For this logo, I went for a clean, smart, and playful vibe that was reflective of the client and his service. To achieve this ‘vibe’ I used geometric shapes, sharp lines, and parts of ‘code’ to construct the image – a simplified robot face.

This was not the first intention, as the brief was quite open-ended, it came about after developing these ideas.

I used brackets ‘< >’ to represent the contours of friendly robotic expression. < – ? – >

The final design was a comfortable balance between sharpness, simplicity, and playfulness. Reflecting both the technical expertise, professionalism, and problem-solving capabilities of Acrobyte.

Here are some more examples of the journey.

in progress logo design
logo design in action


Designing For The NHS: A Logo For A Dietitian

One particularly meaningful project involved myself creating a logo for a dietitian in the NHS ( my specifics of their role could be off).

Given the sensitive and essential role that our healthcare plays, this design called for a touch that was both professional and approachable.

NHS - Example Logo Design Projects

I wanted the logo to convey health, trust, and approachability.

As with the other example logo design projects in this post, I have tried to include some of the design process.

Logo design process
Logo design - connection


Logo Celebrating British Design & Innovation

This British design logo was created as a hallmark to celebrate British design. This badge was used on packaging as a point of pride and to highlight that the product was ‘designed’ in Britain.

The logo needed to capture the essence of something quintessential British while offering a modern and contemporary look. To achieve this, I playfully adopted the path of using ye-olde British stereotypes, or at least how we perceived by other cultures in 1900’s Britain.

Bowler hats, Big moustache, you may think I am describing a Shoreditch hipster! This is actually fine also, but when creating this I was tickling heritage aspects of British innovation.

My logo design was but a few pen strokes away from having a monocle, of which I’m sure I experimented with – or perhaps my colleague designer did – it was a while ago!

Logo
Positive and negative logo - Example Logo Design Projects
Logos ideas and examples
Divider


Designing Brand Identities For Businesses

Beyond industry-specific projects, I’ve enjoyed working with small to medium-sized brands that need their stories to be told through their logo.

I’ve tried to capture; character, charm, memorability, and versatility. When creating a logo as an example, I aim to create a logo that works for a client across a variety of layers and mediums.

People will judge your business on the logo more than they realise or care to consider.


Example Logo Design Projects | MADKATZ

To round off my list of example logo design projects, I have decided to add this somewhat wacky and quirky piece, a design that I felt was unique to this day.

This project was used across a range of small-scale merchandise I used to sell after attending the Cumbria Institute of the Arts. Some of these drawings were created by hand! Scanned and then adjusted in a graphics program!

In hindsight, I feel it still has a non-clean human feel to it. Suitable for some businesses and sectors.


My Example Logo Design Projects – Process Snapshot

When working with a client both old and new, my creative design process is typically the same.

With logo design, it starts with me trying to gain an understanding of what the client’s brand values are – the message they are trying to convey, and where they want to be. A logo alone won’t necessarily guarantee the success of a business, but the logo is important when you are trying to build a recognisable brand. People will judge your business on the logo more than they realise or care to consider.

A logo, when applied to a business, is in part about capturing a certain distinct narrative in a concise mark – a representation of that brand and what it stands for. These marks can be representational of; origin stories, ideals, goods and services, sectors, private of public, or what that company stands for

The logo can be the forefront of their brand – the tip of the spearhead but the ‘brand’ isn’t strictly speaking just the logo.


This is an overview of how I will approach a logo design project for a client.

Example | My At Glance Logo Design Process

  • Given a detailed brief
  • Research + study of competition
  • Ideation
  • Develop the best idea or ideas
  • Finalise
  • Deploy or send across

Payments can also be made in milestones or in a large lump sum.

You may also be interested in reading more about the Graphic Design Process in this post.


Summary ~ Crafting Unique Identities For Every Client

Whether it’s healthcare, tech, heritage, or small business branding, every project is unique. My goal as a designer is to create logos that aren’t just visually appealing but also meaningful and relevant to the business to which they belong.

Each logo tells a story, reflecting the essence of the brand while offering something fresh and engaging to the audience.

Over the years, I’ve found that the key to effective logo design lies in the balance of creativity, functionality and making it adaptable across different media and platforms.

The example logo design projects displayed in this post are copyright property of their respective owners and businesses. Please do not share or copy any of the content on this page for commercial purposes or without prior consent from myself or the respective owners.

If you feel that this post was interesting please do share a link on social media, or – read more on building a brand story.


Testimonial:-


“Jimm created the logo for my web agency, (Acrobyte Ltd) from a very abstract idea. The process for the final logo – which I love – was smooth and timely.
He is creative, friendly and excellent at communicating the pros and cons of early designs through to a polished logo for my website.”

Alessandro – Acrobyte Ltd


Interesting Links
Board game project
You may also find this project interesting! Designing a dice game

Design Bytes

Jimmsdesign

Example animated Gifs created using Adobe Animate | Samples

Here are some of my example animated gifs created using Adobe Animate – the successor to Flash.

Whether you pronounce it ‘JIF’ or ‘GIF’ ( I’m in camp GIF, with a ‘G’ by the way!) the humble .gif format has been around for decades. It’s simple, fun and universal. Gifs are great, and you can use Adobe Animate to create them.

For the sake of show and tell, I wanted to share some of my smaller animated projects. A batch of animated Gifs I made using Adobe Animate CC and its predecessor Adobe Flash.

I have already shared other types of example projects created using Adobe Animate. Such as what you can make using Adobe Animate ( formerly Flash ).

Example animated gifs created using Adobe Animate

Adobe Animate, or when it was called ‘Flash’, was the 2D animation software of choice in its heyday. I’ve used Adobe Animate for making web components, animations, small games, and various other forms of multimedia before it lost its popularity. Adobe Animate still has plenty to offer in my professional opinion. From creating 2D animations to very simple games, videos, and general multi-media in the form of HTML5.

Another benefit of Adobe Animate – it comes as part of the Adobe Creative Suite ( Creative Cloud ). So if you are already a license holder, this is another tool in your arsenal.

A distinction that I like in the way Adobe Animates works for motion graphics, is its granular approach to frame-by-frame animation.

It adheres more closely to traditional methods of frame-by-frame animation.

Divider

Example Gifs created in Adobe Animate – My Animations

My example animated gifs created in Adobe Animate.

Example animated gifs created using Adobe Animate - Thunder cloud animated gif
Example animated gifs created using Adobe Animate - Chip
Floppy disk gif animation
Slider gif
loader gif

My history with Adobe Animate

After studying for an HND in Graphic Design, I decided to embark on another course that built upon my knowledge of working with Adobe Animate – Multi-media design and digital animation.

I still use Adobe Animate for ‘small-scale’ animation projects from time to time, as it is well-suited to creating frame-by-frame animations and small-scale projects.

But, it is no longer my default motion tool for making multi-media applications and animations.

Example GIFS created in Adobe Animate – Shorthand overview of the process

To create the example animated GIFs (or gif) as shown in this post, I did the following:

  • Mocked up some very rough ideas on paper to help brainstorm and visualise my ideas.
  • Created the vector illustrations in Adobe Illustrator.
  • Imported the Illustrator artwork into Adobe Animate.
  • Created the animations through a mix of frame-by-frame animation and ‘tweens’.
  • Exported the GIFs from Adobe Animate – ready to be distributed.

In the paragraphs below, I go to more exact detail of what of what I did in each paragraph.

Divider

Drawing the artwork in Adobe Illustrator

I didn’t illustrate the artwork in Adobe Animate. These examples shown in this post were created in Adobe Illustrator first and then imported into the project library in Adobe Animate.

In the early stages, I created the drawings the way I wanted. I then drew them in such a way that parts of the illustrations could be pieced together and broken apart according to how I wanted the animations to work.

Why not just do it all in Adobe Animate?

Because I find it easier to illustrate and draw in Adobe Illustrator using my Wacom Tablet. Adobe Illustrator is made for drawing.

I can do some basic drawing in Animate, but Illustrator is a lot more capable as far as I’m concerned for drawing, and fortunately, these 2 applications are good bedfellows now they are part of the Adobe Creative Suite. This has not always been the case.

I have written a bit more here, on the merits of drawing with Wacom Tablet, and why I used Adobe Illustrator when drawing on a computer.

Example GIFs created in Adobe Animated | The ‘importing’ stage

Adobe Illustrator enabled me to have greater control of how I wanted the artwork to look. Gradient shading on the artwork, bold highlights, crisp lines etc.

Once I had created the initial illustrations, I then exported these from Adobe Illustrator – some pieces of artwork were direct imports from either single or multiple artboards.

I then got animating the artwork.

Divider

Creating the animations on the main root timeline

Importing complete, assets ready.

This is a similar process I have been using since I was taught how to use Adobe Flash ( Now Animate ) back in 2007. Although the process has changed to some degree and I have streamlined it substantially, the essence of this is more or less the same.

Before using Adobe Animate, I used it to draw it all in Animate – Formerly Flash.

Working on one animation at a time, I pull the components of individual drawings onto the main stage. The white background. I then commence the process of creating animations via a combination of tweens, keyframes, and incorporating simple effects.

When creating the . GIF animations, I try to stay conscious of their intents and purposes. To be used on websites as loops and to be multi-purpose.

I then ‘Exported’ the gifs from Adobe Animate, doing a certain amount of testing and measuring, and tweaking as and when needed.

Caveats – don’t bury in sub animations

Note to self and a lesson to the reader.

Don’t insert the animations into animations. Eg, from the main timeline.
And don’t create an animated clip inside another animated Movie Clip.

These don’t tend to work correctly when exporting from Adobe Animate in most cases.

A strong USP ( Unique Selling Point ) for Adobe Animate

The ability to create frame-by-frame animation is one of the best and most unique selling points when it comes to using Adobe Animate. For me, this is also incidental, as Animate, which was formerly “Flash”, comes as part of the Abobe Creative Suite. No need for extra or new licenses for 2D animation.

Thank you for taking the time to read my post on example gifs created in Adobe Animate and taking the time to watch my animations. Animate, in my opinion, was and still is a great little program for creating animated gifs or 2D animation in general. If you know how to use it.

If you would like any help in creating animated gifs be it for a website or something else, then please do get in touch.

Other topics around example animated gifs created using Adobe Animate

You may also find these subjects interesting around using Adobe Animate.

Other websites

– My brochure and portfolio website & services – jimmsdesign

External Project Website ( takes you away from this website )

Part of my project samples – Example gifs created using Adobe Animate – Copyright Jimmsdesgn

My Adventure Creator Project | Lockdown Foray

Adventure Creator Project

My Adventure Creator project…

For those of you who don’t already know, at the start of the lockdown, I set myself the task of creating a graphic adventure game! Or, I should say, I started to learn how to make a graphic adventure game in Unity.

There was a time in Lockdown – what can I say!

For those of you who don’t know me, I studied Multimedia Design and Digital Animation as a follow-up course to my HND in Graphic Design at university. All those years ago! I also have a yellow belt cert in Unity too.

My Adventure Creator Project character sprite

In the early days of the 2000s, Adobe Flash was king, ( Check this blog post out on why to avoid Flash player on another website ) and I used to make a lot of multimedia applications, both personal and commercial. Most of these early projects were micro games or small interactive animations – all of this stuff was pre-smartphone.

My first project on this sort of scale, where I had to try and create my own project, was at University. I set about making an e-learning game for children, which was all built in Flash. Sadly, with the demise of Flash Player, this is tricky to play now although I may still have a projector for the game somewhere.

Here is a picture of it.

Adobe Animate adventure - Adventure Creator Project
Adventure Creator Project – My first project of this scale was in Flash.

From a game creation perspective, In hindsight, really it was a narrative game with educational elements to it. You may also be interested to see in theory how to make a story game in Adobe Animate.

But now to the crunch.

Adventure Creator Project.

Divider

Adventure Creator Project | Fools Errand

A name for a game that exists solely as a learning exercise – it could have been called anything really, as I had no intention of monetizing it. The game was based on classic 2D point-and-click graphic adventures that you could buy in the 90’s – the humble point and click game.

You point… and you click.

I created this game a greybox prototype to see how Adventure Creator works. It was something to learn during the Lockdown.

The brief – Learn AC.

My Adventure Creator Project
More can be read on this post on this website – game-gunk.com. Is Adventure Creator good for 2D games?

If you are interested, you can play the game on itch.io. It is free to play with bugs and all. ( however, it should be noted that you can’t save it via the browser version )

My Adventure Creator Project - The tools + GUI

Do I think Adventure Creator with Unity is good?

‘I’ think it is great.

Actually, saying AC ( Adventure Creator ) is good is a massive understatement. It is excellent, I have never been able to assemble a graphic adventure game in the most time and cost-effective way until I used AC. The standard that Adventure Creator offers is just excellent compared to some of the game engines or tool sets I have used in the past.

I have written a post about it on this website – is Adventure Creator good for 2D games on game-gunk.com.

What is my Adventure Creator Project about?

I called it Lost Hat, AKA Fools Errand. The title leaves very little to the imagination of what you need to do.

Who knows where the hat got to?

Or who could be wearing it!

Oh, the trifles of life.

You will need to use your wits to get through this 3 level game to find your hat. Perhaps if I see enough people play it, I might write up a shot hints and tips guide. But I have largely moved on to other things.

Adventure Creator Project
Mock up application icon
In-game background – my Adventure Creator Project

The components of the project – AC ( What was involved )

For a personal development project – more than I would care to admit.

This project has a of artwork, basic 2D animation created in Photoshop, some rough and ready characters, Sprites and sprite sheets, sound effects, dialogue, conversations, and logic, and I’ve even decided on a small video clip at the end of the project to see how that would work too. And, of course, Adventure Creator. To summerise it is best to mention it this way.

  • NPC character sprites
  • Player character sprites + and custom animations spites
  • Background artwork
  • Scene and item artwork ( such as coins )
  • UI design
  • End scene video animation ( video )
  • The AC logo for every object and item that can be interacted with in the game
  • The Icon artwork
  • Writing all the dialogue for the game
  • SFX

Adventure Creator Project | Sprites

The sprites, or the characters, however you’d prefer to see them, comprise of all NPCs, the animals, the main player, and various other bits and pieces that were used in the environment. If it moved or was animated, it was probably a sprite.

To quickly paint these characters in various states of animation, I used Photoshop to sketch and brush in the black and white ‘wash’.

The main player in particular has a 4-way direction and various other obscure animations in its repertoire!

The main player was the most time-consuming to create, even as a rough sketch. 8-direction would have taken more time still.

player face down
player left
player right
Dog - Adventure Creator Project
landord serves

Adventure Creator Project | The Scenes

I don’t wish to spoil too much of the game just in case you do decide to play it, as there are only three levels. But in each level, there was a background image that was quickly drawn in Photoshop and then imported as an asset to my project.

Adventure Creator Project - background artwork for indie game - grey box black and white

Adventure Creator Project | Motion & Animation

I gave very little time to the motion graphics and animation sadly.

After all, I needed to think about the project as a whole and produce this game it quickly. I was invested more in the learning of Adventure Creator than the actual product itself. However, creating some basic frame-by-frame animations was still essential for making the sprites.

To create basic in-game animations, I used Photoshop and painted a couple of layers with my Wacom Tablet as if I were to make a GIF before exporting out the layers as frames.

How did I feel about the project?

As a semi-personal project learning experience, I feel pretty good about it. This was never going to be a polished game for the whole world to play. I created it so I could learn and share. It was undertaken during the Lockdowns. It was a grey boxing experiment.

The project as a whole, taught me more about AC and how I could potentially create a bigger and bolder game in the future using Adventure Creator.

You can play the game here on Itch.io if interested. Warts and bugs included ( you can’t save via the browser version ). It should be noted that the browser version of the game won’t allow you to save! Enjoy. Or you may find some information on this website interesting if you are at game projects.

You may also find this subject on game-gunk interesting: is Adventure Creator good for 2D?

Without divulging too much. I’m currently remaking an old project in Adventure Creator.

Adventure Creator Project - live in game action
Adventure Creator Project – actual gameplay screenshot.

Adventure Creator Project – Other subjects around making games

Okay Aardman! Wallace & Gromit Project

Aardman Wallace & Gromit Project – flex those Adobe Illustrator muscles. I have a new post to share… kindly, the team over at Paper Engine has now said that I can share and discuss my part in creating some of the packaging concepts for a new range of Wallace & Gromit themed products.

The artwork shown in this post was used to pitch to Aardman for a new range of British designed card products, otherwise known as – Build Your Own, For Paper Engine.

Aardman Wallace & Gromit Project - box
Aardman Wallace & Gromit Project Wrong trousers

Aardman Project | The Brief

The Brief | I was commissioned by Paper Engine to help create the core design for the packaging concepts for a new range of of Wallace and Gromit themed paper products.

Aardman had set up an agreement with Paper Engine for them to come up with a range of products, themed around Wallace & Gromit.

If you don’t know Aardman, they are the animation studio behind Wallace & Gromit, Chicken Run, Arthur Christmas, and Shaun the Sheep to name a few.

Paper Engine got in touch with me and asked for assistance in coming up with the core packaging concept to pitch to Aardman.

I won’t lie, I was excited and honoured.

Under a strict NDA, I was called in to help come up with some of the core concepts for the new eye-catching packaging.

The NDA has been relaxed now, as the products have been released onto the market. So don’t worry. And I asked the crew over at Paper Engine and they were happy to allow me to show my my part!

(All artwork on this page is the intellectual property of Aardman and Paper Engine. Do not copy, save, or download any of this content for commercial use ).

Divider

Packaging For Paper Engine… Which was actually for Aardman

To spill the beans on the projects.

Here is a bit of extra information on the project process. Once Paper Engine had sent the brief across to me, and we did all the admin, the project was set in motion!

Aardman Wallace & Gromit Project | The design process involved…

  • Coming up with some very early ideas for speech bubbles, titles, typography, backgrounds, and other accents and parts for the project.
  • Creating a variety of packaging front ideas for both products.
  • Developing rough designs into polished designs.
  • These were presented to Aardman ( gulp ).

It should also be said that this project was quite particular and that there were 2 companies involved in the approval process. Nonetheless, it still allowed room for design creativity.

Aardman Wallace & Gromit Project
Aardman Wallace & Gromit Project Typography
Background idea

Aardman Wallace & Gromit Project | Developing The Design

While I was allowed to work conceptually and creatively, I also had to adhere to 2 sets brand guidelines! One set was supplied by Paper Engine for Paper Engine and, the other was for Aardman!

Aardman Wallace & Gromit Project
box
Aardman Wallace & Gromit Project - 2 rockets
badges

Aardman Wallace & Gromit Project | The Delivery

After working on the polished designs, Paper Engine pitched the artwork to Aardman. I was told on the grapevine that they were pleased with the project – with very few changes to the pitch!

Thank you Paper Engine, it was an honour! From there the look and feel for the range was set. It was an awesome project.

How I approached the project

When creating the packaging, I tried to create artwork that was exciting and matched the tone of Wallace & Gromit. I also tried to create packaging concepts that would excite both children and adults if they saw them on the shelf!

‘wow look at that!’

type of thinking with the hopes somebody would pick the product up and purchase it. The product did most of the selling in all fairness, these are very cool products.

Aardman Wallace & Gromit Project | Paper Engine Testimonial

‘We worked with Jimm on some early packaging concepts for our collaboration with Aardman on three Build Your Own kits. He delivered some superb designs which enabled us to get ahead of the curve by keeping the client on board with approvals and saved us some valuable in-house studio hours. We would definitely work with Jimm again in the future when the occasion arises. Top marks. 5 stars.’

Geff – Creative Director, Paper Engine Ltd.

Aardman Wallace & Gromit Project | You may be interested in some of the following

Retail packaging projects
Stem Project samples
Snakes & Ladders type board game
Board game playtesting post

Why not read more on my playtesting post?

3rd Party

Jimmsdesign Services

Dragon Bone Games ( Board game website )