What is a Graphic Design process?
As in the creative process used by professional Graphic Designers.
This is a common question I hear from both new and old clients. I have illustrated this article to educate and explain the basics of the ( a ) graphic design process.
Before providing a generalised overview of ‘what a graphic design process’ is, and how it works, I wanted to dispel some common misconceptions about the graphic design process and discipline as a whole.
- Conceptual graphic design does, or should have a process.
- Graphic design isn’t just about making things look pretty. It needs style and substance. It should have an objective.
- Good or relevant graphic design does not manifest from thin air.
- Commercial graphic design is different from just ‘pure art’ and expression.
- Graphic design existed long before the Adobe Creative Suite.
Those are some points I wanted to raise and resolve before going into the details of how a Graphic Design process works for many designers in a commercial setting.
So…

What is a Graphic Design Process? ( Short Answer )
A graphic design process is a series of steps Graphic Designers use to create visual content. This content can come in the form of logos, advertorial, online media, and print collateral. The design process will typically run in stages, often starting with the project brief and objective, the creation of ideas, through to development of the final artwork.
The design process is not only great for managing the workflow and adhering to a design brief in an efficient manner. It is also a great way for both the client and designer to explore the possibilities and potential outcomes of the design journey.
As part of the process, It is common for experienced Graphic Designers to assess a brief, plan a course of action for the design, and execute what needs to be created. While also keeping an open line of communication.
It is common for some Senior Designers ( and some Junior designers ) to openly discuss their design aims so that objectives set by a client, team lead, or managers.
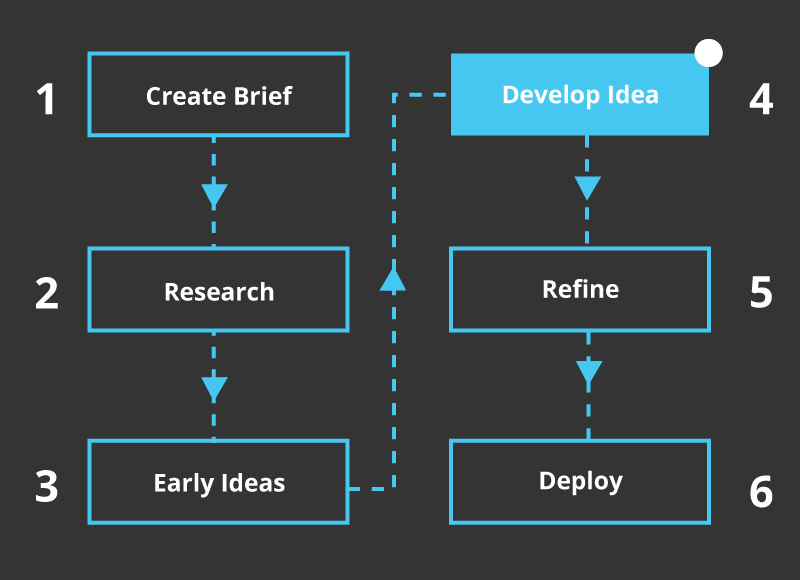
As a breakdown, these steps may resemble the following – depending from designer to designer.
Core Design Steps May Involve:-
- 1 ) Discussing the brief
- 2 ) Research and information
- 3 ) Creating initial drawings and ideas
- 4 )The developed idea is critiqued and tweaked as and where needed
- 5 ) The design is then refined and polished
- 6 ) The project is packaged in whatever format was required in a brief
That is, of course, a simplification of how a graphic design process works as a commutative approach across the industry. Each company is different, as is each designer and sub-discipline with ‘design’. As well as Graphic Design.
My bias and perspective on the design process
Before going into the details of my design process in steps, I felt it responsible to mention to you as a reader, I work and have worked in graphic design.
Before becoming a ‘Freelance Designer’, I worked in-house at a company for over 8 ¾ years. During this time I had the opportunity to work on a broad variety of graphic design projects both online and offline. I learned a lot. I could have cried sometimes too!
My skills, my processes, and my steps had a significant influence on my previous employers. Not only just on creating the final design but in the processes that lead to that final design. This post is not about my skills and experiences, that is what CVs and about pages can be used for.

What is a Graphic Design Process? | The Caveats
1 ) Not all graphic designers work in the same way.
2 ) Some designers are at different points in their careers.
3 ) Some Graphic designers have worked in different sectors and industries.
4 ) It is quite likely that you will meet multi-discipline designers who may have a mish-mash of the process illustrated in this post.
All and more of the factors above can influence how a designer works. Please keep this in mind.
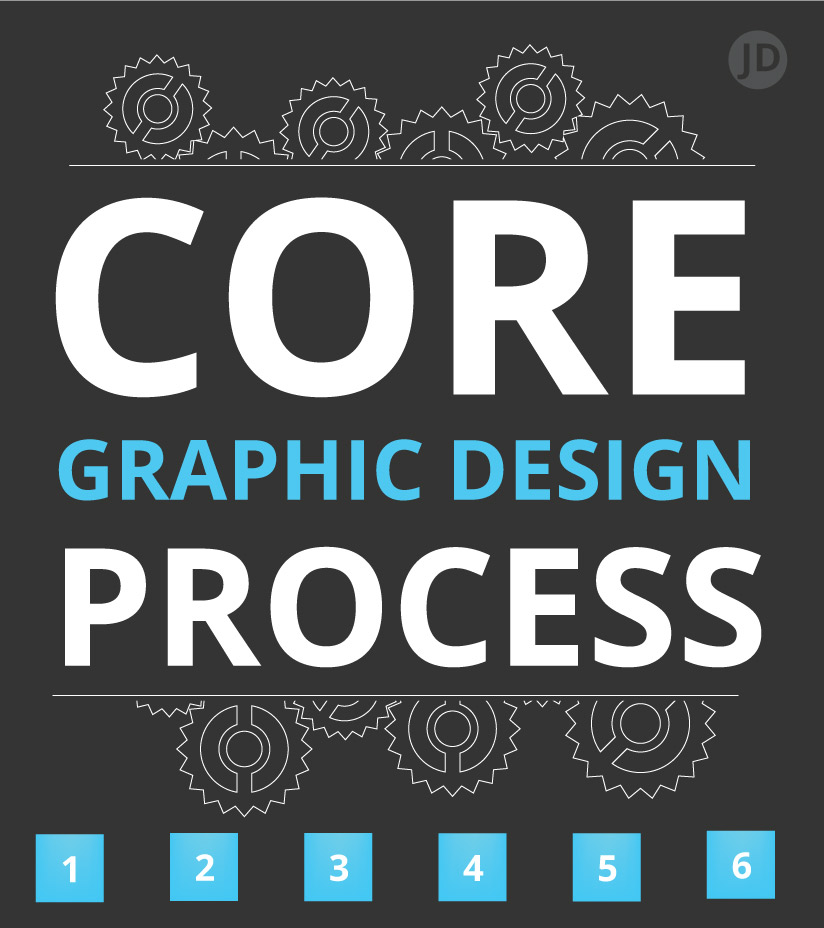
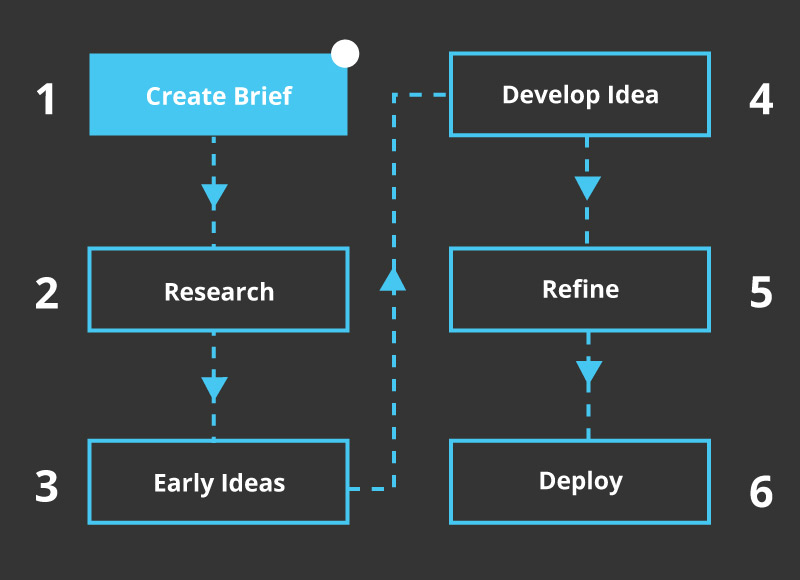
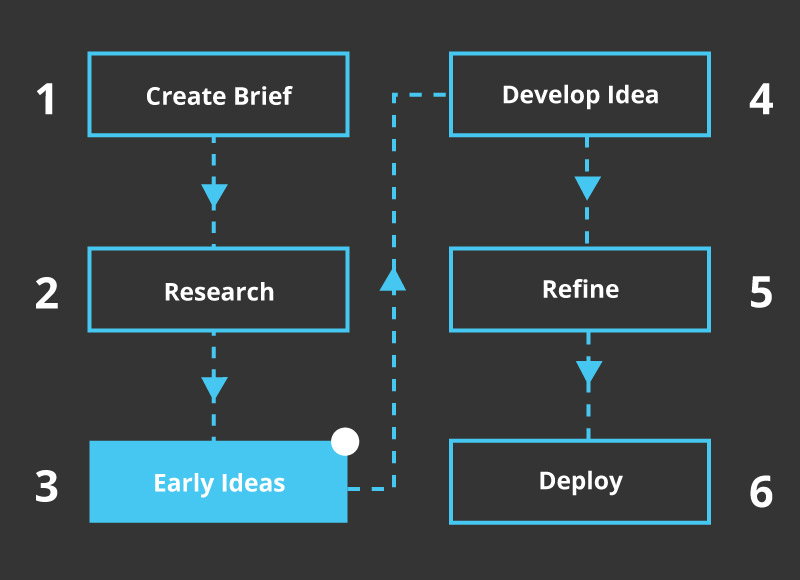
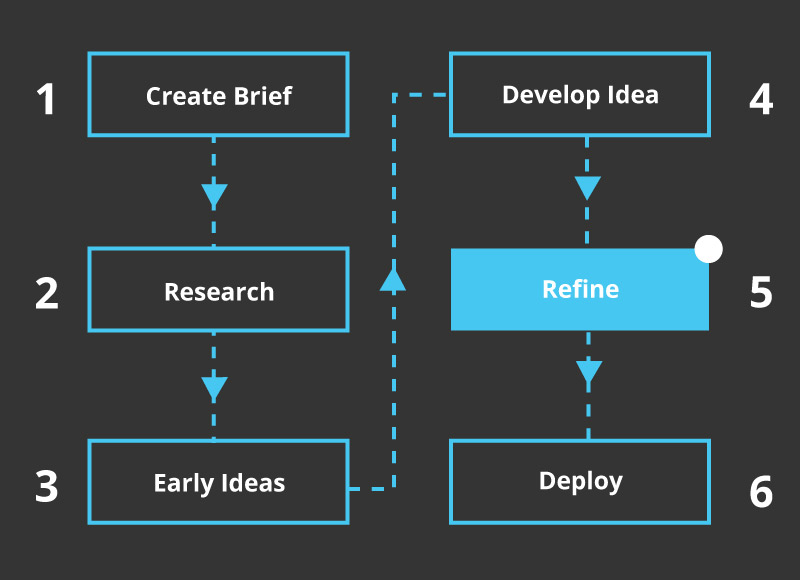
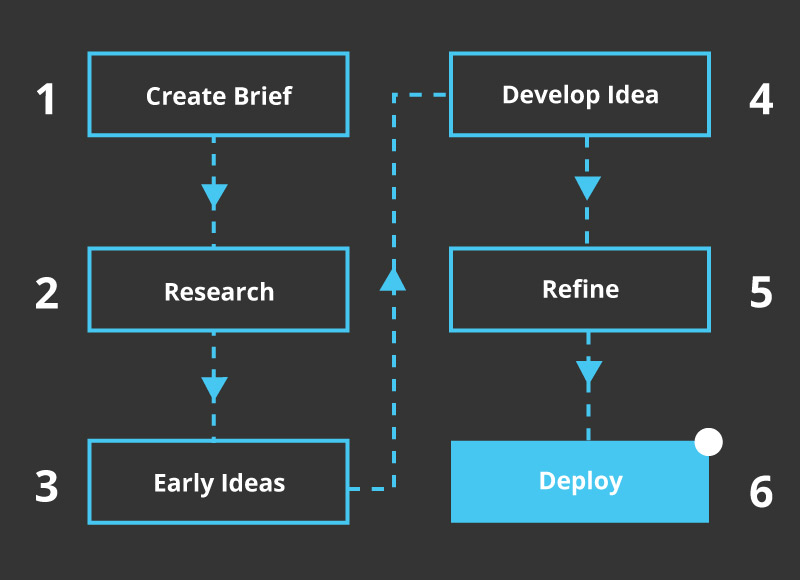
Graphic Design Process Diagram | Illustrated Explanation
Below is a simplified diagram of the graphic design process used by many Graphic Designers, including myself. Although this is a simplified version of the core workflow and processes, it does offer a simple overview of the whole design process employed by many graphic designers.
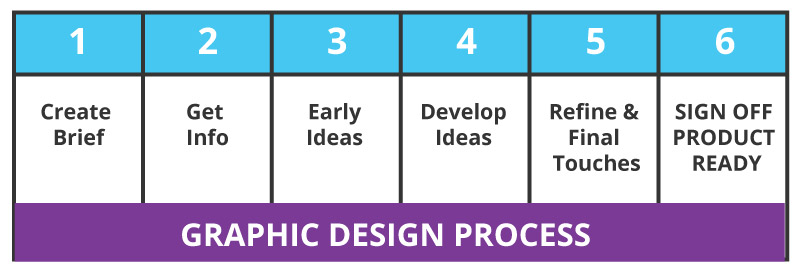
Graphic Design Process Steps – Overview
This is a breakdown of the design process and core stages. Each paragraph explains each step in detail and allows you to read and re-read certain stages at your leisure.
Stage 1 ) The Graphic Design Brief
The ‘brief’ is a crucial part of a design project, be it in Graphic Design or any similar field. The design brief is an opportunity to establish core goals and objectives for a project – normally set out by a client or business owner.
You can also imagine the ‘brief’ as setting a mission. This mission is given to a designer so they know what the aim of the project is. Without one, the end objective of what a design needs to achieve is left to costly guessing and piecemeal assembly of what needs to happen.
A design brief is very important. You shouldn’t work without one.
How can you or a designer find a solution when neither party can establish what the problem is?
Or… what the aim of the project is?
It is also harder to plan a budget for a project without one.
It is best to establish a clear brief as early as possible. This will save time, headache, and money for both designers and those setting a project.
What happens if you work without a design brief?
Without a brief – especially a written and mutually agreed one, proper communication between the designer and the person setting the brief is more likely to fail. This lack of clarity can also lead to the disintegration of a working relationship, poor budget control, and potential and unnecessary resentment between both parties.
Make sure to create a brief.
A brief can act as a mutual ‘project map’ to establish what, when, and how a design project needs to be fulfilled.
As for myself, I will often refer back to a brief or a “specification and agreement” to see what I’m working towards with the client. It could be regarded as a loose recipe to follow also for want of a better analogy.
1.1 Quickfire Tips For Constructing a Basic Design Brief
When creating a design brief for a graphic design project, try to consider some of the following :
- Who?
- What?
- Why?
These are all things I consider when working on a design project.
When creating a brief you may wish to consider formats, mediums, and any restrictions or limitations that may impact the project. It is better to give detailed thought at the beginning, rather than part way through.
The “Who, What, and Why” can act as a great starting point and framework for creating a brief. If you can establish the who, what and why. Designers such as myself can establish the how and the details – it can help us better solve problems or avoid them altogether.
However, it is not also uncommon for me to collaborate and consult a client and the, who, what and why. It can be this that helps to craft a brief and point the client in the right direction.
Graphic designers don’t know your business!
The majority of designers, most likely, won’t understand your business as much as you do, especially if working on short-term freelance project.
When constructing your brief, it is better to assume that a new designer, or a designer you haven’t worked with previously, knows absolutely nothing about your business. From here, write all that is relevant to share with the designer in translating your initial thoughts into a well-rounded, well-described brief, with a clear direction.
This can be trickier than it sounds and there is no harm in seeking tips and advice.
Stage 2 ) Collecting Information & Research | An Important Stage In The Graphic Design Process
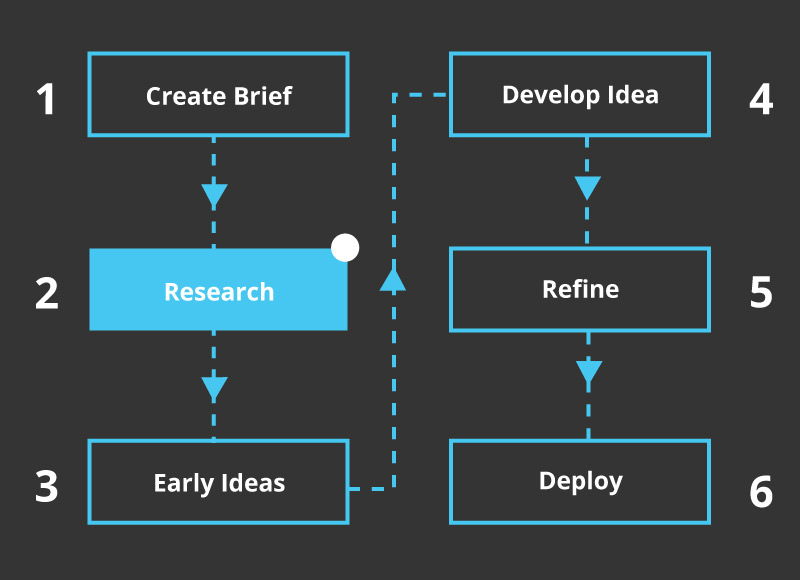
When looking at the stages and steps to a graphic design process, collecting together information, data, files, images, and text are all important aspects of the creative process. Especially when exploring new ideas.
The degree to which research is carried out for a graphic design can vary from project to project, but there are common patterns that are adhered to by many designers.
The preliminary research can be carried out by the client, designer, or both parties. In this stage, it can be a case of collating together: photos, data, logos, or anything that is useful in aiding the designer to create a compelling piece of visual design.
*Designers: When working with clients, encourage them to share research or at least mention that time will need to be set aside for research projects, this is something I do. I have listed some examples of what may be collected together for graphic design research.
2.1 ) Collecting Information
Collecting information together for a design project may consist of the following:-
- Data
- Photography
- Fonts
- Logos
- Things can inspire
- Plans
Initial copy or ‘text’ is a common requirement for design projects. As a designer, I tend to request this as early as possible so I can plan the space around and accommodate the word volume. This can apply to books, webpages, and many other mediums that require written words for the project.
It is quite common for a designer to also be aware that a certain amount of editorial changes are likely to arise later in the project and allow for wriggle room. It is still best practice to have as much of the word count calculated sooner rather than later.
Images and photography may also be sourced or collected together in the early stages of the design process, along with logos and brand guidelines.
2.2 ) Graphic Design Research
Research, or ‘design research’ is an important stage when it comes to the design process. Research can help form, inspire and guide the overall direction of a project.
For large or medium-sized projects, research is a vital tool in not only greasing the design wheels of your project but in helping to form a better more polished product. I am a big advocate for good research across various mediums, design being a key one.
Here are some examples of what the design research stage may consist of, noting that the criteria can vary from project to project and designer to designer.
What design research may consist of :
- Studying competition.
- Searching areas such as Pinterest, magazines of similar platforms for certain ideas.
- Checking what types of design will appeal to your target market.
- Looking for any relevant or inspirational criteria that can impact your final design.
- Avoiding accidental copyright infringement.
- Considering what courses of action will serve the project.
These are just some examples of what the design research phase may include.
Some freelance designers may prefer that the client does the majority of the research before contact. This can leave the designer to focus solely on the creative aspects of a project. I am of split opinions.
On one hand, I like to know that the client has at least carried out some basic research for their own product and business before speaking to me.
On the other hand, I also like to add to the research and build upon what the client has already found the further steer the course of a project, I tend to tweak and steer this from brief to brief.
Research Examples | Core Design Process
With the links below, I have pointed to where you can read more on case studies and research I used for some projects.
Here are a couple of links that may be of interest :
- How to design a shop kiosk in steps
- Kiosk Examples
- Building a brand theme and story
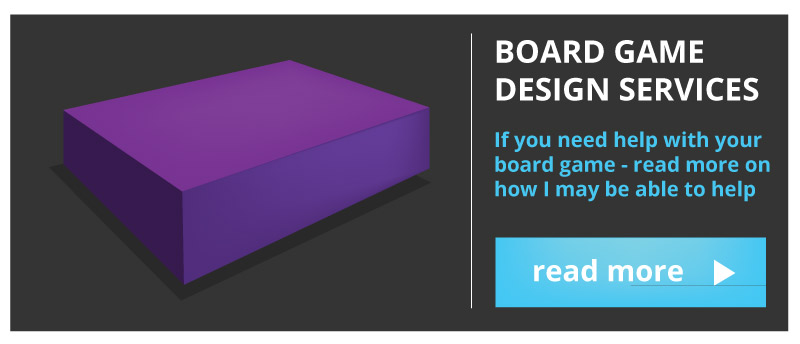
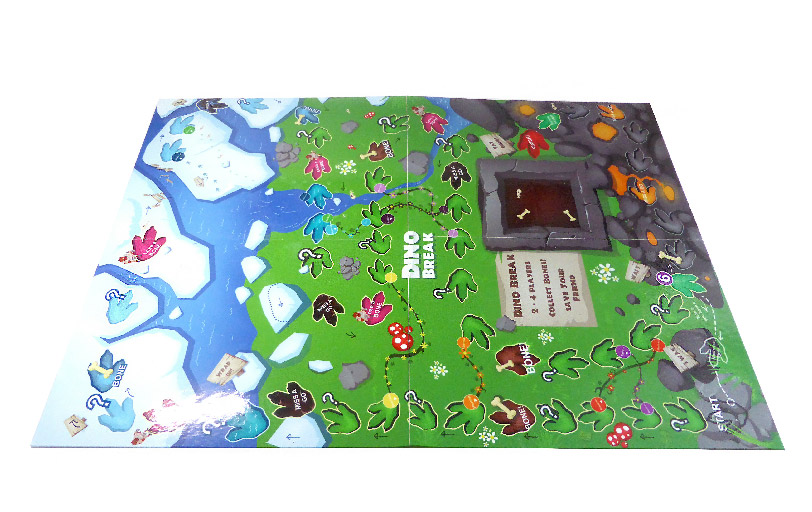
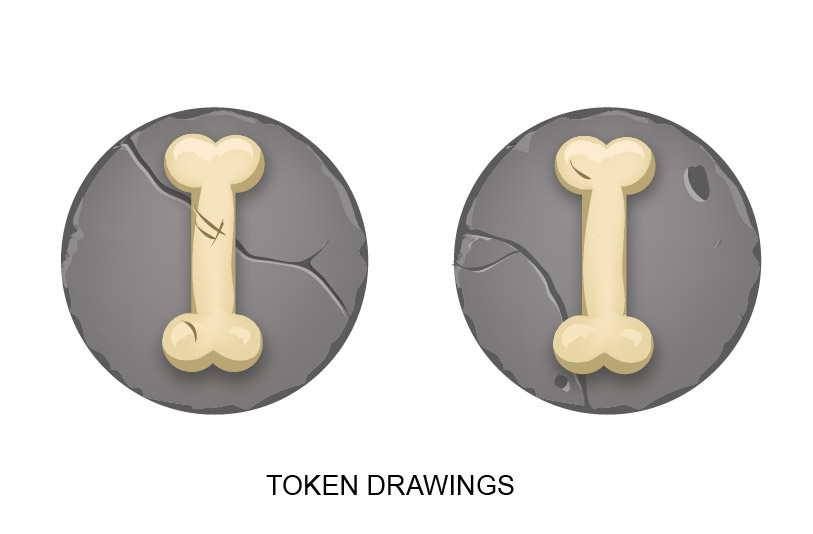
- How I made an education board game for a client
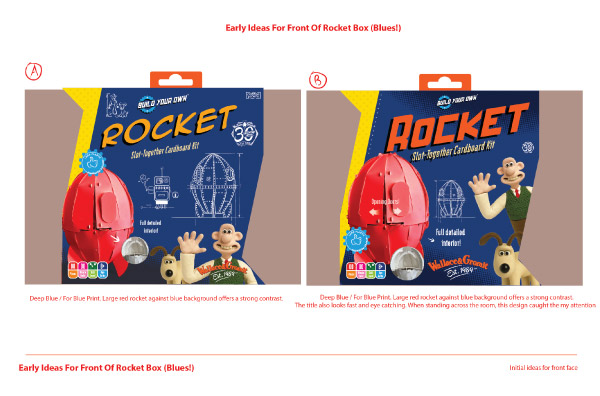
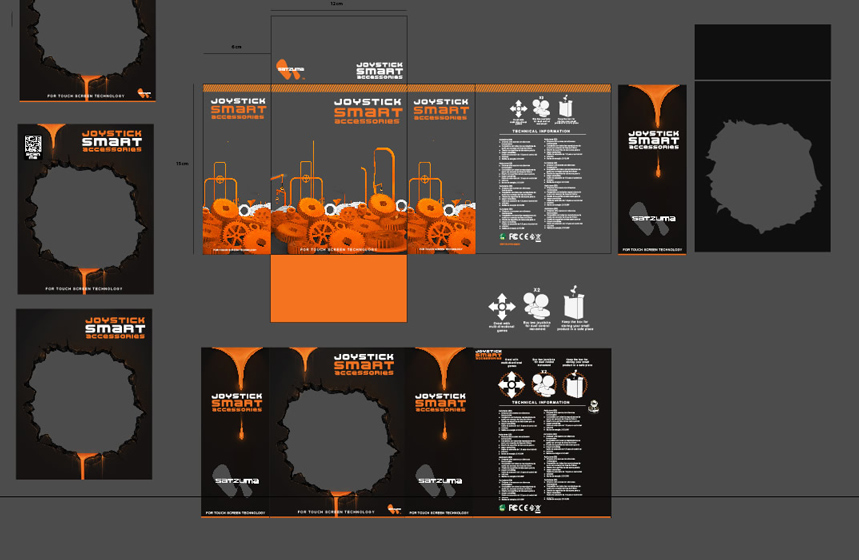
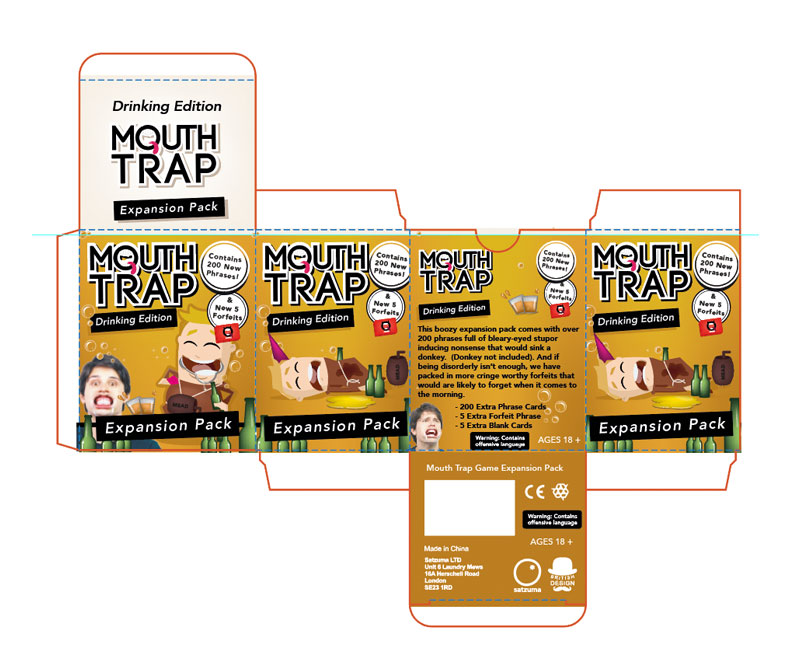
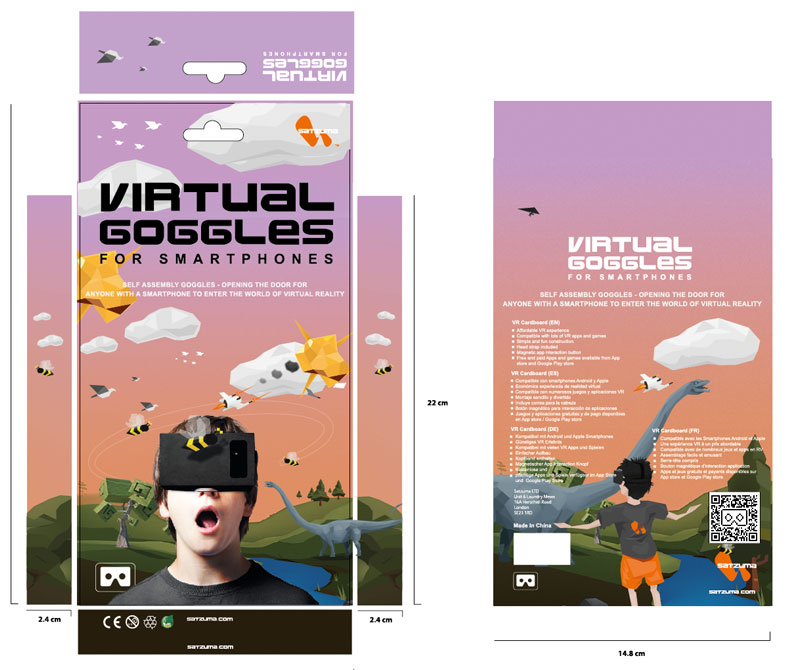
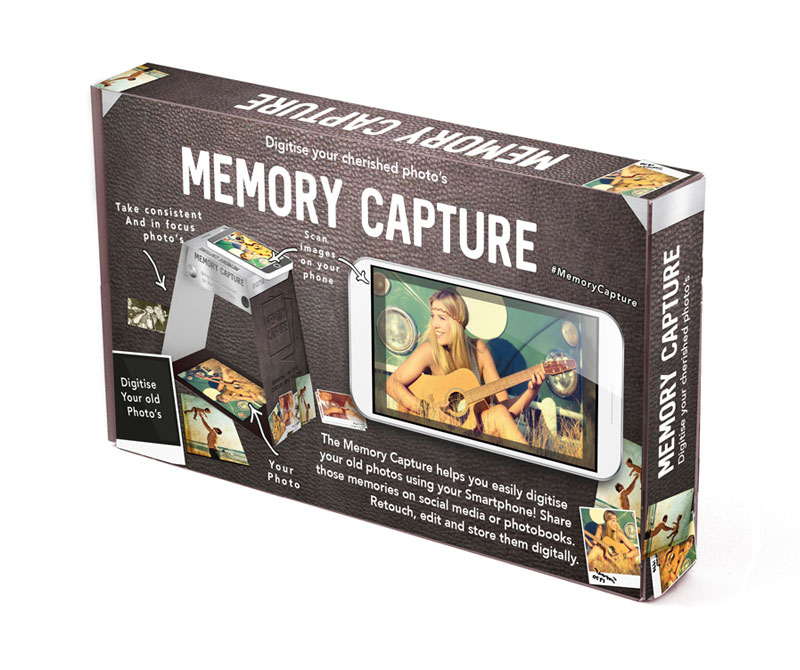
- Creating Packaging Ideas for Aardman

Stage 3 ) Initial Ideas | The Ideation Stage
“On the other hand, designers have to be realistic. People change their minds.”
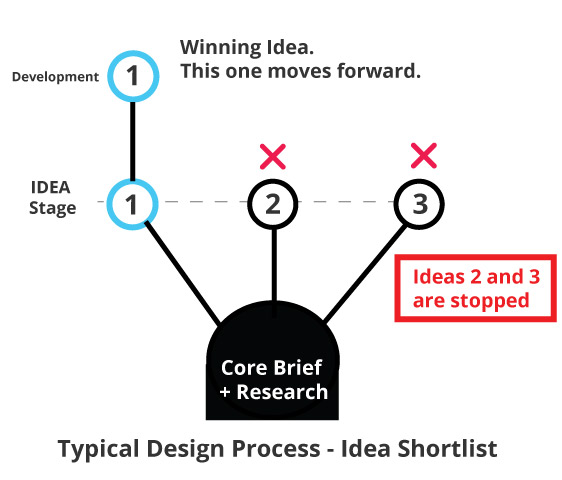
It is common practice for graphic designers, especially those of a more conceptual vein, to come up with an idea or a selection of ideas early in a project. However, strictly speaking, this is not a default practice for all designers.
Some designers may only work with one idea and revise this single idea as opposed to working with a variety of ideas and short-listing the strongest.
Depending on fees, time, and requirements, design ideas (ideation), can vary drastically in quality and finish. Each designer may only create a short selection of ideas and others may create a broader selection of ideas to illustrate intent and potential avenues a project can take.
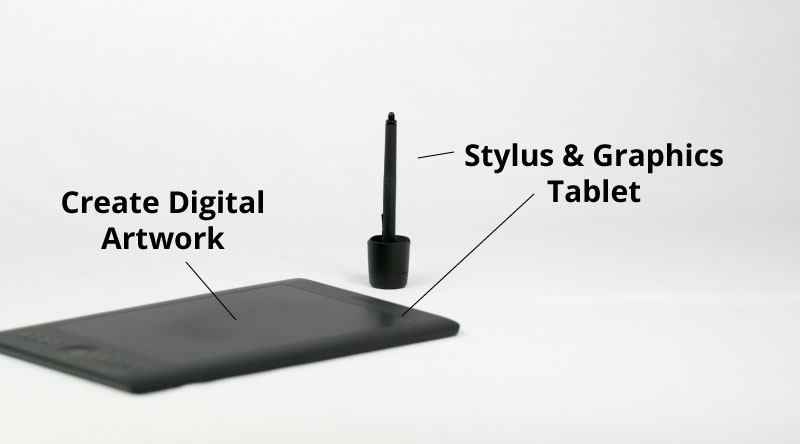
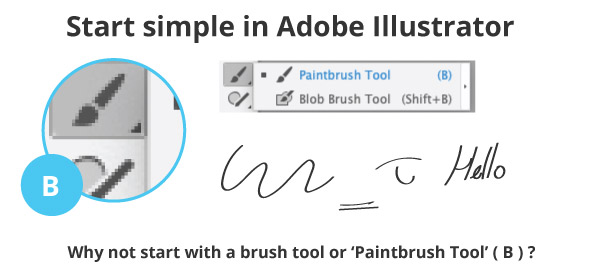
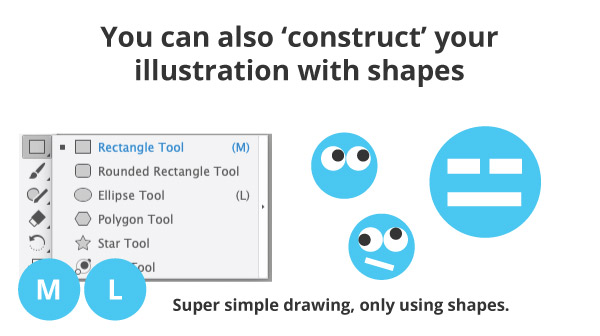
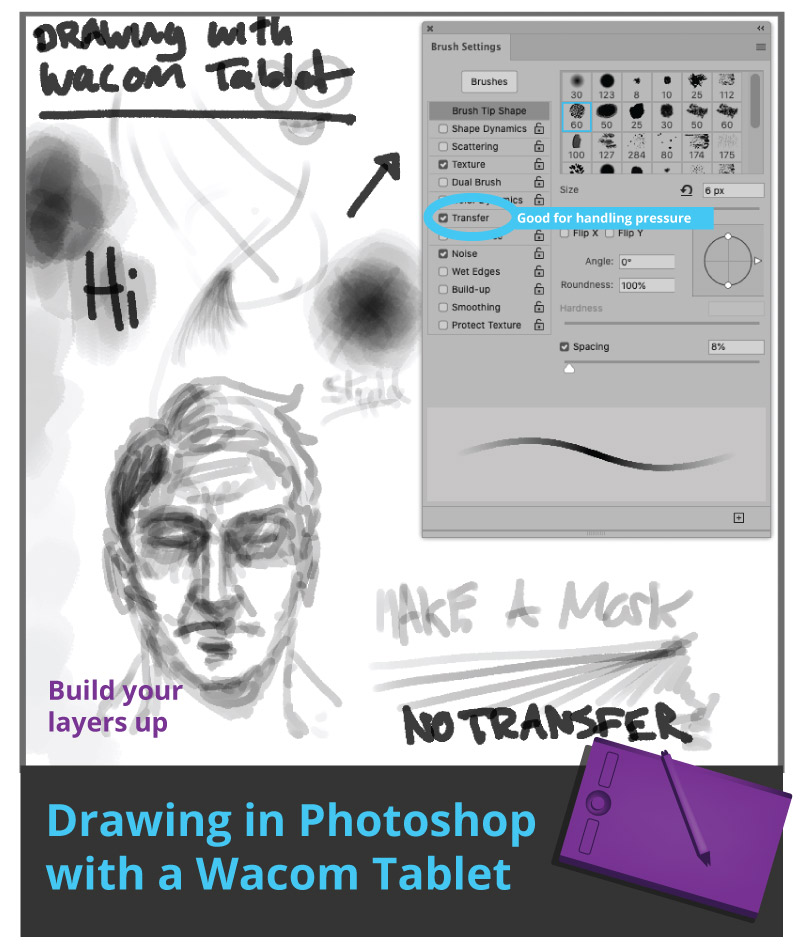
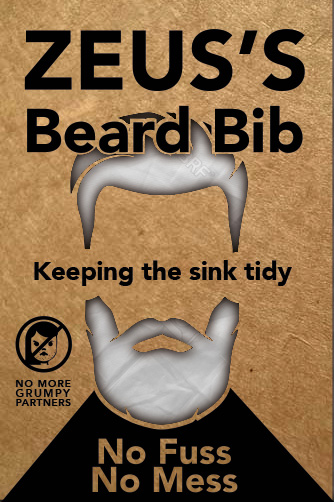
In the earliest stages of ideas creation or ‘ideation’, what is presented may be little more than a rough drawing or digital sketch to illustrate what will be created.
Speaking for myself, I will often use this stage to discuss what has been created and why I have made the choices I have made. Here is an example idea.

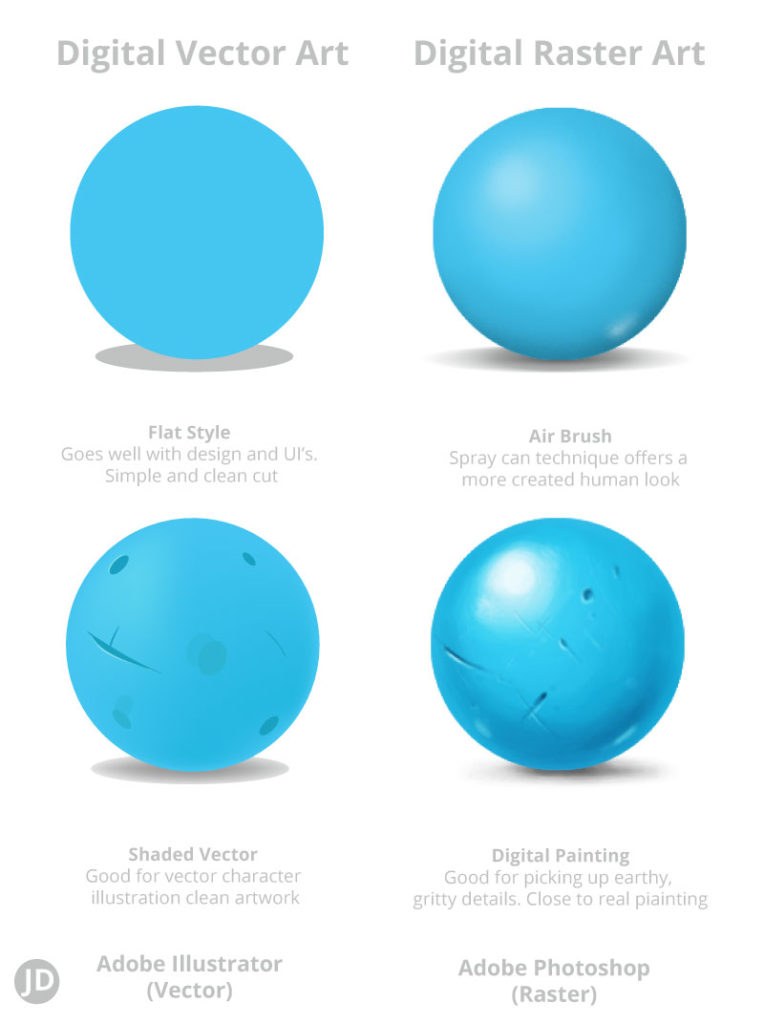
Each designer is different, and our tools and methods may differ. But as a generalisation, design ideation may be presented in the following formats :-
- Rough sketches and drawings on paper
- Digital drawings
- Or rough digital mock-ups ( as proof of concept )
- Loose thumbnails ( small drawings )
- Doodles
- A selection of ideas with labels
- Annotated concepts showing reasoning
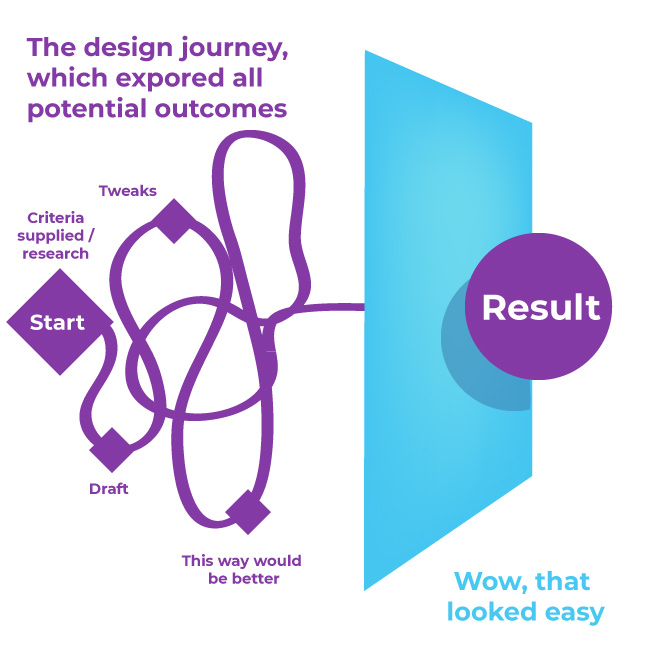
The idea and the idea development stage can blur when it comes to developing a design.
To illustrate this flow – here is an image from another blog post – Design Journey.
For many conceptual-based graphic designers, the idea stage is a core stage in the design process. As a conceptual design. Here are to projects and case studies that may further illustrate how a project may go.
- Case study: Creating and STEM game prototype.
- Packaging Project For Aardman – Proof of concept
- Creating an educational board game
( Important ) The Ideation Stage May Need To Be Revisited
*There is no guarantee that the original ‘proof of concept’ from the selection of ideas will become the final product. Although costly, time-consuming and frustrating, it is not uncommon that a designer will need to backtrack to this pivotal stage once a project is near completion. I have on occasion had to do this on graphic design projects.
List of reasons as to why a graphic designer may need to revisit the ideas stage:
- Executive discussion outside of design influences has come into play
- Senior management wants to revisit or change course
- An idea isn’t as good as originally hoped
- New criteria and information have come into play that weren’t known before
- Fussy clients
- Too many people have differing opinions on a project
- Weak project planning or thought given to the brief in the first place
- A better idea came along
These are just some of the reasons why a designer may need to return to the proverbial drawing board.
Whoever said design was easy needs to actually work in design, or at least share their secrets to make it easier for them.
Revisiting or needing to backtrack to the ideas stage of a design project is sometimes required – there is no way to avoid it. However, it is best avoided for the sake of the client and the designer. Budget restrictions and time constraints can lead to rows between both parties if, for example, the culprit is a poorly written brief or the disregard for the sign-off stages.
On the other hand, designers have to be realistic. People change their minds.
If the design journey was a straight line, both the designer’s and the client’s lives would be a lot easier. Many internal and external forces will require a designer to revisit other ideas, even if the first choice was put into play.
Do all graphic designers create a range of ideas? ( Ideation )
No, not all graphic designers will create a range of ideas for your brief. As mentioned above, it will vary from designer to designer and from skill level to skill level. Not all graphic designers are conceptual designers. Some graphic designers will have certain leanings towards ‘creative artworking’ , marketing, etc.
It is beneficial to discuss with a graphic designer before embarking on a project. Ask about their process and methods. Make sure there is a clear brief between the designer and the client.
Stage 4 ) Development Stages | Graphic Design Process
How this stage translates in reality will vary from designer to designer. But as a general rule – it will work accordingly.
Once both the designer and client ( or clients ) have shortlisted the preferred design idea or ideas, this will then lead to that idea being developed. Being ‘developed’, or ‘developed further’ may consist of the following actions:-
- Polishing the aspects of the design
- Building upon the visuals to establish the viability of a concept
- Moving the design to a delivery-ready stage
In layman’s terms, the development stages translate to the spit and polish applied to the shortlisted idea. The development stage can also be further proof of concept, in which an idea is built further.
Speaking for myself, this is the stage where I straighten up text, remove burs, tweak compositions, and add the final ingredients to get a design over that proverbial line.
The later development stages are when a design moves towards completion. Be it a piece of print media or as a digital project.
Common Situations That Arise In The ‘Development’ Stages
From my own experience, the development stage is the part of the process in which an idea is stress-tested against the brief.
It not uncommon for senior managers, CEOs, business owners and anybody else in between to have additional opinions on overall design direction – some relevant, some not. This is the reality of working with humans on a design brief.
Project requirements change. What was initially established as the winning idea, does not strictly translate to what was hoped when it comes to Graphic Design. Project scope can change, and external influences can derail the path of your project – there are many various factors when it comes to design.
Even in the development stages, I have had situations in which 2 of the same idea ( colour change for example ) have been created side by side.
Imagine A Development Tree ( illustration )
Design development can be one of the heftiest stages of design. I wanted to illustrate the development flow for the mid-to-late stages of a graphic design project.
This is a scenario.
A favourite idea has been selected. This idea has been polished and presented before the ultimate decision-makers. They like the design, however, somebody wants to see the same layout but on a different background. You have run with the same idea and made some minor changes. A sub-version of a main version – sound complicated?
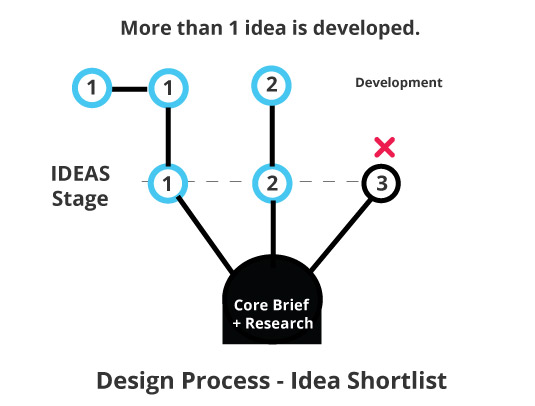
A single idea has been selected. This idea will make up the trunk of the flow and energy to design.
From this single idea – the trunk of a tree – a single branch or node will stem.
On some projects, as is the case with experimenting with some minor variation of core ideas. 1 or 2 twigs will stem.
These ‘Twigs’ may be little more than a colour variation, or position change. Or some minor experimentation alignment.
Development Versions
Or to further illustrate, as a tested method I have used in the past. It makes look like so:
- Version 3.1
- Version 3.2
- Version 3.3
Or it could also look like this.
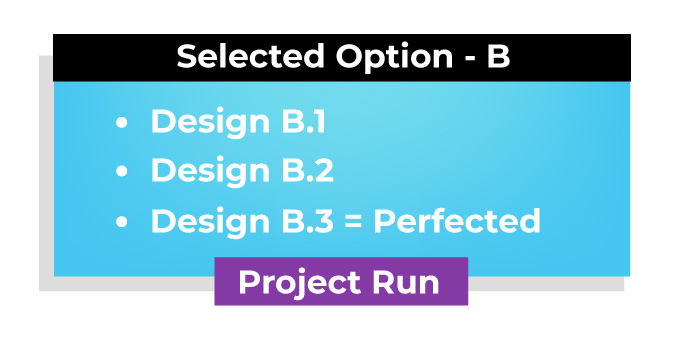
The number 3 could represent ‘Idea 3’ and the variant or version ‘1’ and 2, and 3. And so on. It is similar to version releases.
3.0 = The main version
3.1 = May equate to almost the exact same look, perhaps a text change
3.2 = Still much the same as 3, only that the text and, text colour were changed to a lesser degree
4.1 ) How to communicate with designers regarding project development
Communication is an integral part of graphic design.
The very nature of graphic design is visual ‘communication’ and open dialogue is a must to ensure that the project is the best that it can be.
Communication should not stop with the end visuals.
Not being able to keep an open and frequent line of communication between the designer and client ( or manager ) allows more room for errors, misunderstanding, and needless time wasting which could have been easily averted with conversation. I am a big advocate for working as close with a client as possible as emails alone can miss those ‘water cooler’ moments.
Communication is important from start to finish, not only in the development stages but throughout.
Typically, communication in the development stages of a project will take the form of feedback on what has already been created by the graphic designer. A client will offer a point of view as will a designer. ( hopefully ).
Communication and feedback may come in this form :
- Exchanges between emails
- Phone calls
- Video meetings
- In-person meetings
- Platforms in which you can message your team
- And SMS – And Whatsapp ( both of which are my least favourite lines of communication when it comes to design )
4.2 ) Design Feedback
“ Can I just ask…”
“ This is will be quick…”
When an idea has been chosen and developed, it is at this latter stage that a client, client or team member will offer further feedback with regard to a design. And, if you are a designer reading this, it is a stage in which you brace yourself.
Once the feedback has been communicated to a graphic designer, they will then respond and act accordingly to that feedback.
This feedback to the designer may resemble the following :
- Make some minor tweaks and adjustments
- Listening the what the client has to say and offer polite help and advice in return
- Refining the design
- Preparing for completion
- Or potentially going back to the conceptual stages
- ( Or crying )
Stage 5 ) Core Design Steps – Refine Design
Refining the design typically entails polishing ‘the developed’ artwork to completion. A project will be at a level of final draft in which the artwork is ‘near ready’ to be sent to the client, production or print. This is the latter stage of a project.
Refining a design can involve minor tweaks, minor changes, or the very last touches to the design and a once-over from the person giving a sign-off.
It is common for me to hear some of the following types of phrases at this stage ( paraphrased ) :
- Could I add an extra word?
- Can I add a comma?
- Let me show it to management again!
- It looks lovely thank you!
- … ( silence )
- Can I just ask…
- Could the thumb be moved 2 pixels
- Let me know when you are ready for an invoice
Stage 6 ) Core Design Step 6 – Deliverables & Sign Off
The final stage of the process – the Sign off. This phase may seem self-explanatory, but for the sake of completeness, I will elaborate.
The ‘Sign Off’ can refer to the stage in which a head of a team ‘signs off’ a final design or interim stage of a project. This may be a verbal or written formal declaration that what is being presented, is the artwork to be passed to the next stage.
In this instance, the ‘sign off’ on the final artwork – completion.
The ‘Sign off’ in the design process may take the form of the client saying that they are happy with what they have seen and wish to sign off the whole, or part of the project.
When at this stage, It is also wise for the client to assess their artwork closely before agreeing to sign off any design work. When artwork has already been sent to print as a PDF, it can be costly or sometimes impossible to remedy any mistakes once a project has been printed. Any mistakes need to be remedied with hacks and workarounds.
This is not strictly speaking as rigid as digital design, as projects tend to be easier to remedy and amend but this is still not a guarantee.
The Graphic Design Process | What Are ‘Deliverables’?
What are deliverables in design?
Speaking in terms of graphic design, the deliverables are the complete assets and artwork made by the designer. All completed artwork, files, and supporting documents are often referred to as ‘deliverables’ or final artwork. The completed artwork and supporting items are often handed to the client or owner when a project has been marked as complete or signed off.
This is how the deliverables may come into play at the end of the graphic design process.
Once a graphic design project has been signed off or marked as complete, it is common for the graphic designers to send the final print-ready artwork to other the new owners of the artwork.
Or if working internally the designer may package the artwork into a PDF and this is passed to another department for validation and QC for being shipped or sent to print.
* It should be noted however that companies do have their own ways of validating and signing off projects, do keep this in mind.
6 .1) Scenario 1 | Design Process | What Is a Freelance Design Project Sign-Off?
‘Sign off, marked as complete, green-lighted’ or any other similar terminology can all be markers to signal the end of a project. When working with a client on a design project, I will ask the client to sign off on the final artwork before sending the final versions across.
This is a rough example of how a Freelance project process may flow towards the later stages of a project :
- Client sees work
- Requires small changes
- These changes are then sent to a client
- The client then sends across their approval, assuming that they do approve of what they see
- Project is either sent to print or packaged up and passed to a client or both
6.2 ) Scenario 2 | Design Process | Internal Design Team Sign-off
As above, ‘Sign off’, ‘marked has complete’, ‘green-lighted’ or any other similar terminology can all be markers to signal the completion of a graphic design project.
A key difference based on my experience from working in-house design positions, ‘a sign-off sheet’ or an Excel spreadsheet may be used to mark off the stages or parts of a project that have been completed.
There are often more people with internal teams when it comes to the sign-off in-house who will want to see or understand the status of a project.
What is a Graphic Design Process – Conclusion
A graphic design process or workflow is a process or system in which a piece of graphic design or visual communication is created following a sequence of important steps. These steps will often include research, collection of data and information, ideation, development of an idea, and the delivery of that idea in print or digital form.
This process is what follows as the end result of what was assigned in a brief.
You may also find this post interesting.
Other topics around the graphic design process:
- – Design Journey
- – Board game design case study – London Pub Crawl
- – Board game design case study – Streetwise
- – Retail Packaging examples
- – How to make Stem product
Or if you have a project and brief, feel free to get in touch via my portfolio website or read a bit more about me.
Need a hand with your board game design project?